


How to Boot into Safe Mode in Windows
- Support
- Software Tutorials
- Kate
 284
284- 2026-03-10 18:26:07


If your Windows PC is experiencing issues such as crashes, freezes, or software errors, booting into Safe Mode can help you troubleshoot and fix problems quickly. Safe Mode starts Windows with only the essential drivers and services, making it easier to identify and solve issues. In this guide, we’ll show you three practical ways to boot into Safe Mode and access the Advanced Startup Options screen.
What is Safe Mode?
Safe Mode is a diagnostic startup mode in Windows that loads a minimal set of drivers and system files. It allows you to:
Troubleshoot system errors
Remove problematic software or drivers
Restore Windows to normal operation
There are three types of Safe Mode:
Standard Safe Mode - minimal Windows startup
Safe Mode with Networking - includes network drivers for internet access
Safe Mode with Command Prompt - boots directly to the command line
How to Access Advanced Startup Options
Before you can boot into Safe Mode, you need to access the Advanced Startup Options screen. Here are three ways to do it:
Method 1: Restart via Start Menu
Press the Windows (WIN) key to open the Start menu.
Click the Power button. Hold Shift and click “Restart”.
Your PC will reboot into the Advanced Startup Options screen.
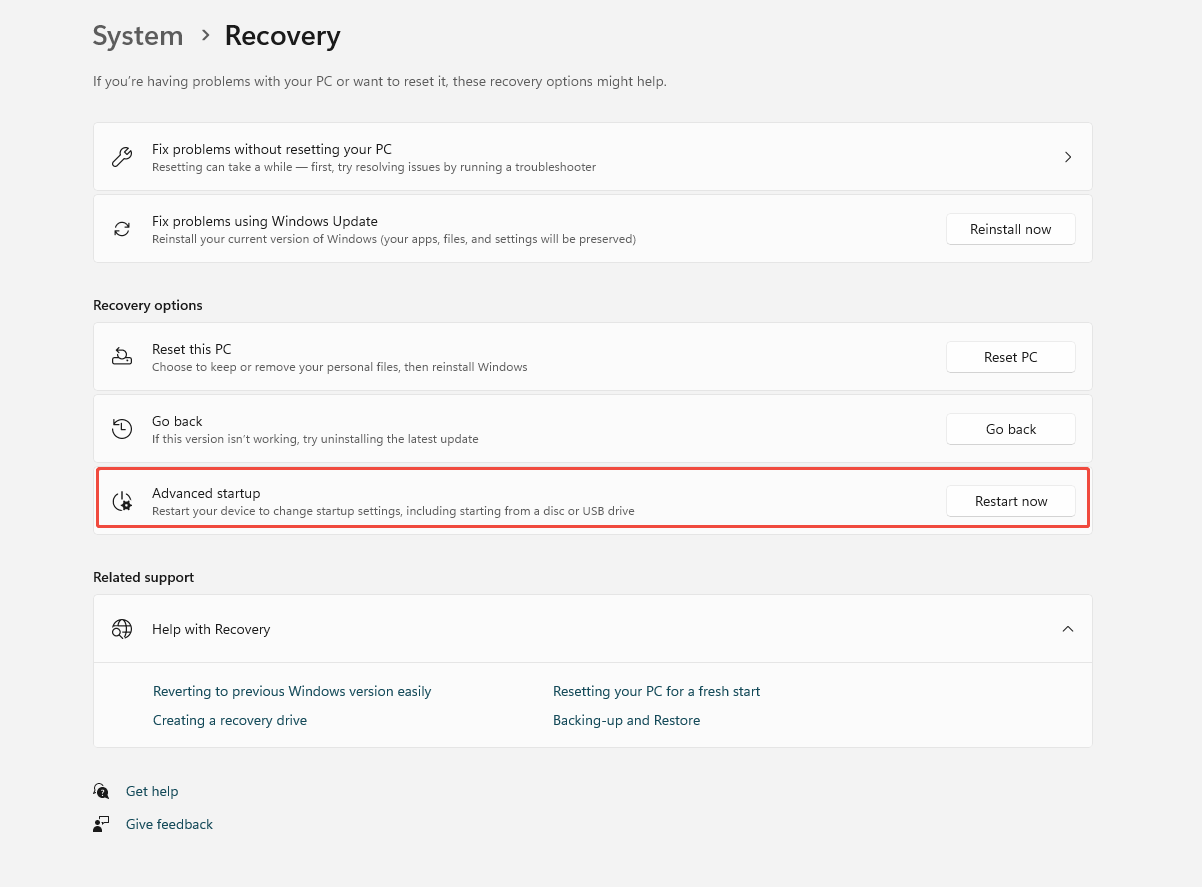
Method 2: Using Windows Settings
Open “Settings” -> “System” -> “Recovery.”
Under Advanced Startup, click “Restart Now”.
Your PC will reboot into Advanced Startup Options.
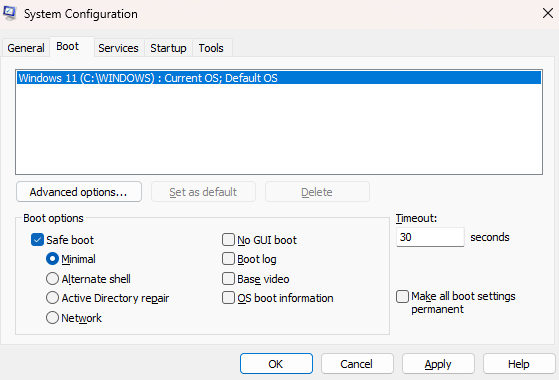
Method 3: Using System Configuration (msconfig)
Press “Win + R” to open the Run dialog.
Type “msconfig” and press Enter.
Go to the “Boot” tab.
Under Boot options, check “Safe boot”, then click “Apply” and “OK”.
Restart your PC to enter Advanced Startup Options.
Tip: To exit Safe Mode later, uncheck Safe boot and restart.
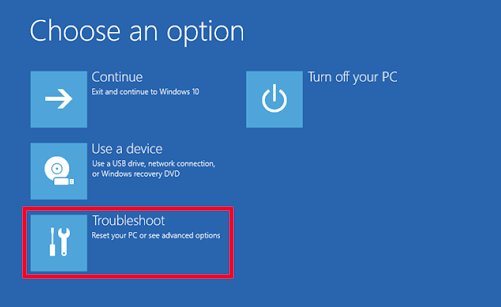
How to Boot into Safe Mode
Once you are in the Advanced Startup Options screen:
Click “Troubleshoot” -> “Advanced Options” -> “Startup Settings” -> “Restart”.
After reboot, choose the “Safe Mode” environment:
Press 4 / F4 - Standard Safe Mode
Press 5 / F5 - Safe Mode with Networking
Press 6 / F6 - Safe Mode with Command Prompt
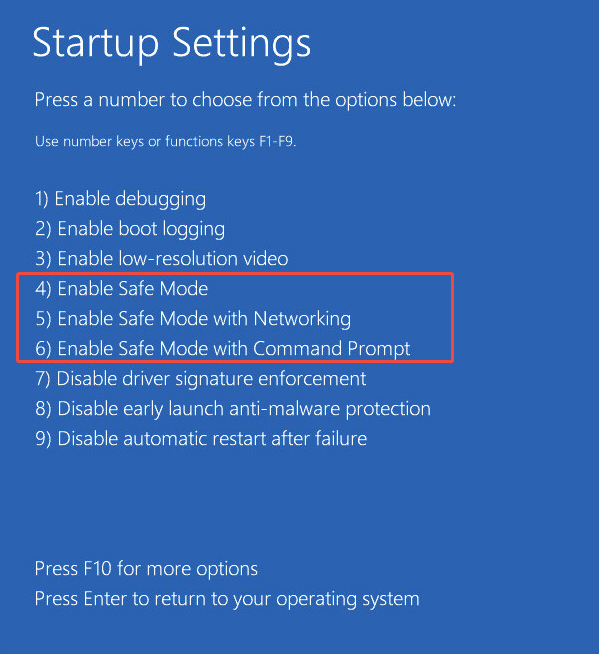
Some PC interfaces may vary slightly. Follow on-screen prompts if needed.
Conclusion
This page provides clear steps to boot into Safe Mode using the Start menu, Windows Settings, or System Configuration. By following these methods, you can quickly access the Advanced Startup Options and select the right Safe Mode for troubleshooting. Safe Mode is a powerful tool to fix Windows issues and keep your system running smoothly.


