How to Enable NTFS Support on Your Mac [Free]
- Support
- Dynamic News
- Kate
2664
- 2023-11-28 20:15:51
Mac users who frequently work with external storage devices like USB drives or external hard drives may have experienced difficulties when it comes to reading or writing files in the NTFS format. NTFS, which stands for New Technology File System, is the default file system used by Windows. It offers various features such as advanced security permissions, support for large file sizes, and efficient data storage. However, macOS, the operating system used on Mac computers, has limited built-in support for NTFS drives.This page will explain how to enable NTFS support on your Mac. It will provide 5 most accessible solutions to use NTFS in some simple clicks. Let’s get started.
Page Content:
1. Method 1. Use Kingshiper NTFS for Mac - Easiest
2. Method 2. Use FUSE for macOS
3. Method 3. Use Terminal Command
4. Method 4. Use Boot Camp Assistant
5. Method 5. Use Disk Utility to Format NTFS to FAT32
Method 1. Use Kingshiper NTFS for Mac - Easiest
One of the most popular solutions for enabling NTFS support on your Mac is by using third-party software like Kingshiper NTFS for Mac. Kingshiper NTFS for Mac provides a reliable and convenient solution that allows you to read and write NTFS drives with ease. It allows Mac users to access, copy, edit, delete, and transfer files effortlessly on NTFS-formatted drives without any limitations. You can easily enable NTFS support in one simple click after connecting your NTFS drive.
Here is the reason why you need Kingshiper NTFS for Mac:
Quick responsible access to read and write NTFS disks
Intuitive interface and easy to use without any technical knowledge
Fully compatible with all mainstream operating systems
Ensure data integrity and privacy when writing NTFS drives
One day free trail to experience all the features
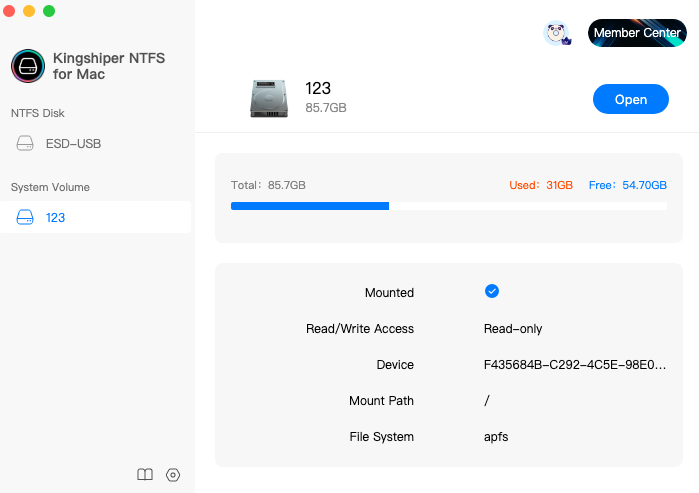
Step 1: Launch Kingshiper NTFS for Mac and connect your drive to Mac.
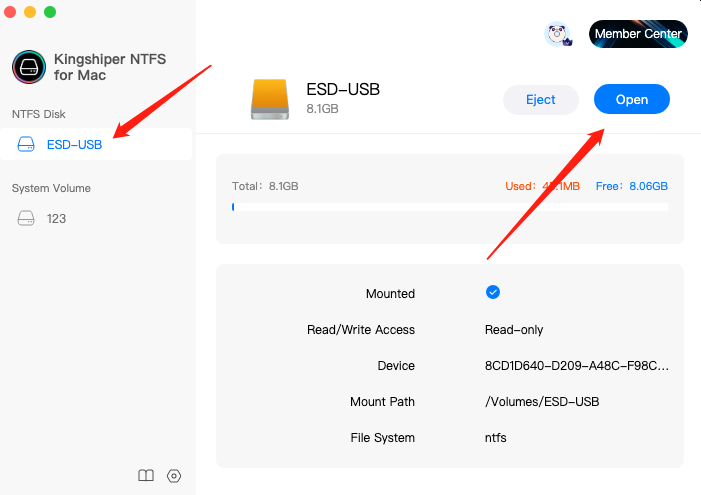
Step 2: Select the NTFS drive and click “Open” to get the writable access.
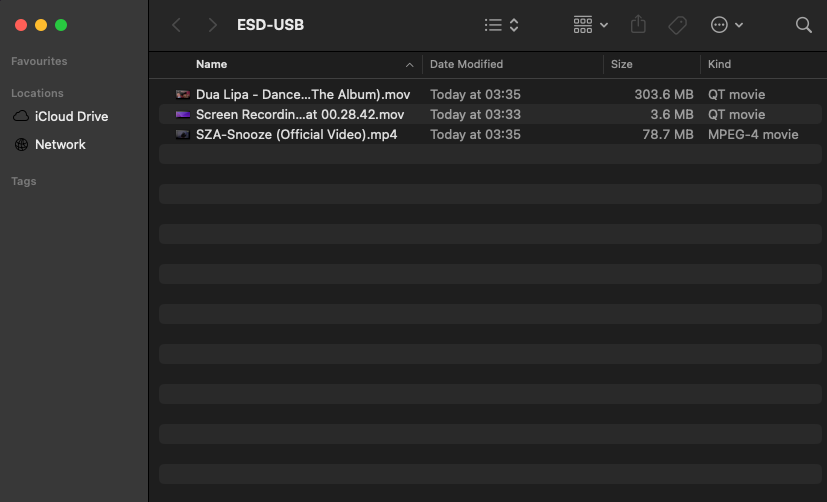
Step 3: Now you can edit, copy and even delete your files in the pop-up window.
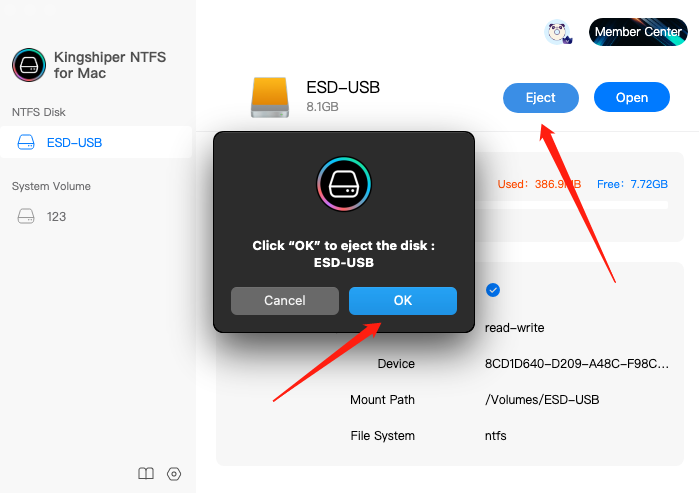
Step 4: If you’ve finished, click “Eject” to safely remove your drive to Mac.
Method 2. Use FUSE for macOS
If you're comfortable with using the Terminal and prefer a free solution, FUSE for macOS combined with ntfs-3g is an excellent choice. This method involves installing FUSE for macOS, a file system extension, and ntfs-3g, a third-party NTFS driver. With these tools, you can mount and write to NTFS drives using Terminal commands. It requires a bit more technical know-how but provides a reliable solution if you're willing to dive into the command line experience.
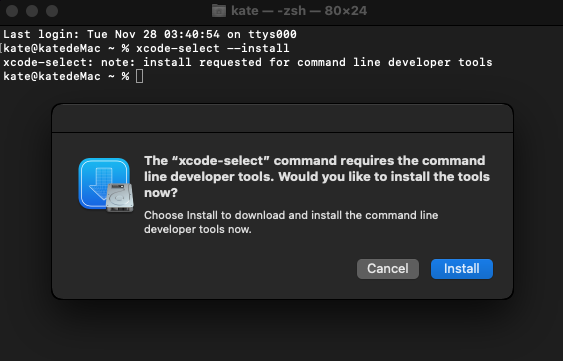
Step 1: Launch Terminal on your Mac and type: xcode-select --install to install Xcode.
Step 2: Press "Install" to install Xcode. Afterward, type: /usr/bin/ruby -e "$(curl -fsSL https://raw.githubusercontent.com/Homebrew/install/master/install)" to install Homebrew.
Step 3: Download and install macFuse from its official website. And then type: brew install homebrew/fuse/ntfs-3g to install NTFS-3G in the Terminal window.
Note: To enusre FUSE for macOS can work, you need to disable System Integrity Protection on Mac. Click here to know how to disable SIP.
Step 4: If you have disable SIP successfully, open Terminal through Launchpad and type the following command to enable NTFS support.
(1) sudo mv /sbin/mount_ntfs /sbin/mount_ntfs.original
(2) sudo ln -s /usr/local/sbin/mount_ntfs /sbin/mount_ntfs
Method 3. Use Terminal Command
For tech-savvy users, macOS offers a built-in but experimental feature that allows limited NTFS write support. By using Terminal commands, you can activate this feature and enable write access to NTFS drives. However, please be careful as this feature is experimental and may not be as stable or reliable as other methods.
Step 1: Open the terminal and connect to the NTFS drive.
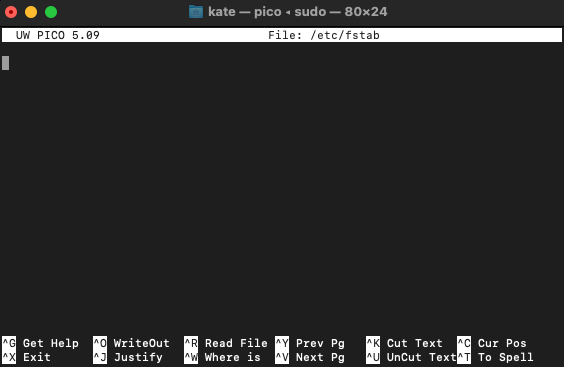
Step 2: Type the "sudo nano /etc/fstab" command here and click on return.
Step 3: Type "LABEL=NAME none NTFS rw, auto, browse" to replace the "Name" of the NTFS drive and click on return.
Step 4: Press "Ctrl+ O"and then "Ctrl + X". Now, go to Finder and select Folder.
Step 5: Type “/Volumes”, and select "Go."
Method 4. Use Boot Camp Assistant
If you have Windows installed on your Mac using Boot Camp Assistant, you can access NTFS drives without any issues. Boot Camp Assistant allows you to boot into a Windows environment on your Mac, where NTFS support is already native. By switching to the Windows partition, you can access and manage your NTFS files effortlessly.
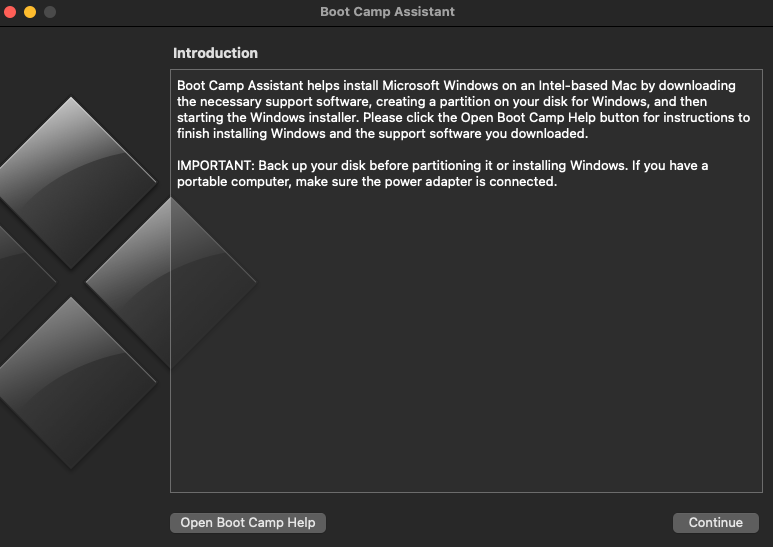
Step 1: Download the ISO file for Windows from Microsoft and then launch Boot Camp Assistant on your Mac. Press "Continue" on the intro screen to initiate the process.
Step 2: Choose the Windows ISO image and select where you want the Windows to be installed.
Step 3: Once Windows is installed,restart the Mac and wait for it to boot into Windows.
Step 4: Now connect the NTFS drive to the Mac to access the files.
Method 5. Use Disk Utility to Format NTFS to FAT32
Did you know that macOS has a built-in feature that allows you to format drives with the NTFS file system? While this method won't enable NTFS support for existing drives, it's worth considering if you have a drive that you frequently use with both Windows and macOS systems. By formatting the drive as NTFS using Disk Utility, you can ensure compatibility between the two operating systems. Keep in mind that formatting a drive erases all data, so remember to back up your files before proceeding.
Step 1: Go to "Disk Utility" through "Utilities" in the "Launchpad".
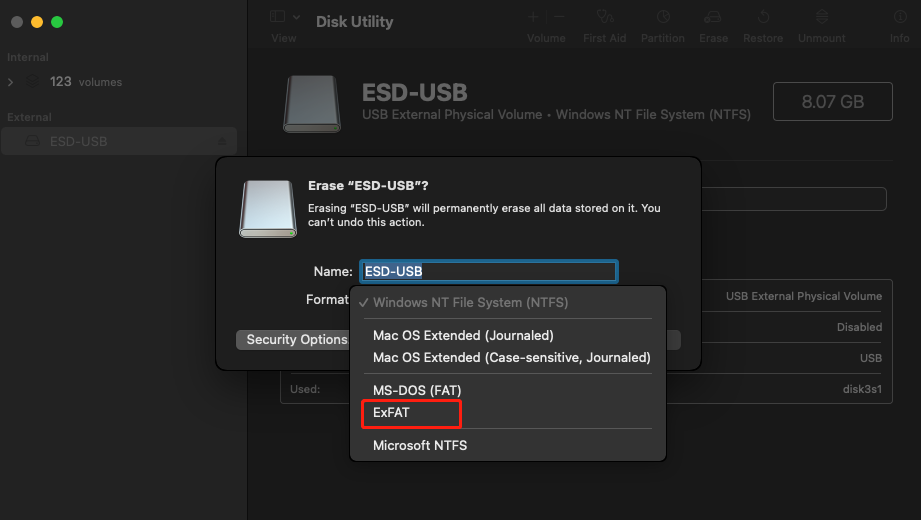
Step 2: Select the NTFS drive in the left side bar and click "Erase" from the top bar.
Step 3: Click the "Format" option and select your FAT32. Afterward, press "Erase" to start the formatting process.
The Final Thought
By now you must know how to enable NTFS on Mac, we list 5 best methods that can help mac users get writable access with some simple clicks. But Kingshiper NTFS for Mac is the easiest one that suitable for all beginners and pros. It can mount the external drives automatically when connecting which will save you time. Give it a try and download now!
You May Also Like
1. 3 Ways to Change Permissions on External Hard Drives, 100% Works
2. How Can I Use Disk Utility to Format NTFS Drives on Mac?
3. Solved! How to Edit an NTFS File on Mac


