


Top 3 Methods to Screen Record on Mac with Audio
- Support
- Dynamic News
- Kate
 4105
4105- 2024-02-01 19:55:32


Screen recording has become an essential feature for many Mac users, whether for work, education, or entertainment purposes. Being able to capture your screen along with the audio is particularly useful when creating tutorials, sharing demonstrations, or preserving memorable moments during online meetings. If you're a Mac user seeking reliable methods to screen record with audio, don’t miss this guide! Whether you want to record internal sound, microphone audio, or a combination of both, you'll discover the perfect method here. These solutions will enable you to create high-quality screen recordings on your Mac, ensuring that you never miss any crucial information. So, let's get started.
Page Content:
1. Method 1. Use Kingshiper Screen Recorder to record screen and audio on Mac
2. Method 2. Use Capto to record screen and audio on Mac
3. Method 3. Use OBS Studio to record screen and audio on Mac
Method 1. Use Kingshiper Screen Recorder to record screen and audio on Mac
Difficulty Level: ★
Kingshiper Screen Recorder for Mac is a powerful and feature-rich screen recording software that offers exceptional functionality for capturing your screen activities with audio. With its user-friendly interface, you can effortlessly record your screen, system audio, microphone, and even webcam simultaneously. The software allows you to adjust the recording area, choose the desired frame rate, and customize other settings according to your needs. Moreover, it supports various video formats and offers editing options to trim, crop, or annotate your recordings.
With Kingshiper Screen Recorder, you can easily adjust the audio settings, such as selecting the input device, adjusting the volume levels, and even reducing background noise for a clearer recording. It provides a straightforward interface and offers a range of useful editing features, including trimming, cropping, and adding annotations to your recorded videos. Kingshiper also supports various output formats, allowing you to save your recordings in different file types based on your requirements.

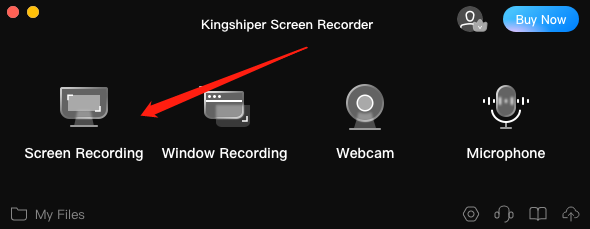
Step 1. Launch Kingshiper Screen Recorder for Mac and choose screen recording.
Step 2. Press ”Sound” to record the system audio, and then click “Start Recording”.

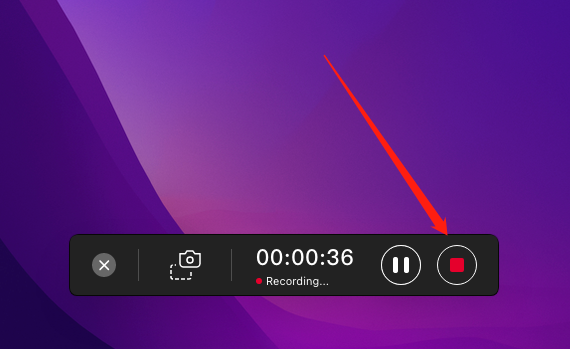
Step 3. When you’ve finished recording, click on “Stop Recording”.
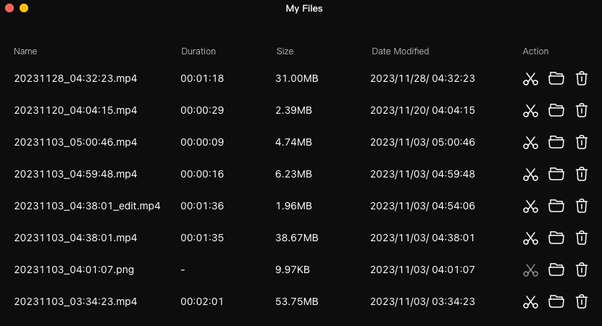
Step 4. Click “My Files” to check your recording. Here you also can make further edits on your recording by clicking “Edit” through Action.
Method 2. Use Capto to record screen and audio on Mac
Difficulty Level: ★★★
Capto is another comprehensive screen recording tool for Mac that allows you to capture your screen with audio conveniently. It offers a user-friendly interface and a plethora of features to enhance your screen recording experience, which is suitable for all level users. With Capto, you can customize your recording settings to suit your needs, such as adjusting frame rates, resolution, and audio sources. In addition, it allows you to take high-quality screenshots of specific areas on your screen, full-screen shots, or entire web pages.
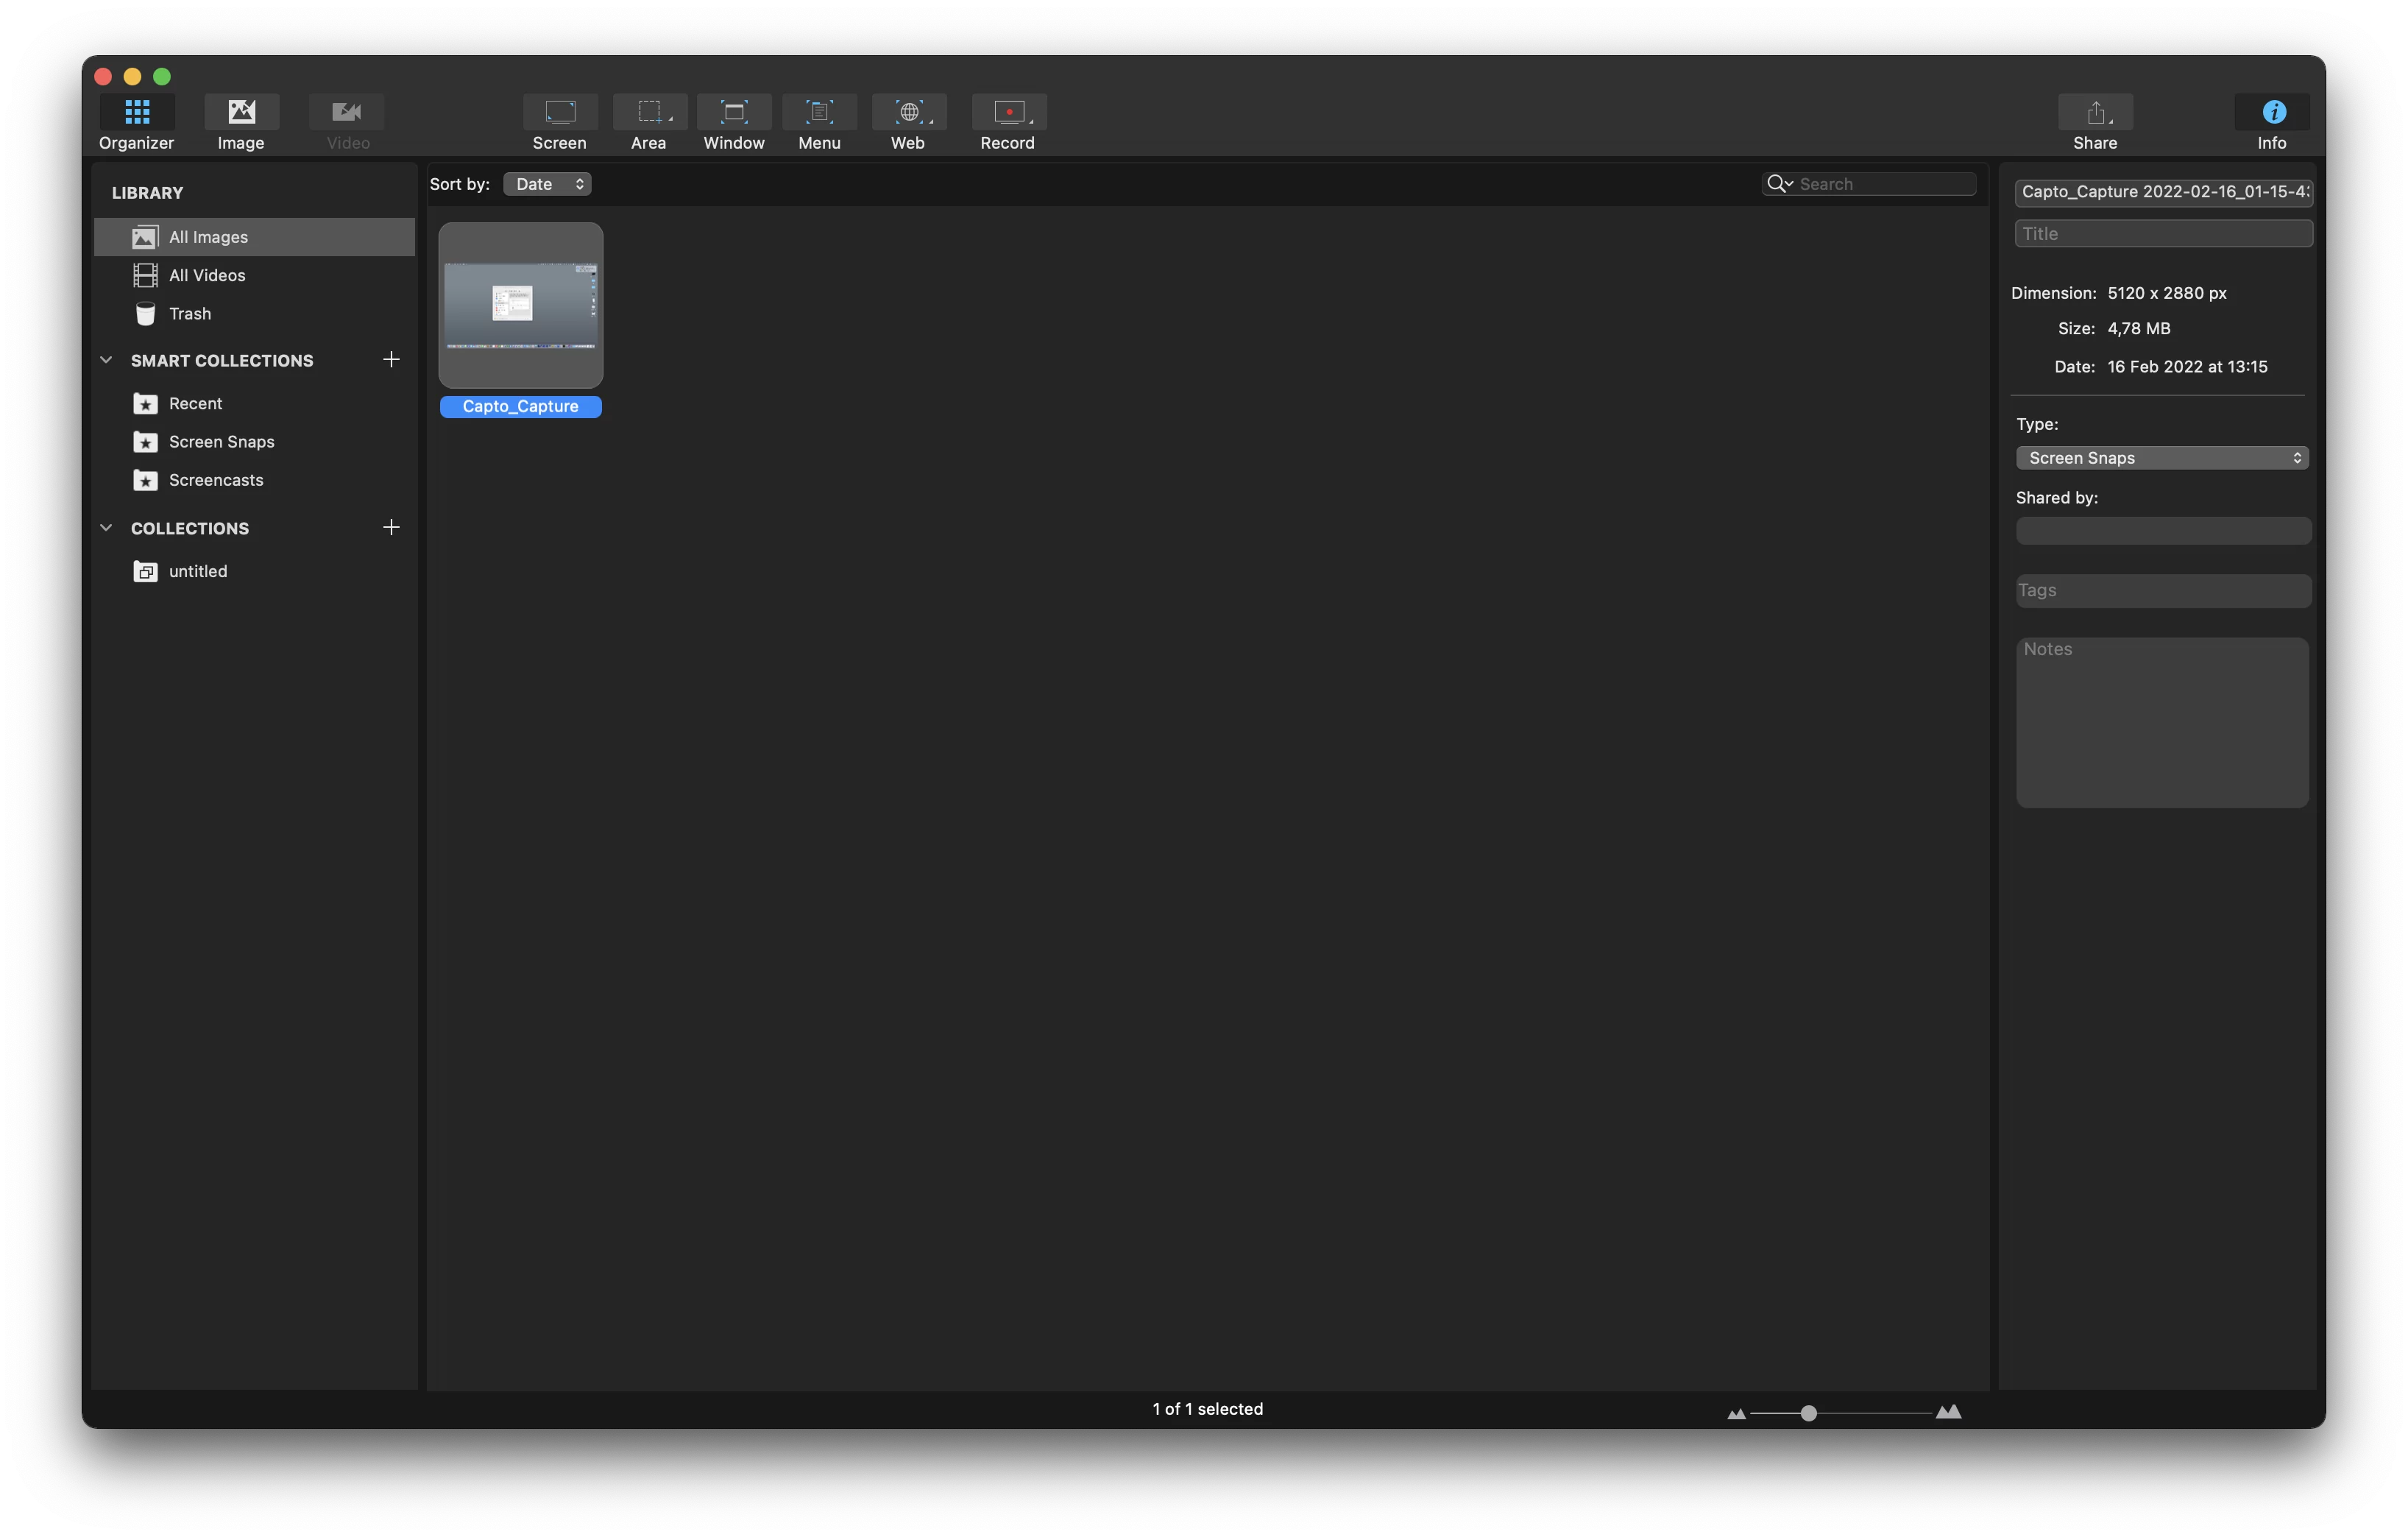
Step 1. Launch Capto on your Mac.
Step 2. Click on the camera icon and select “Record” from the drop-down menu.
Step 3. A recording toolbar will appear, and you can choose the desired video and audio settings.
Step 4. Click on the “Full Screen” button to capture the entire screen.
Step 5. Click on the red record button to start recording.
Step 6. To end the recording, click on the stop button to finish your task.
Method 3. Use OBS Studio to record screen and audio on Mac
Difficulty Level: ★★★★
If you're into gaming or live streaming, OBS Studio (Open Broadcaster Software) is a widely popular choice among professionals. Although primarily known for its live streaming capabilities, OBS Studio also offers powerful screen recording features. It allows you to capture your screen, audio, and webcam simultaneously, providing advanced settings and customization options. While OBS Studio may be more complex to set up compared to other options, it provides unparalleled flexibility and control over your recordings. If you're willing to invest time in mastering a feature-rich screen recording software, OBS Studio is an excellent choice.
Step 1. Launch OBS Studio and click the "+" icon in the "Sources" box.
Step 2. Select "Display Capture" from the options list and click "OK".
Step 3. Go to "Settings" > "Output", and select "Recording Path" to determine the location where to place the file.
Step 4. Select “Properties” through “Audio Mixer”. Then, check the box next to “Monitor Only” and click “OK.”
Step 5. Hit the blue "Start Recording" button. To stop recording, click on the "Stop Recording" button.

Wrapping up
In this post, we have discussed the top 3 solutions for recording your Mac screen with audio. You can select the method that best meets your requirements. Among these options, we highly recommend using the Kingshiper Screen Recorder for its convenience and versatility. With this software, you can effortlessly capture both system sound and external audio while recording. It is a user-friendly tool that guarantees you have a wonderful recording journey!
You May Also Like
1. Top 5 Ways to Screen Record on Mac [2024 Updated]


