


Top 5 Ways to Screen Record on Mac [2024 Updated]
- Support
- Dynamic News
- Kate
 2155
2155- 2024-02-01 19:57:49


Screen recording has become an essential tool for Mac users, enabling them to capture and share their on-screen activities efficiently. Whether you want to create tutorials, troubleshoot technical issues, or save memorable moments, screen recording on a Mac offers a multitude of benefits. In this guide, we will offer the top five methods to screen record on a Mac, providing you with the latest options and techniques.
Page Content:
1. Way 1. How to Screen Record on Mac with Kingshiper Screen Recorder for Mac
2. Way 2. How to Screen Record on Mac with ScreenFlow
3. Way 3. How to Screen Record on Mac with QuickTime Player
4. Way 4. How to Screen Record on Mac with OBS Studio
5. Way 5. How to Screen Record on Mac with Screenshot Toolbar
Way 1. How to Screen Record on Mac with Kingshiper Screen Recorder for Mac
Kingshiper Screen Recorder for Mac is a feature-rich screen recording tool that offers a perfect balance between functionality and ease of use. You can choose to record full screen, specific application windows, or just a selected portion of your screen. It also offers various video and audio settings to ensure your recordings are tailored to your preferences and requirements. With its easy-to-use interface, both beginners and pros can handle it without any additional tutorials.
Why choose Kingshiper Screen Recorder?
User-friendly interface that makes it easy for users of all levels.
High-quality output with options to record in different resolutions.
Massive formats are supported whether you require high-quality videos or smaller file sizes.
Flexibility in Recording Options that you can record your entire screen or choose specific sections to capture.

Follow the simple steps to record the screen on Mac:
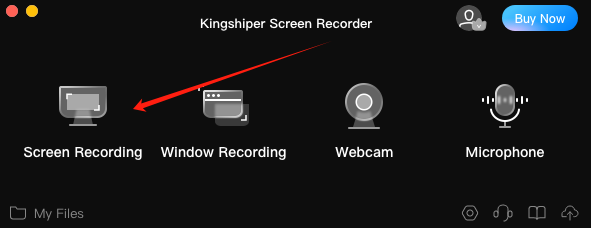
Step 1. Launch Kingshiper Screen Recorder on your Mac. Choose “Screen Recording” to start the screen record.
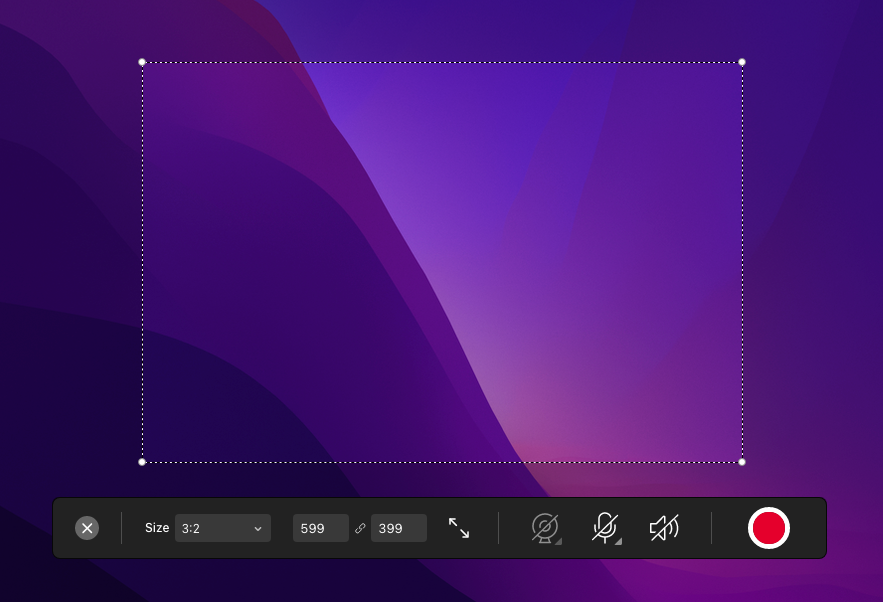
Step 2. Adjust the size to choose entire screen or select a specific area. And then, choose Start Recording to start your recording.
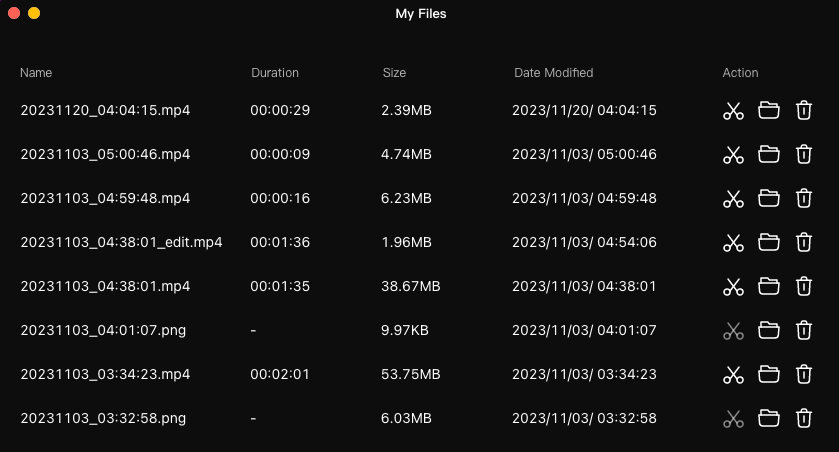
Step 3. Once you finish recording, click on the "Stop" button to end the recording. And then click on “My Files” from the home interface to check your recordings.
Way 2. How to Screen Record on Mac with ScreenFlow
ScreenFlow is a popular screen recording and video editing software designed specifically for Mac. It offers a user-friendly interface and a comprehensive set of tools for creating professional-looking screen recordings, such as chroma key (green screen), video and audio animations, and support for external cameras and iOS devices. However, if you want to choose ScreenFlow, you must consider its price which is higher that some other options available in the market.
Step 1. Launch ScreenFlow and click “New Recording” on the left menu.
Step 2. Select the monitor you want to record on. And press the red Record button to begin recording.
Step 3. Click the Stop Recording button or press the ”Shift + Command +2” to finish.
Way 3. How to Screen Record on Mac with QuickTime Player
QuickTime Player is a built-in application that comes pre-installed on every Mac. It not only allows you to play various media files but also enables screen recording. In addition to screen recording, QuickTime Player also supports basic video editing functionalities, such as trim, split, and merge. It's a convenient tool for making quick edits to your videos without the need for separate, complex software.
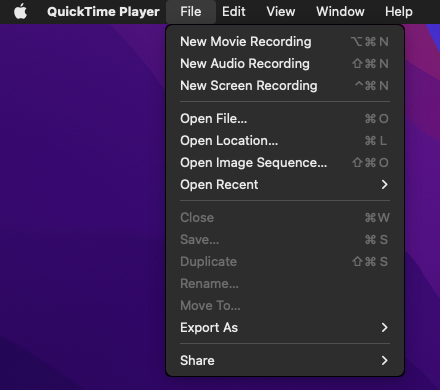
Step 1. Launch QuickTime Player and go to "File" > "New Screen Recording".
Step 2. In the next window, you can customize your recording area.
Step 3. After setup, click the "Record" button to start capturing. When you want to finish, click the "Stop" button or press the "Command-Control-Esc" keyboard combination.
Way 4. How to Screen Record on Mac with OBS Studio
OBS Studio is an open-source screen recording and streaming software that provides a wide range of features. This program allows you to easily capture and record your computer screen so that you can create tutorials, gameplay videos, presentations, and many other types of videos. While OBS Studio is a great tool for advanced users, it may prove overwhelming for those who are just starting out.
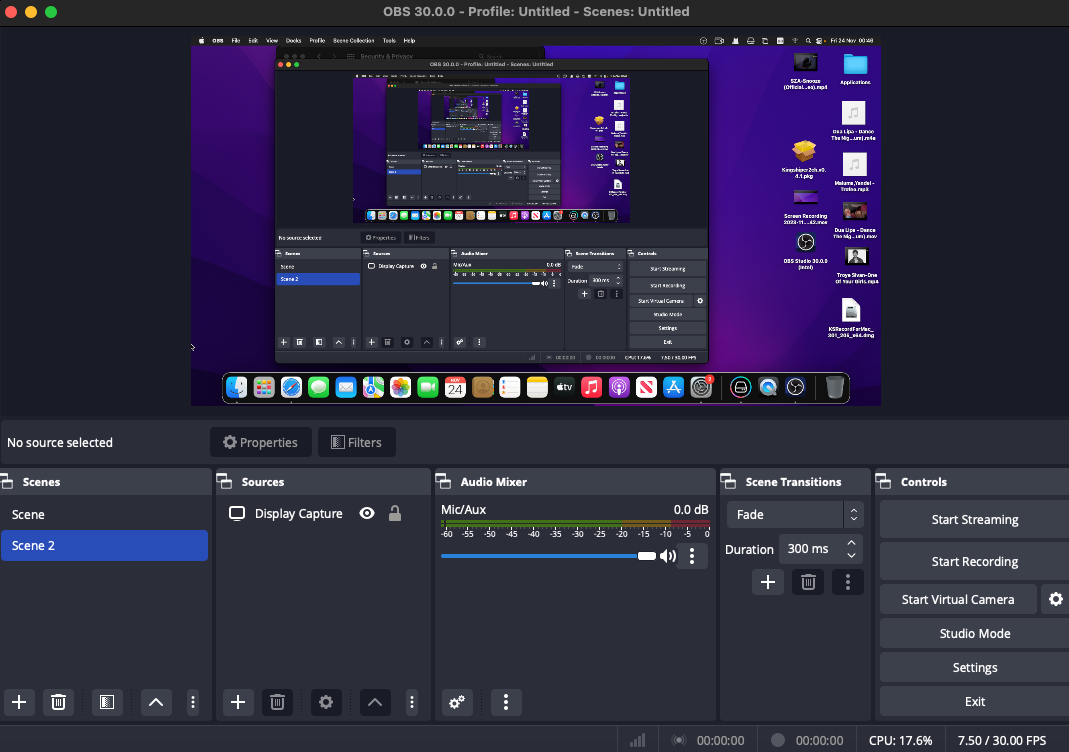
Step 1. Launch OBS Studio on your Mac and click the "+" icon in the "Sources" box.
Step 2. Then, select "Display Capture" from the options list and click "OK".
Step 3. Next, go to "Settings" > "Output" and select "Recording Path" to determine where to place the file.
Step 4. Hit the blue "Start Recording" button to start recording. To stop recording, click on the "Stop Recording" button.
Way 5. How to Screen Record on Mac with Screenshot Toolbar
If you don’t want to download any third-party software on your Mac, you can try to use Screenshot Toolbar, a built-in tool that allows you to capture screenshots and record your screen with ease. However, if you want to record the sound from system audio, it may not fully meet your needs because the Screenshot Toolbar only can record audio from microphone.
Step 1. Press the "shift + command + 5" keys to open Screenshot Toolbar.
Step 2. Click on the "Options" button to adjust the recording settings. Here, you can customize settings such as the storage location, timer and microphone.
Step 3. Select the part you need to record and click "Record".
Step 4. When you finish, click "Stop" or press "command + control + Esc" to end the recording.

The Bottom Line
By now you must master how to screen record on your Mac, it can be accomplished using the above five methods. You may simply create tutorials, record live streams, and record your microphone sound with these tools. But if you need a stable and wonderful recording experience, Kingshiper Screen Recorder for Mac is your go-to solution, which offers various recording modes to suit your specific needs and ensures a high-quality output.
You May Also Like
1. How to Record Video on Mac [3 Methods]
2. How to Install Virtual Soundcard on Mac
3. [2023 Updates]FAT32 VS NTFS VS exFAT, Which is the Best File System


