


How to Install a Printer on Windows 10
- Support
- Software Tutorials
- Kate
 273
273- 2026-01-28 17:45:14


Installing a printer on Windows 10 is an essential task, yet it can be confusing for those who are doing it for the first time. From driver issues to connectivity problems, many users encounter obstacles that prevent their printer from working properly. Having a correctly installed printer not only ensures smooth printing but also significantly improves productivity and workflow efficiency. In this guide, we will provide a detailed process to install a printer on Windows 10. Let’s get started.
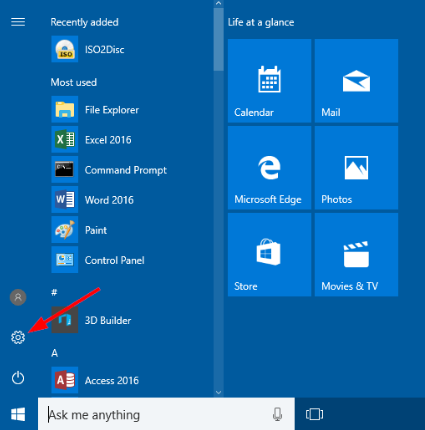
Step 1. Click the “Windows” icon in the bottom-left corner of your screen, then select the “Settings” icon. Windows Settings allows you to manage devices, including printers.
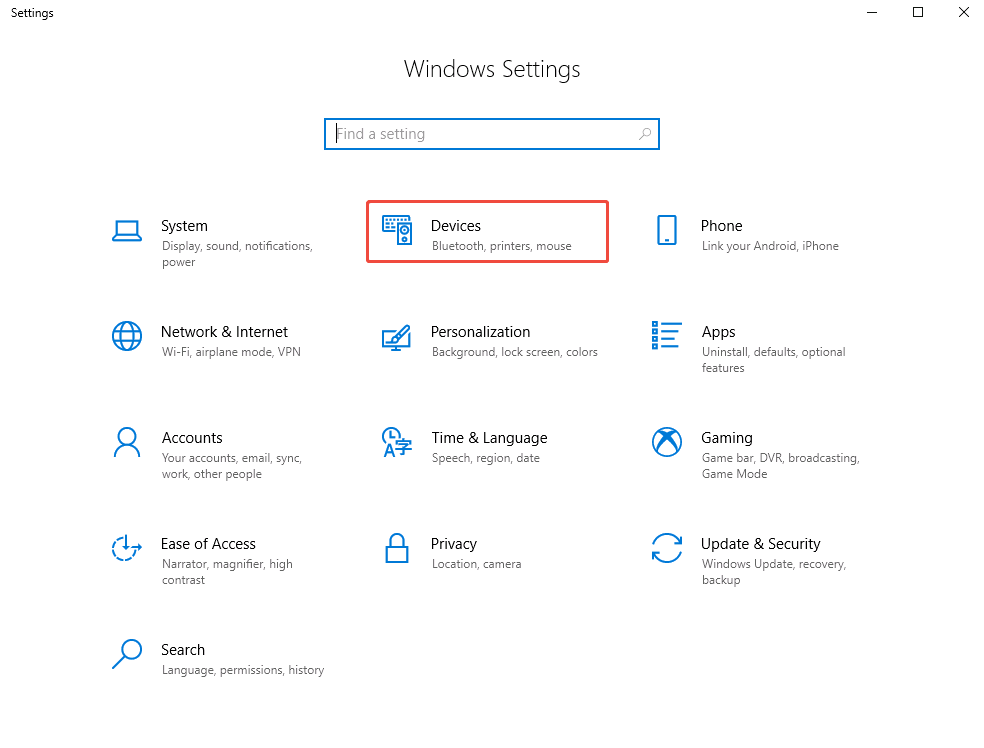
Step 2. In the Settings window, select “Devices”, which contains options for Bluetooth, printers, and other hardware.
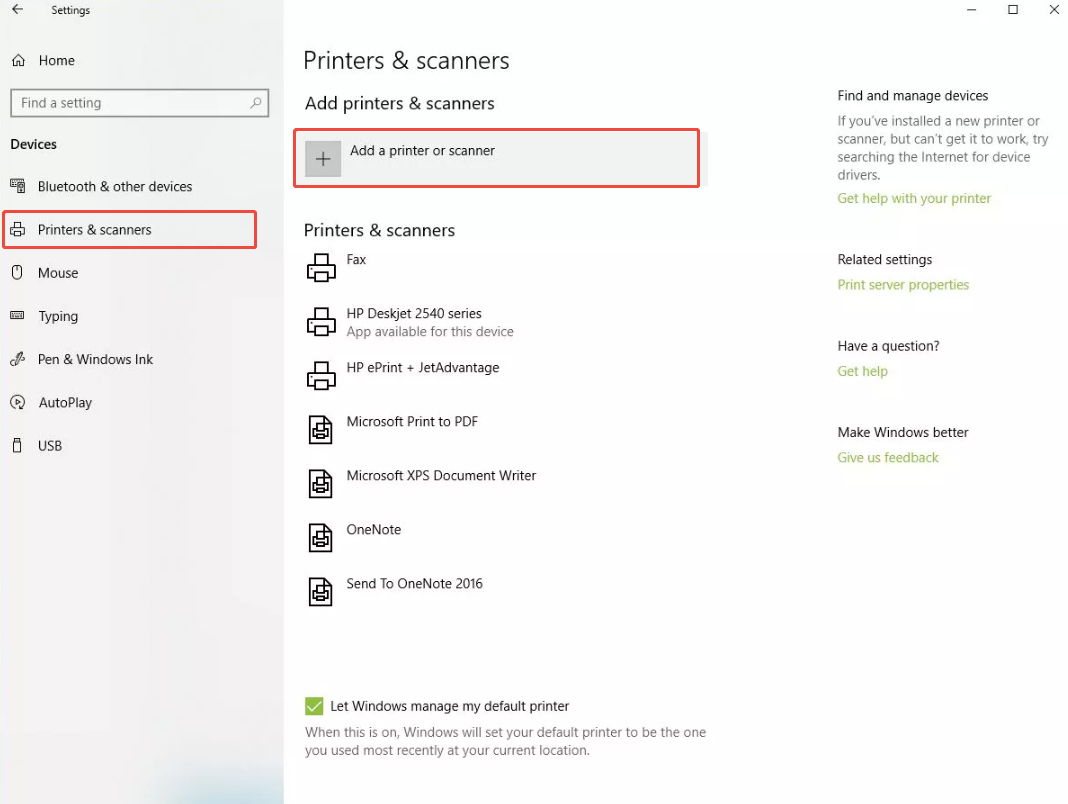
Step 3. On the left-hand menu, click “Printers & Scanners”, then select “Add a printer or scanner”. Windows will automatically start searching for available devices.
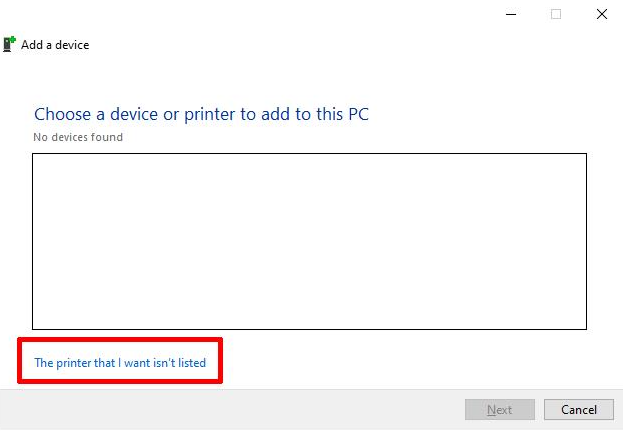
Step 4. If your printer does not appear in the list of detected devices, click “The printer that I want isn’t listed”. This allows you to manually add your printer.
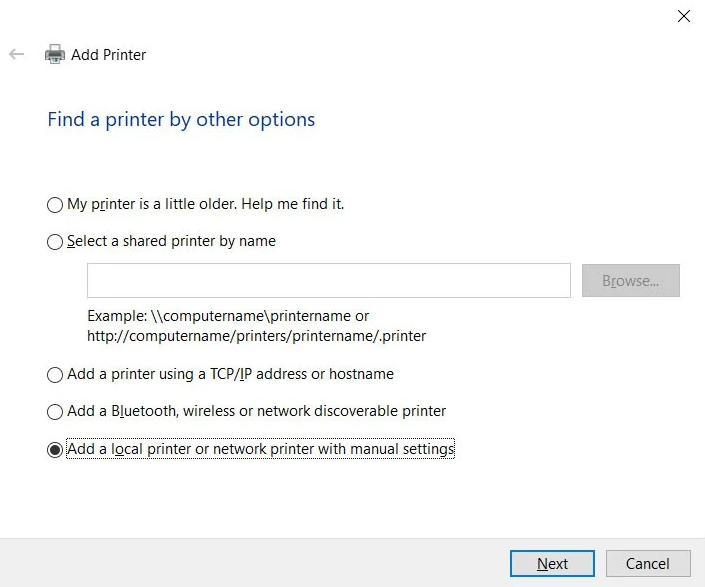
Step 5. Choose “Add a local printer or network printer with manual settings”, then click “Next”. This step is important for USB printers or network printers not automatically detected.
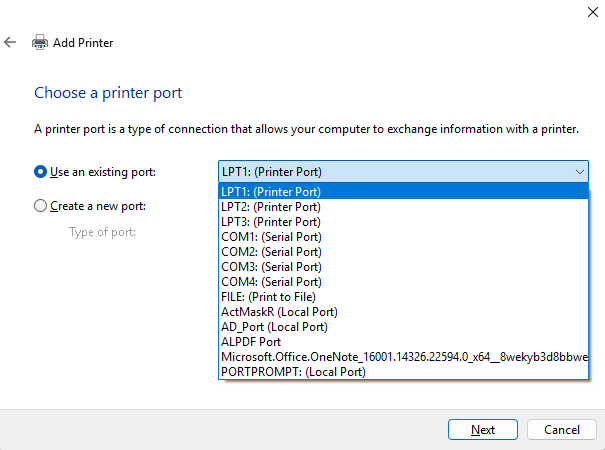
Step 6. Select the USB port corresponding to your printer model. For USB printers, make sure to select the correct “USB00x” port to ensure proper communication between your computer and printer.
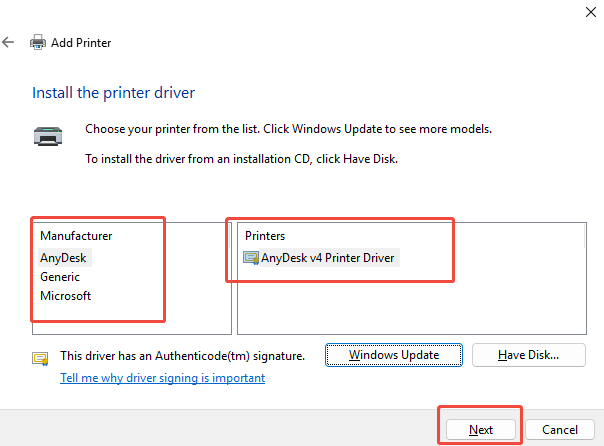
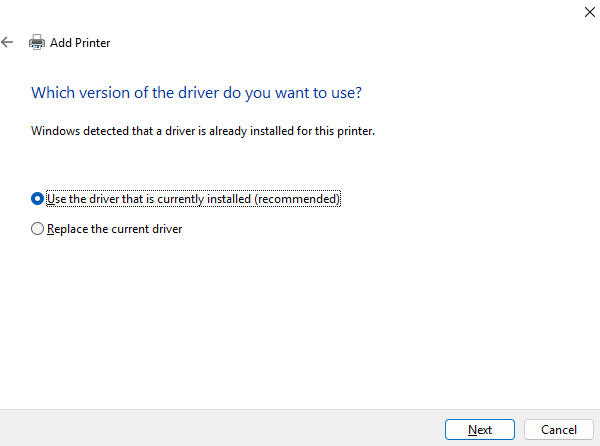
Step 7. Choose your printer manufacturer and model from the list, then click “Next”. If your printer does not appear in the list, the driver may not be installed. You can use “AiPrinter Fixer” to automatically detect your printer and install the driver.
Step 8. Windows will prompt you to customize printer settings, such as naming the printer, setting it as the default, and choosing sharing options. Once configured, click “Next” to proceed.
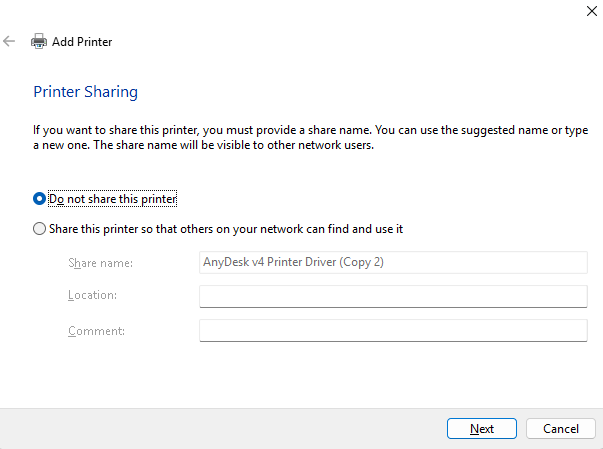
Step 9. Select “Do not share this printer” if you don’t want to share it on a network, then click “Next”. This ensures the printer is ready for local use.
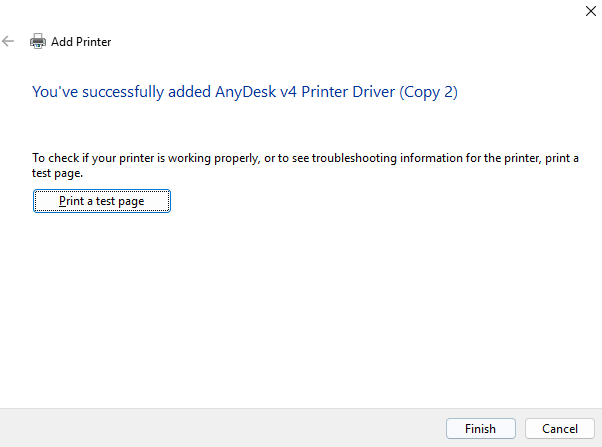
Step 10. Finally, print a test page to confirm the printer is working correctly, then click “Finish”. If the test page does not print or shows errors, try connecting to a different USB port, restarting the printer, and trying again.
Conclusion
Installing a printer on Windows 10 is simple when you follow the above steps. Proper configuration improves system stability, prevents common printing errors, and allows users to print efficiently. For quicker troubleshooting and automated driver management, tools like AiPrinter Fixer are highly recommended.


