


How to Install a Printer on Windows 7
- Support
- Software Tutorials
- Kate
 339
339- 2026-01-28 17:45:33


Installing a printer on Windows 7 is a common task for both home and office users. Whether you’re connecting a local printer via USB or setting up a network printer, knowing the correct installation process ensures smooth printing and avoids driver issues. In this guide, you’ll learn how to install a printer on Windows 7 quickly and efficiently.
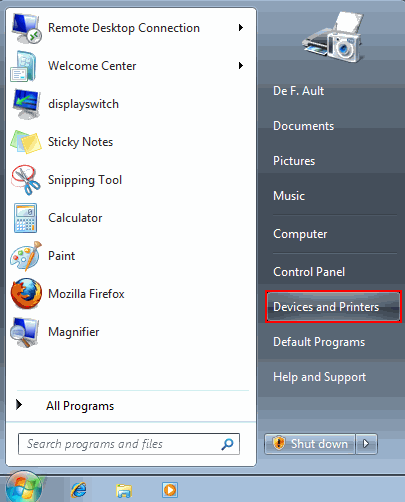
Step 1. Click the “Start menu” at the bottom left of your screen, then select “Devices and Printers”. This window shows all printers currently installed on your system.
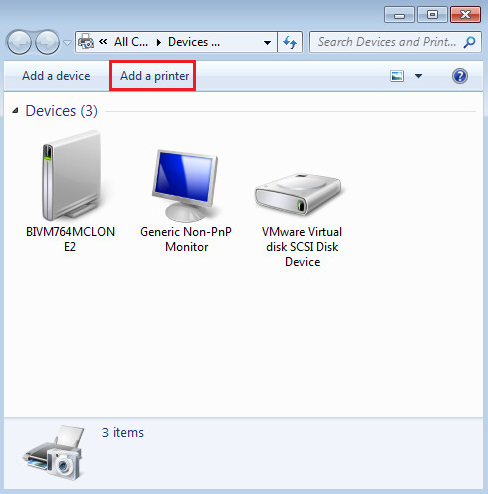
Step 2. Click “Add a printer” at the top of the window. Windows will start searching for available printers, both locally connected and networked.
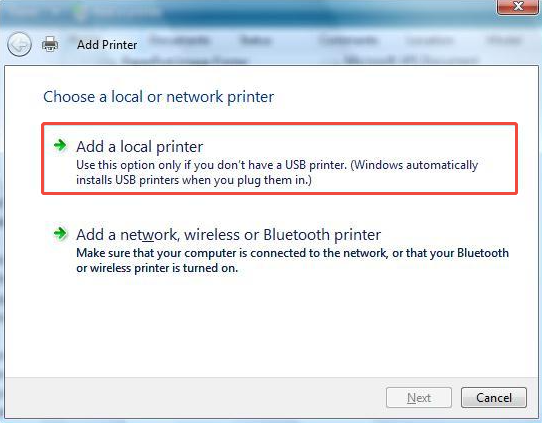
Step 3. Choose “Add a local printer” and then choose the appropriate port according to your printer.
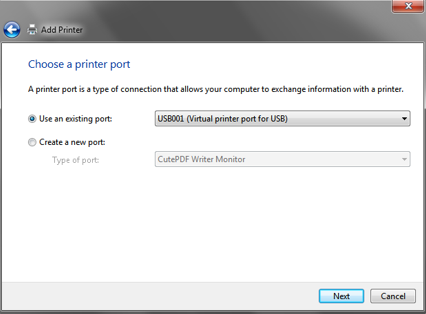
Step 4. For USB printers, you need to choose the USB00x port.
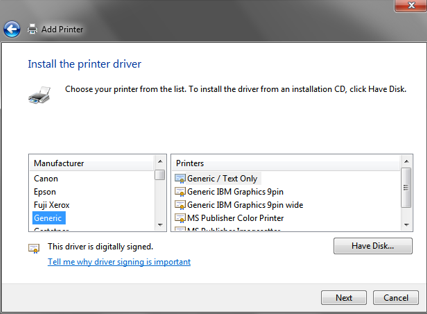
Step 5. Select your printer manufacturer and model from the list. If your printer is not listed:
Check if the driver is included on the printer’s CD or the manufacturer's website.
Use a printer driver repair tool like AiPrinter Fixer to automatically download and install the correct driver.
Then, click “Next” once the driver is installed.
Step 6. Customize the printer settings as needed and click “Next” to proceed.

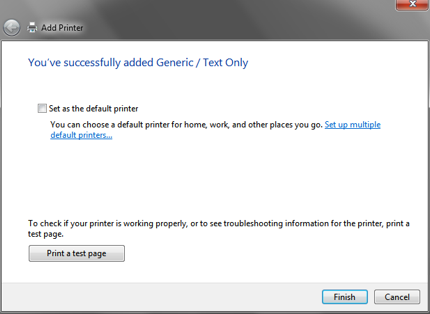
Step 7. Print a test page and then click “Finish”. If the test page prints correctly, the installation is successful. If it does not print or shows errors, try connecting the printer to a different USB port, restarting the printer, and printing the test page again.
Conclusion
Installing a printer on Windows 7 is straightforward when drivers and connections are properly managed. If you encounter any printer issues or errors, using AiPrinter Fixer can quickly detect and resolve driver or port problems, ensuring your printer works smoothly.


