


USB Reinstallation Cannot Detect System Drive? Fix Now
- Support
- Software Tutorials
- Kate
 597
597- 2026-01-28 17:48:48


If you’re trying to reinstall Windows from a USB drive and your system drive appears as an abnormal disk, blank, or unrecognized, preventing you from selecting it during installation, don’t worry. This is a common issue caused by incompatible hard drive modes, missing drivers, or new hardware protocols. In this guide, we’ll show you the detailed solution to get your system drive recognized and complete the reinstallation successfully.
Why Your System Drive Isn’t Detected
Incompatible Hard Drive Mode: Modern PCs use AHCI or IDE modes. If the mode doesn’t match the installation environment, the drive may appear blank or unrecognized.
Missing Drivers: Older Windows images may not include drivers for newer hardware, such as Intel 11th/12th Gen CPUs or NVMe SSDs.
New Hardware Compatibility: Some laptops and desktops use TPM 2.0, Intel VMD, or other protocols that can prevent traditional installation methods from detecting the drive.
How to Fix USB Reinstallation Cannot Detect System Drive?
Fix 1. Modify Registry Before Creating the USB
Note: Perform this on the computer used to create the USB installer. After modifying the registry, you can proceed to create the bootable USB.
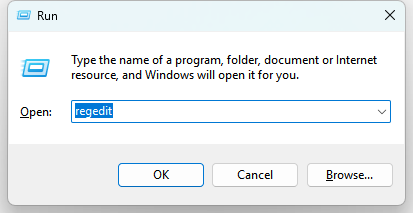
Step 1. Press “Win + R” to open the Run dialog, type “regedit”, and press Enter to launch the Registry Editor. If User Account Control prompts, click “Yes” to grant permission.
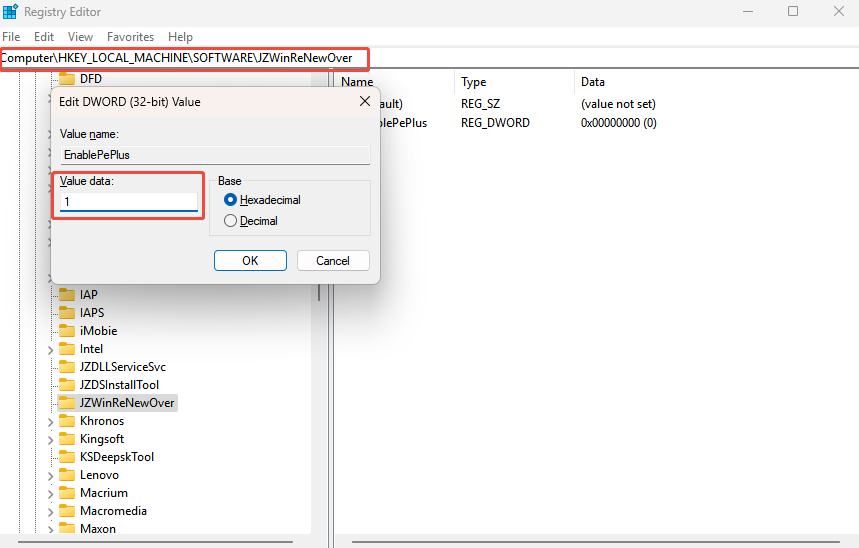
Step 2. Navigate to Computer\HKEY_LOCAL_MACHINE\SOFTWARE\JZWinReNewOver and locate the EnablePeplus entry in the right panel. Double-click it and change its Value Data to 1.
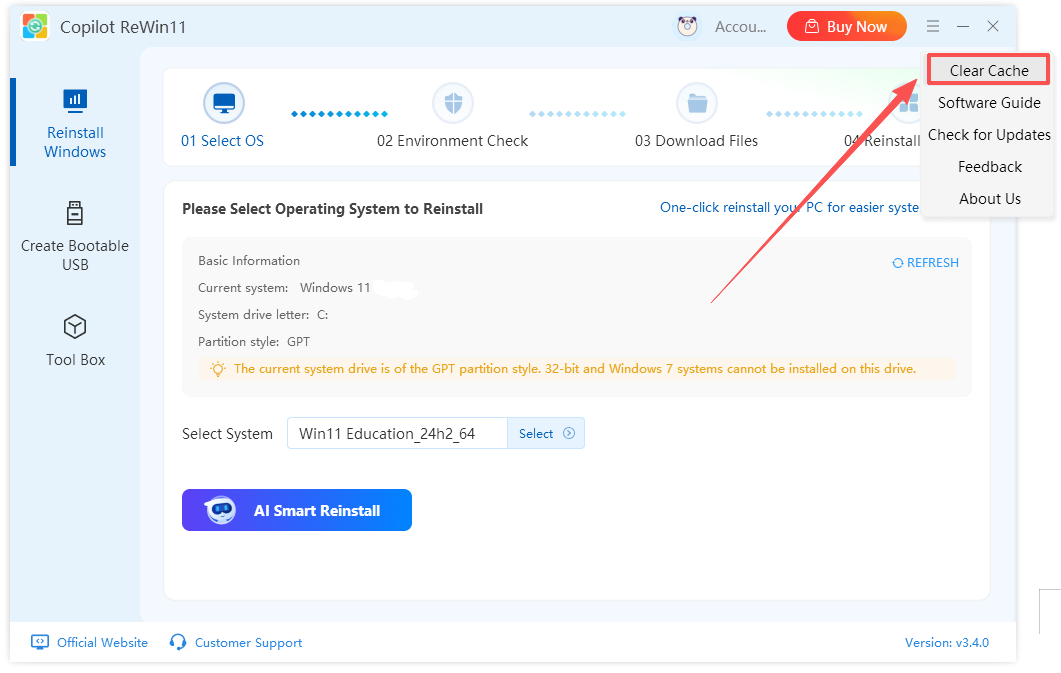
Step 3. Launch Copilot ReWin11, click the top-right menu, and select “Clear Cache” to remove temporary data.
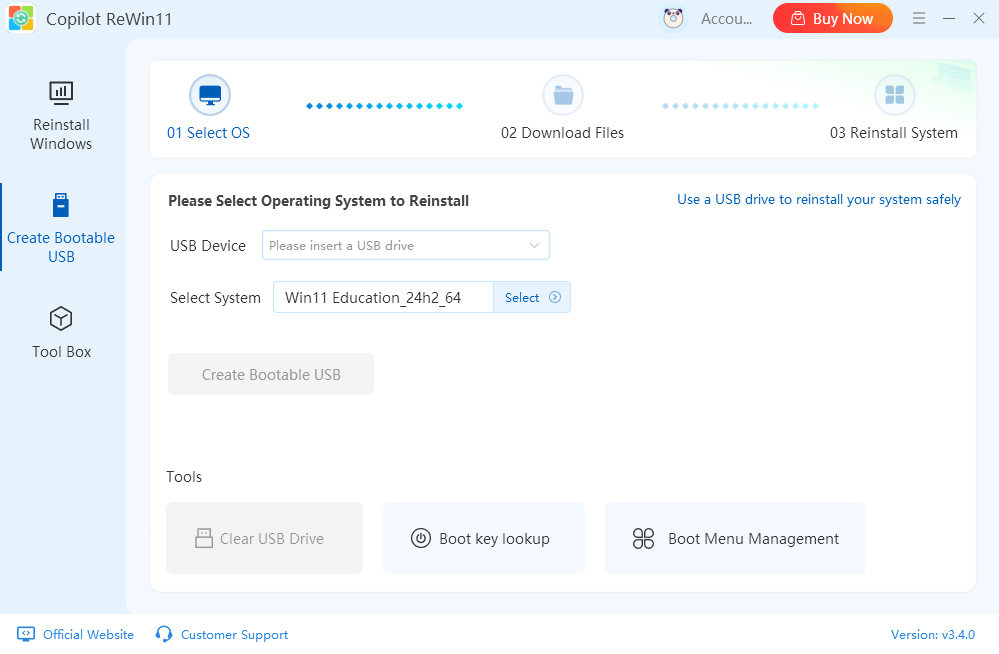
Step 4. Close the Registry Editor, restart the Copilot ReWin11 to create a bootable USB.
Fix 2. Change Hard Drive Mode in BIOS
Changing the hard drive mode is similar across most brands, but the keys and menu options may vary depending on your motherboard or laptop model. Below we have summarized the common steps to enable AHCI mode, along with specific instructions for several popular computer brands for your reference.
For General PCs/Laptops:
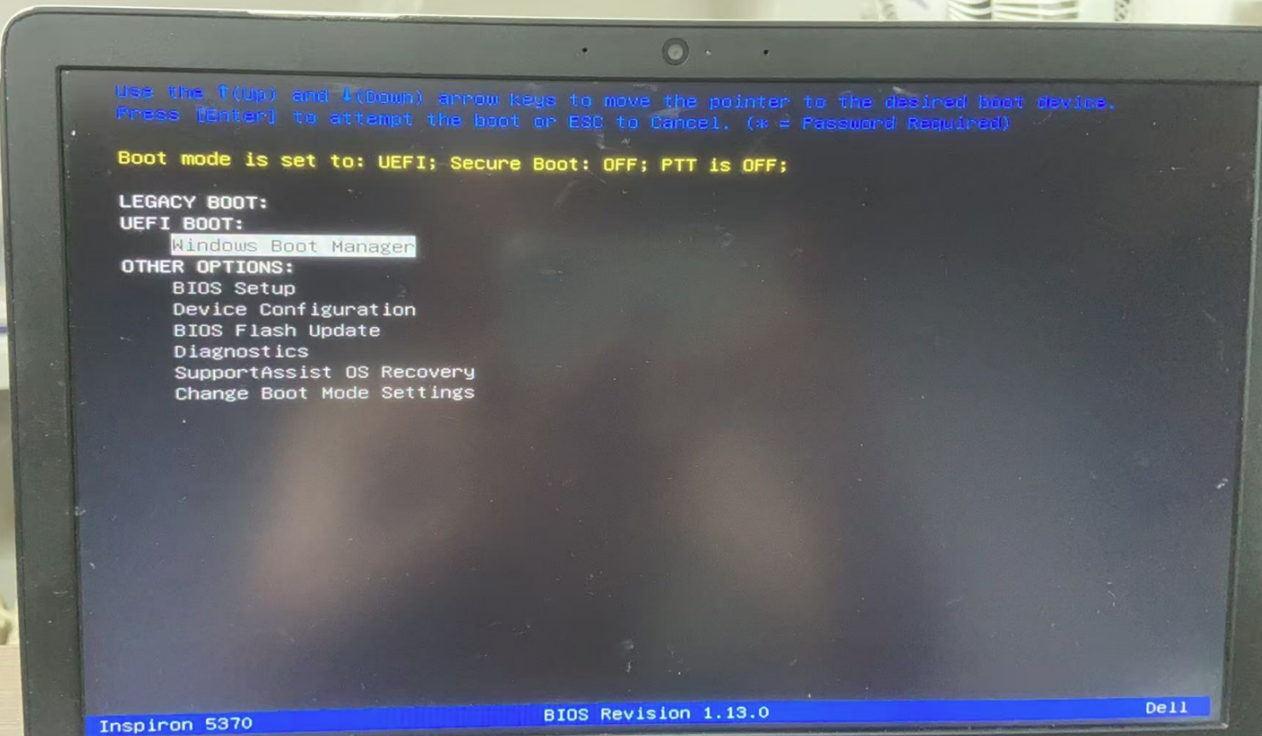
Step 1. Restart your computer and, during the startup screen, repeatedly press F12 (some models may use F2 or Esc) to enter the BIOS. Once inside, use the arrow keys to navigate to “Advanced Setup”.
Step 2. Go to the “Storage” or Storage Configuration menu and change the hard drive mode from the default option to “AHCI”.
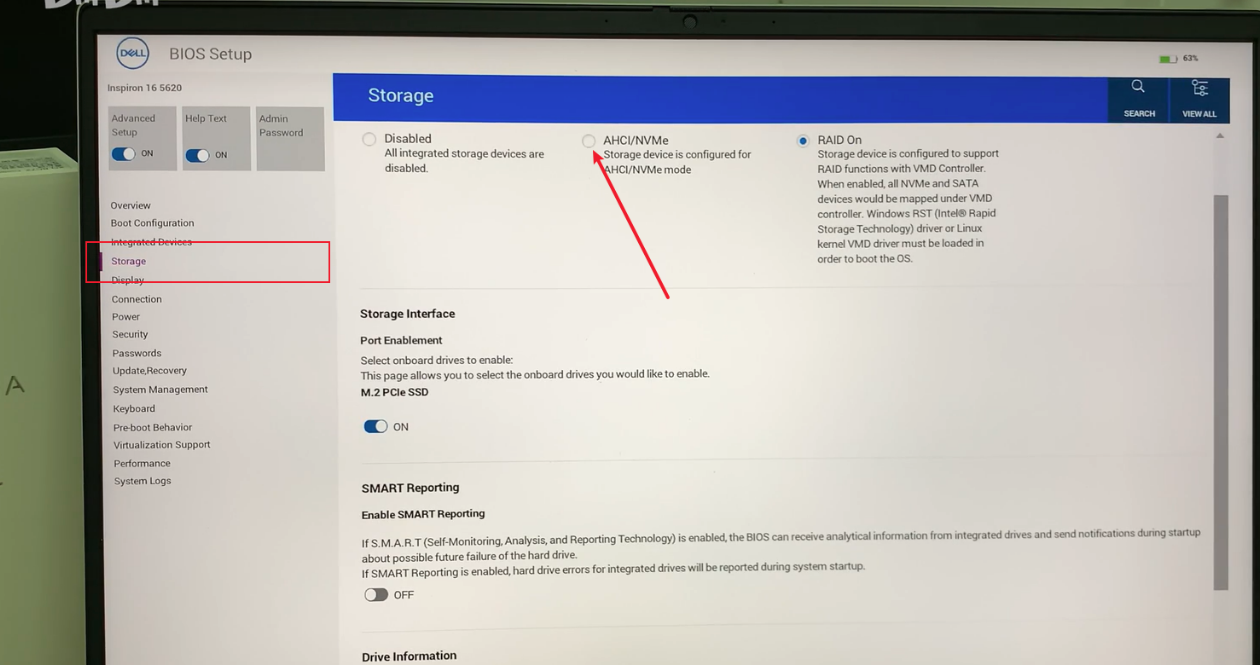
Step 3. Press F10 to save your changes and tap on the “Yes” button to confirm and reboot the system. After rebooting, reinsert the bootable USB drive and check if the system drive is now recognized.
For Dell PCs/Laptops:
Step 1. Power on or restart your Dell computer and, when you see the logo, repeatedly press F2 or F12 to enter the BIOS.
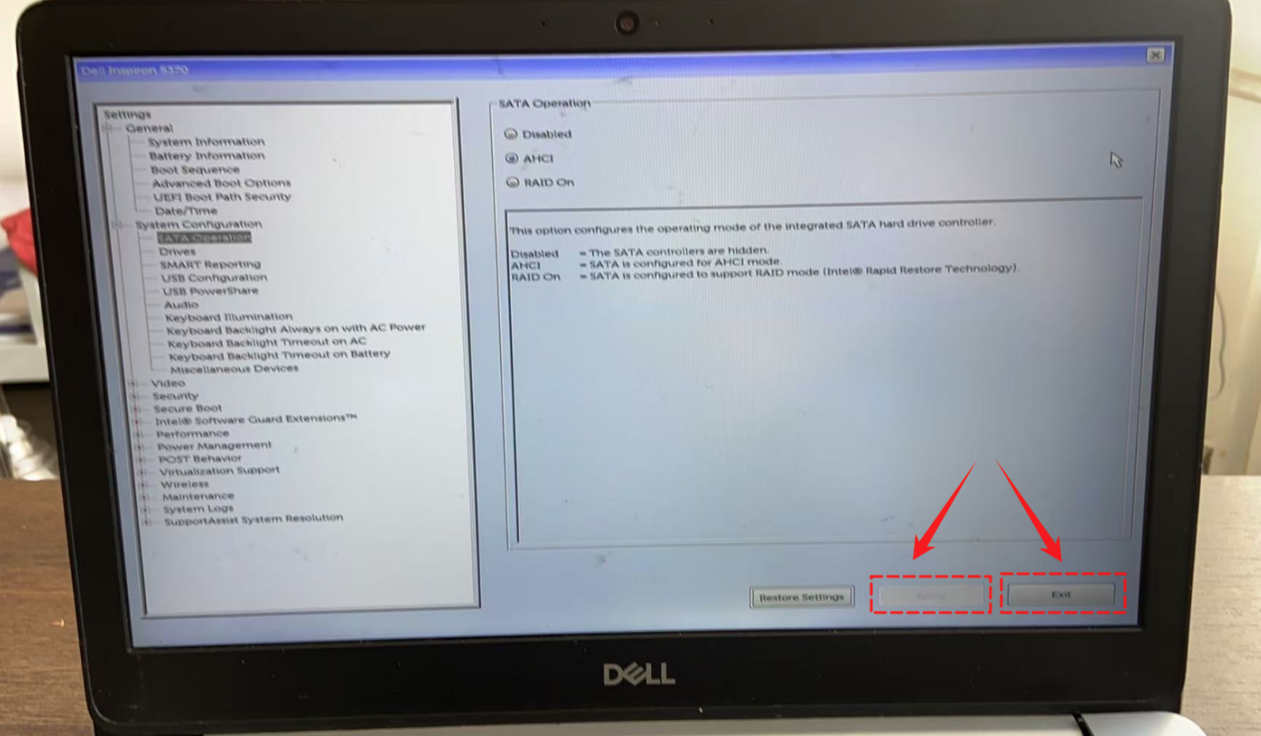
Step 2. In the BIOS, navigate to “System Configuration” and select “SATA Operation”, then change the mode to “AHCI”.
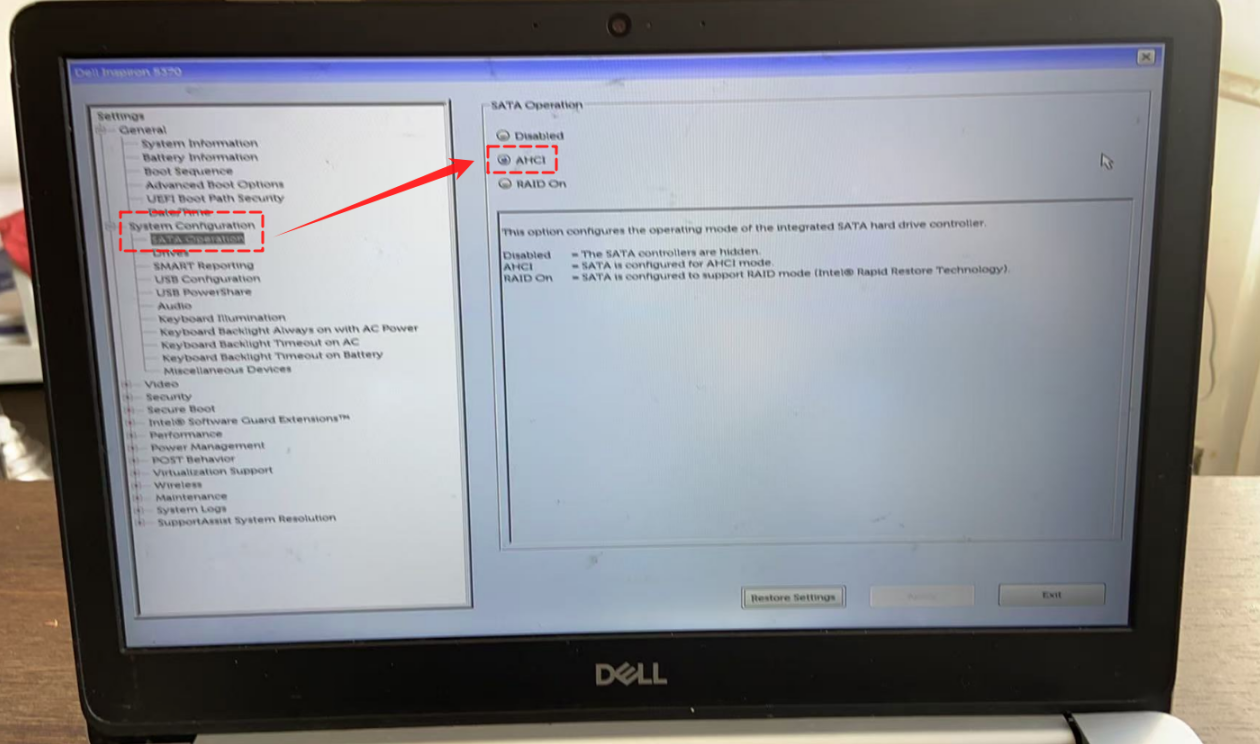
Step 3. Click “Apply” to save the settings and then click “Exit” to leave the BIOS. After rebooting, reconnect the USB installer and verify that the system drive is now detected.
For Asus PCs/Laptops:
For traditional BIOS systems:
Step 1. Power on or restart your Asus computer and, when the Asus logo appears, repeatedly press Del or F2 to enter the BIOS.
Step 2. Press F7 to switch to “Advanced Mode”, then select the “Advanced” tab.
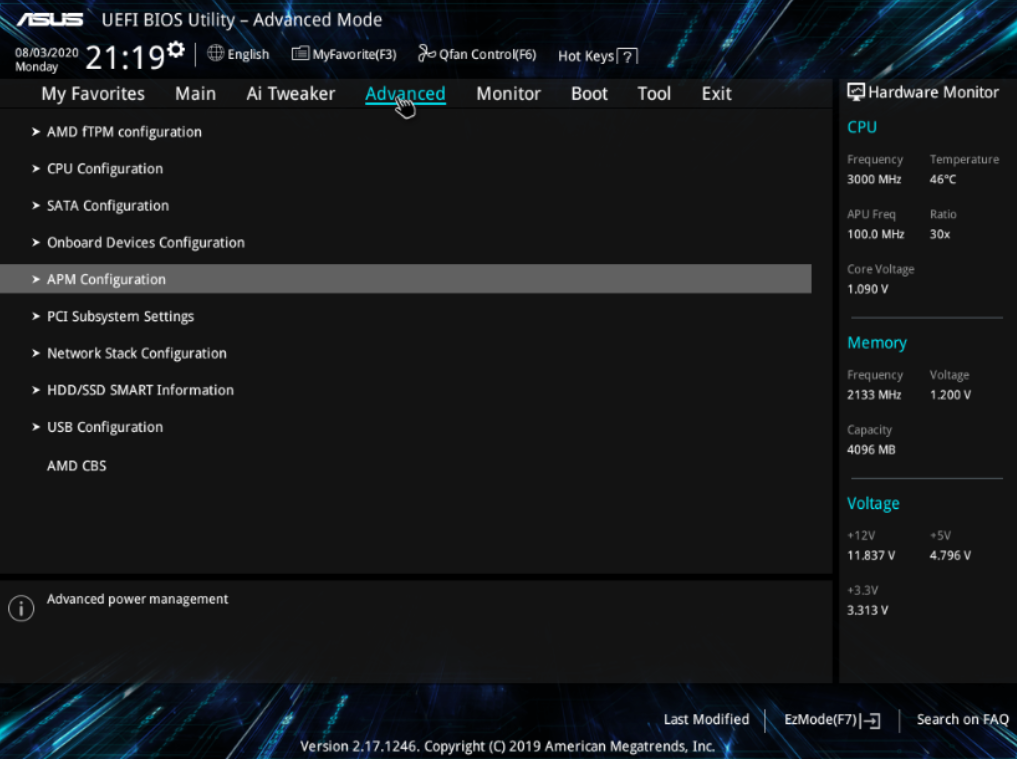
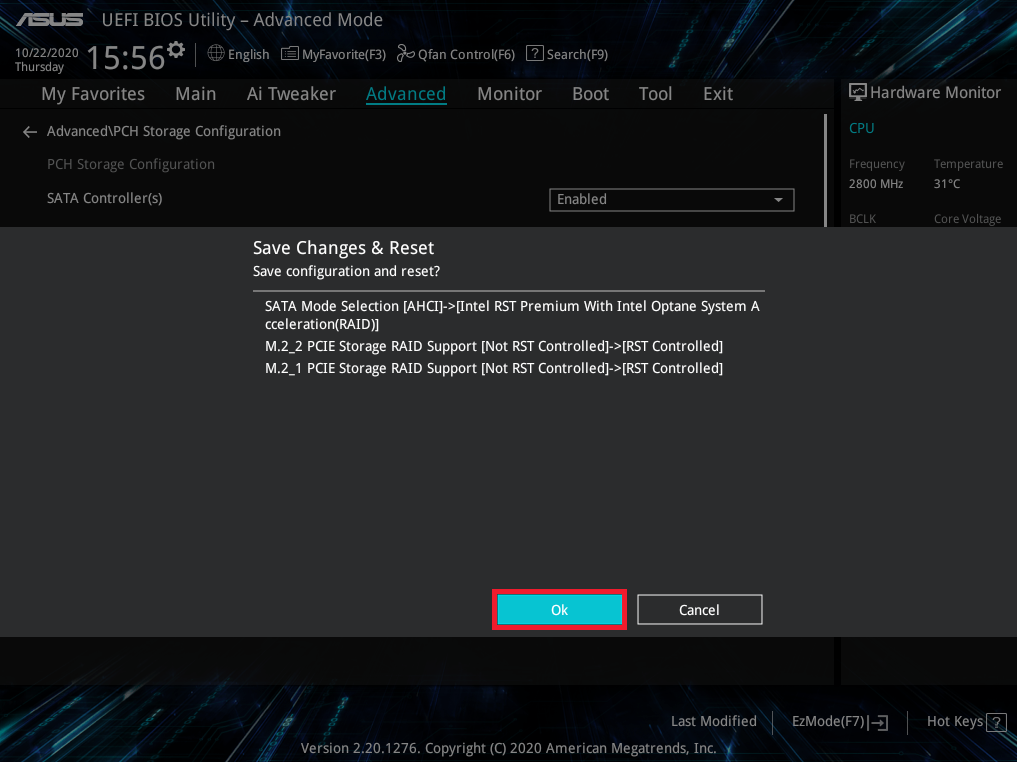
Step 3. Navigate to “PCH Storage Configuration” or “SATA Configuration” under the “Advanced” tab and change SATA Mode (or SATA Mode Selection) to “AHCI”.

Step 4. Press F10 to save the settings and exit the BIOS.
For systems with Intel VMD technology (common in newer laptops):
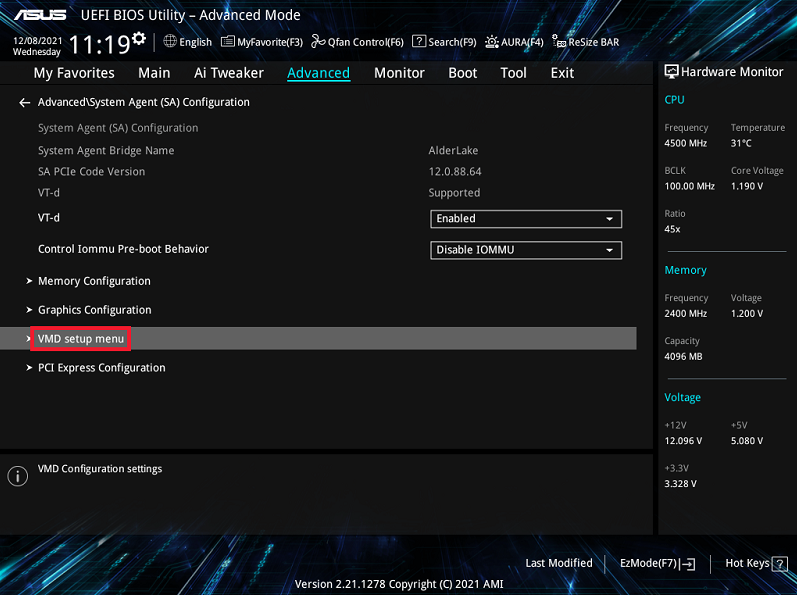
Step 1. Enter the BIOS as above, switch to “Advanced Mode”, and go to the “Advanced” > “System Agent (SA) Configuration”tab.
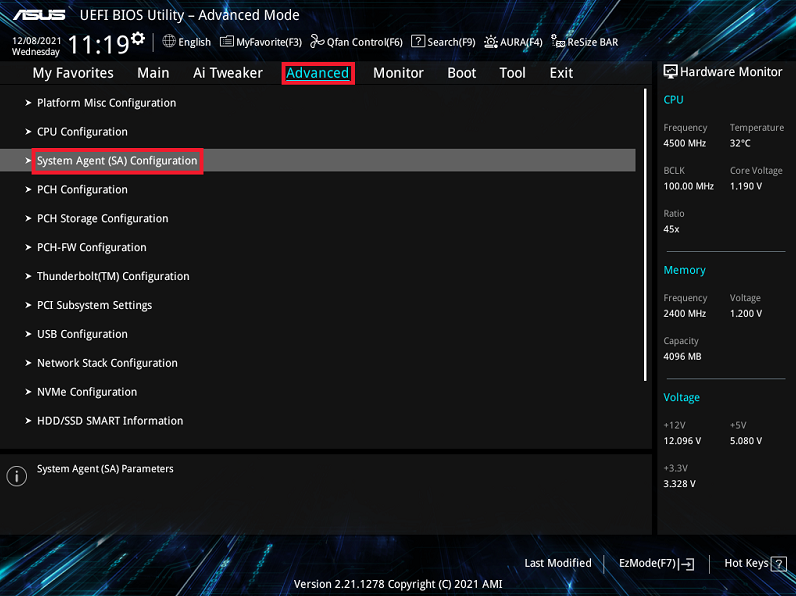
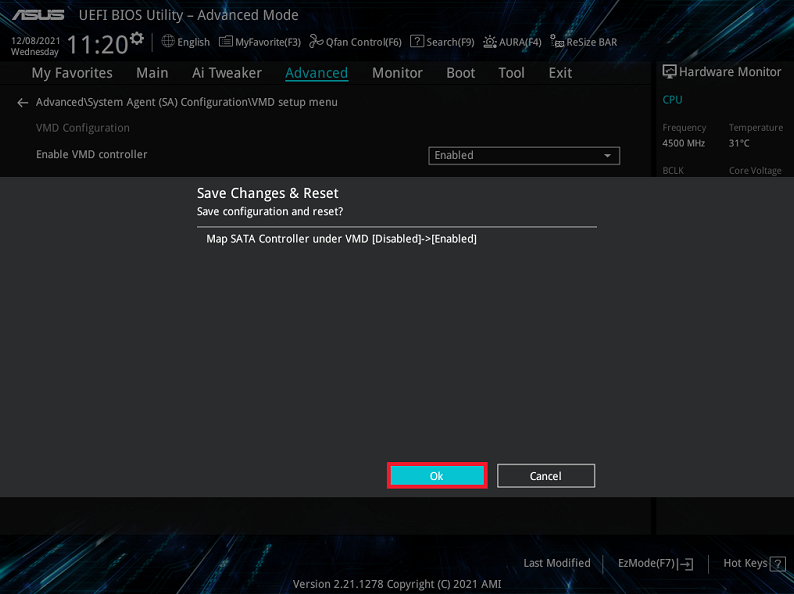
Step 2. Navigate to “Intel VMD Configuration” or “VMD setup menu” and set the “VMD Controller” to “Disabled”, which will automatically enable AHCI mode.
Step 3. Press F10 to save the changes and exit the BIOS.
Extra Tips for USB Reinstallation
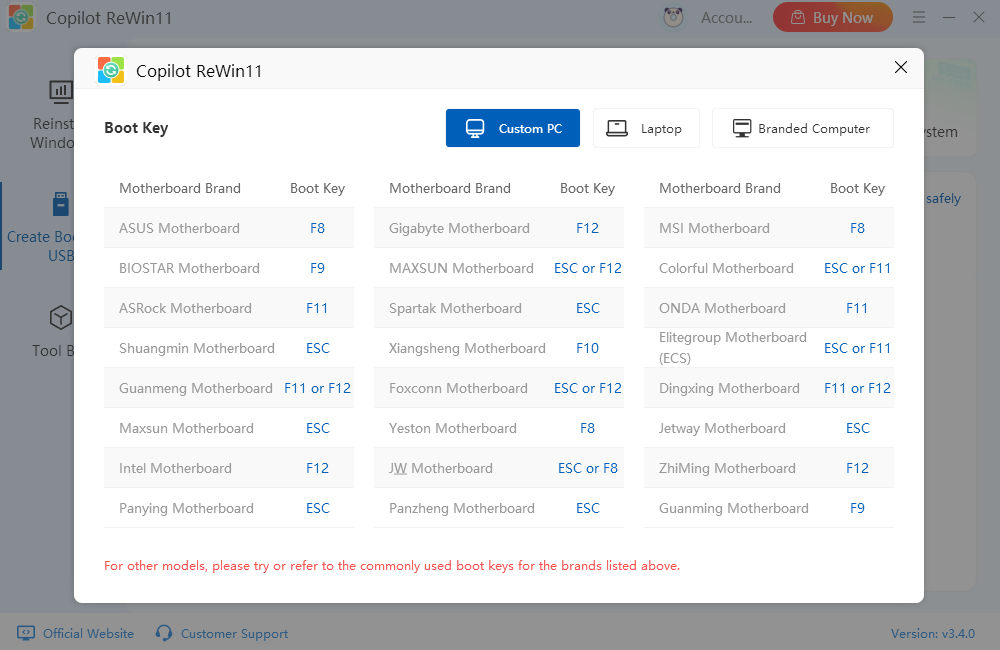
If the system drive is still not recognized after changing the hard drive mode, try disabling “Secure Boot” in the BIOS. Secure Boot is designed to protect your system from unauthorized software during startup, but it can sometimes prevent the USB installer from detecting the drive. BIOS access keys vary depending on your computer brand. You can use the “Boot Key Lookup” feature to find the correct key for your system. Some common keys are listed below:
Lenovo / Dell: F2
Asus / Xiaomi: Delete
Huawei / Honor: F2 or F10
Why Choose Copilot ReWin11?
Smart Environment Detection: Copilot ReWin11 automatically analyzes your current system environment to ensure it is safe to proceed with the reinstallation.
Fully Automated One-Click Operation: From downloading the system image to completing the installation, the entire process requires no manual intervention.
Various Operating System Support: Choose from official Windows 7, 10, or 11 images freely.
Fast Installation Experience: Powered by P2P acceleration technology, the system can be reinstalled in under 30 minutes.
Clean and Bloat-Free: The reinstalled system comes without any third-party software, plugins, or ads.
Conclusion
Following the steps above will help you quickly resolve issues where the system drive appears blank or cannot be detected. If you still encounter problems, contact us for assistance. For more detailed guides on system reinstallation, visit the Kingshiper Software.


