


How to Fix “Working Directory Not Found” During Windows Reinstallation
- Support
- Software Tutorials
- Kate
 604
604- 2026-01-28 17:49:37


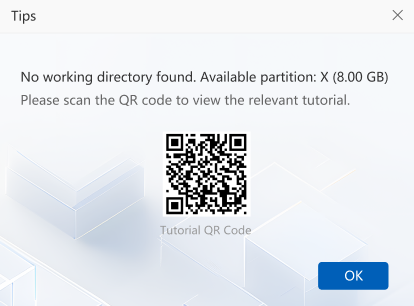
When you encounter the error “Working Directory Not Found” when using Copilot ReWin11, what can you do? This usually happens because the system drive is not recognized or due to driver compatibility issues. In this guide, we’ll explain the main causes and provide detailed solutions to fix the problem.
Why Does the “Working Directory Not Found” Error Happen
System Drive Not Recognized: Some computers fail to detect the system drive due to incorrect BIOS storage settings (IDE, RAID, or AHCI modes).
Driver Compatibility Issues: Older hardware may not have compatible drivers preloaded, which prevents the reinstallation tool from accessing the disk properly.
Fix 1. Modify Registry (If You Can Boot into Windows)
If your computer can still start Windows, modifying the registry can resolve AHCI-related detection issues without entering the BIOS.
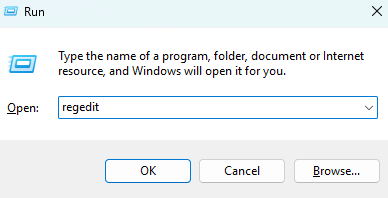
Step 1. Press “Win + R” to open the “Run” dialog box. Type “regedit”, and press Enter to open the Registry Editor. If a User Account Control (UAC) prompt appears, click “Yes” to allow the Registry Editor to open.
Step 2. In the Registry Editor, navigate to the following path: Computer\HKEY_LOCAL_MACHINE\SOFTWARE\JZWinReNewOver.
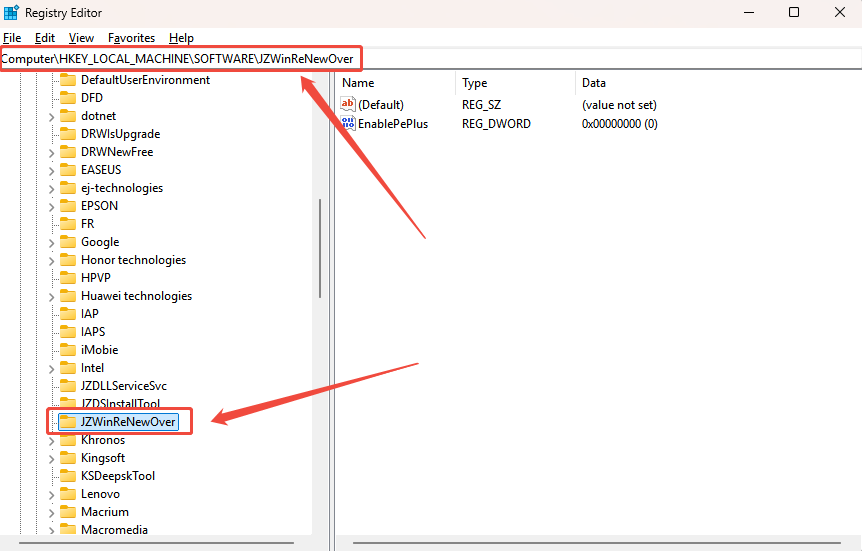
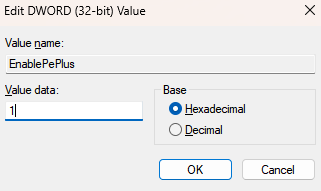
Step 3. On the right-hand panel, locate EnablePeplus, double-click it, and change the Value data to 1.
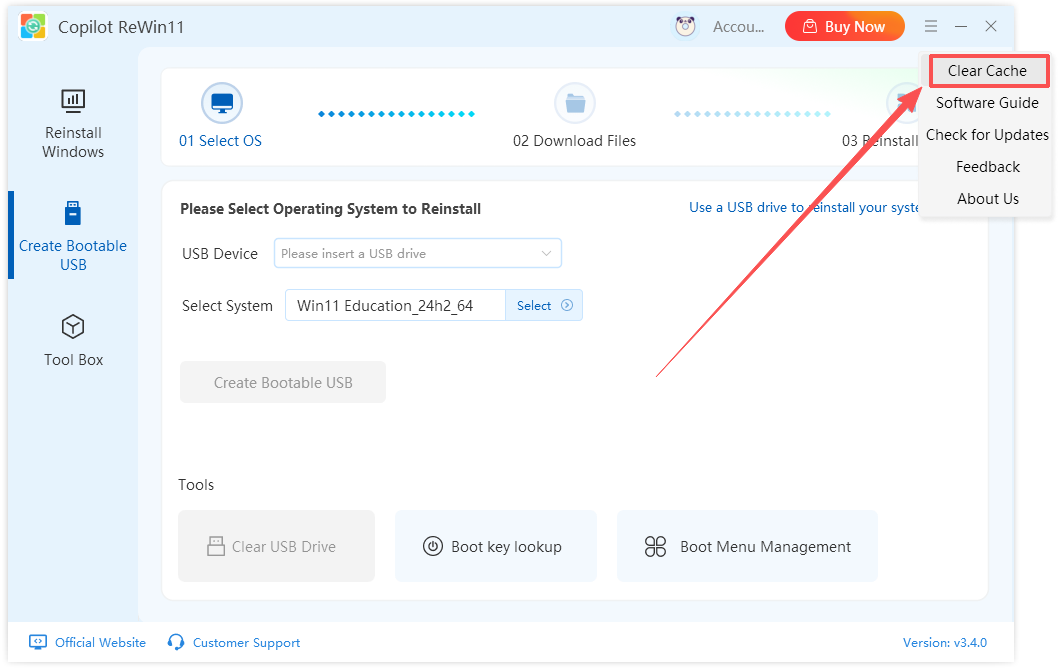
Step 4. Exit the Copilot ReWin11 and relaunch it. Click the menu icon at the top right and select “Clear Cache”.
Step 5. After saving the registry changes, close the Registry Editor and restart Copilot ReWin11.
Fix 2. Change BIOS Hard Drive Mode to AHCI
If you encounter the “Working Directory Not Found” error during Windows reinstallation, it is often due to the system hard drive not being recognized. Changing your BIOS hard drive mode to AHCI can solve most of these issues. Follow the steps below for common PC brands.
For General Laptops/PCs
Step 1. Restart your computer and, during the boot screen, repeatedly press F12 (some models may use F2 or Esc). Once inside BIOS, use the arrow keys to navigate to Advanced Setup.
Step 2. In the Storage section, change the hard drive mode from its default (IDE or RAID) to AHCI.
Step 3. Press F10 to save your changes and select “Yes” to confirm the restart. Reinsert your USB installation media and check if the system drive is now recognized.
For Dell Laptops
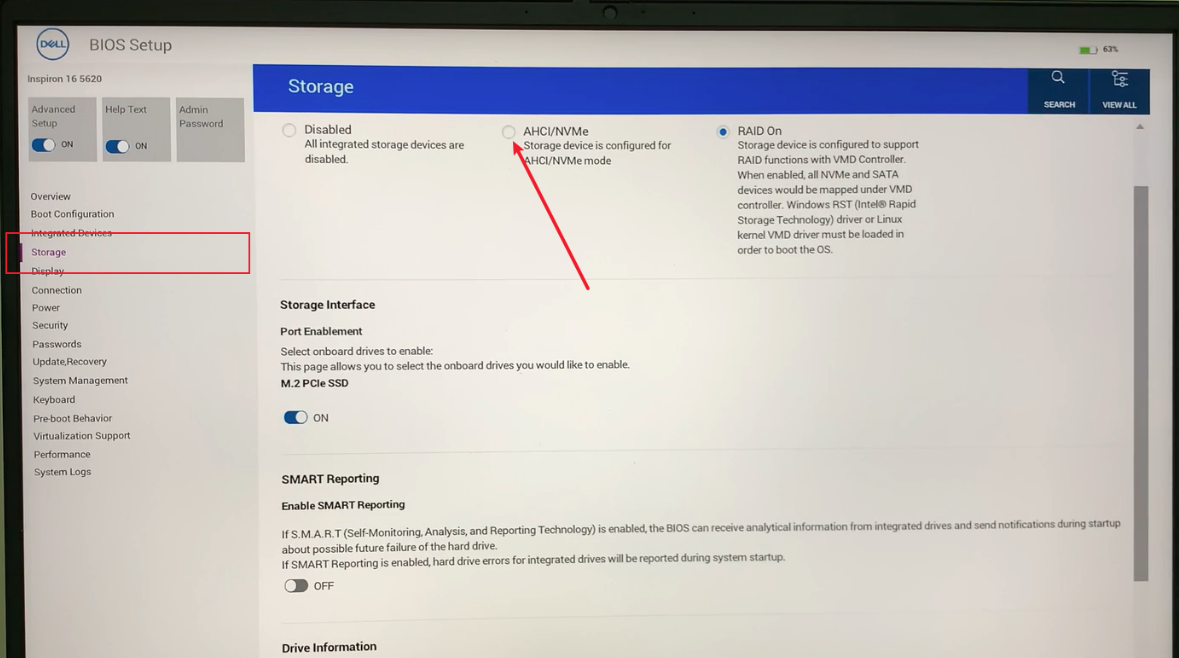
Step 1. To access the BIOS on a Dell computer, restart your PC and, when the boot screen appears, quickly press F2 or F12 repeatedly until the BIOS menu opens.

Step 2. Once inside the BIOS, navigate to “System Configuration” and select “SATA Operation”, then change the SATA mode to “AHCI”.
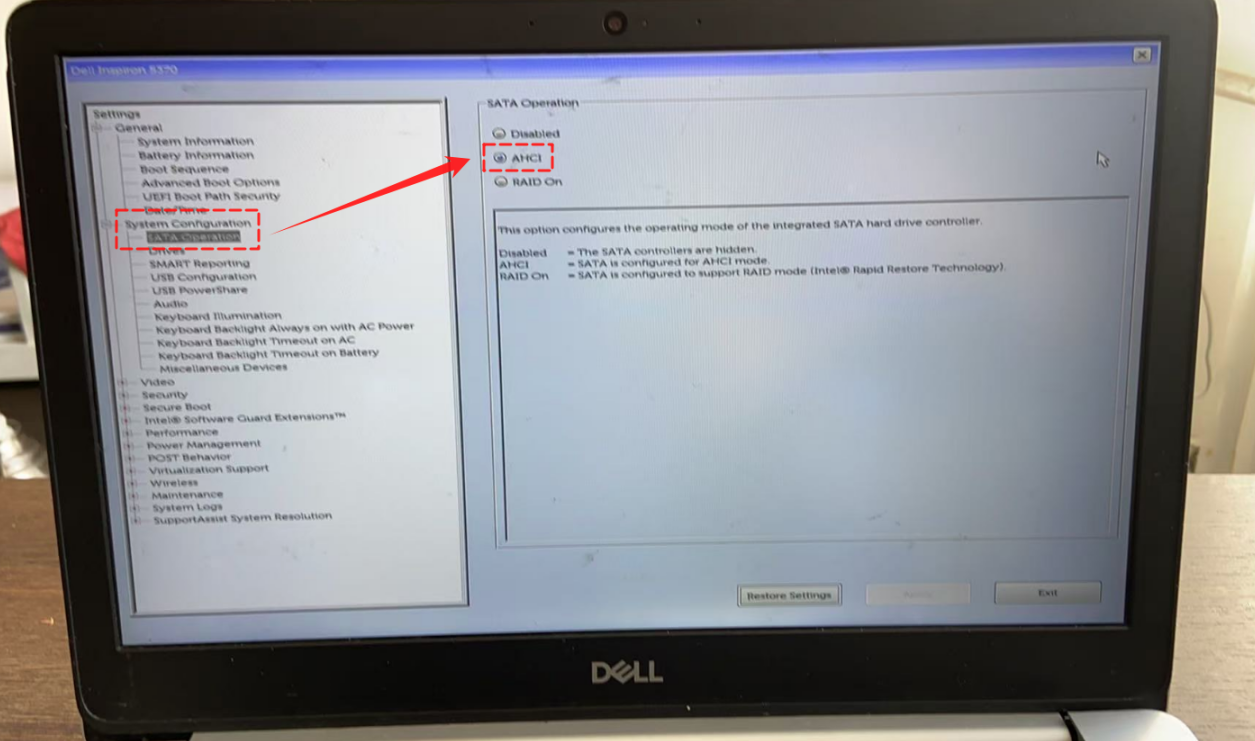
Step 3. After making the change, click “Apply” to save the settings and then “Exit” to leave the BIOS. The computer will reboot, and you can continue with the Windows installation process.

For ASUS laptops/PCs
Step 1. To access the BIOS on an ASUS computer, restart your PC and, when the boot screen appears, quickly press the Del key or F2 repeatedly until the BIOS menu opens.
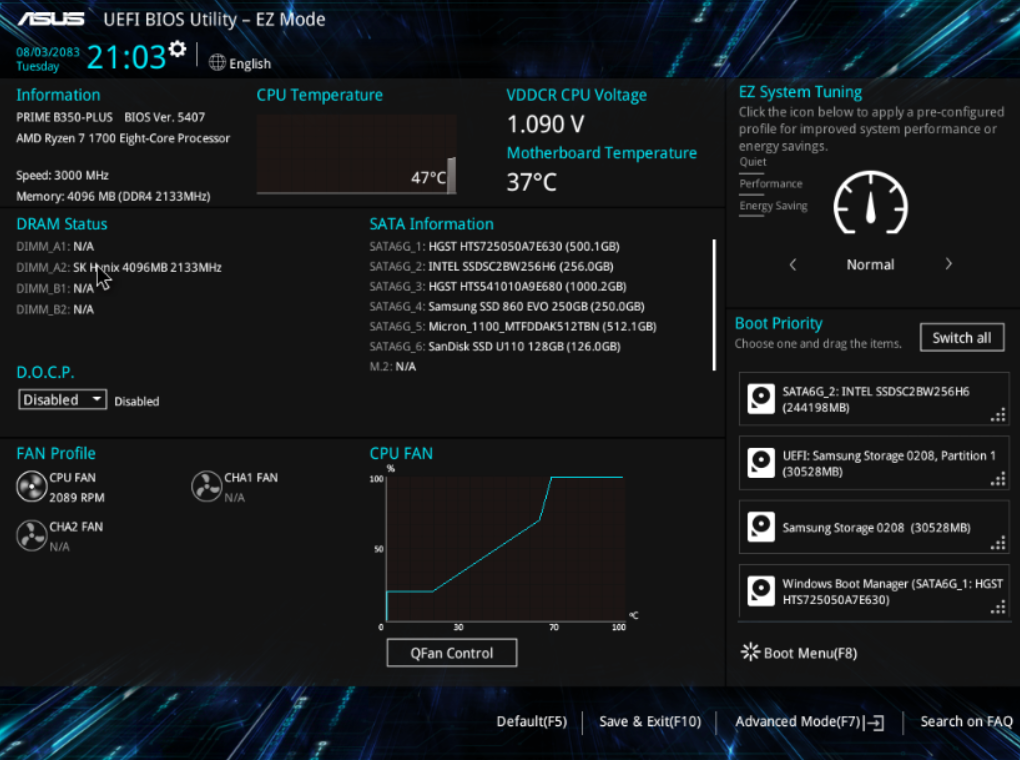
Step 2. Once inside the BIOS, press F7 to enter Advanced Mode, then select the Advanced tab to access the detailed configuration options.
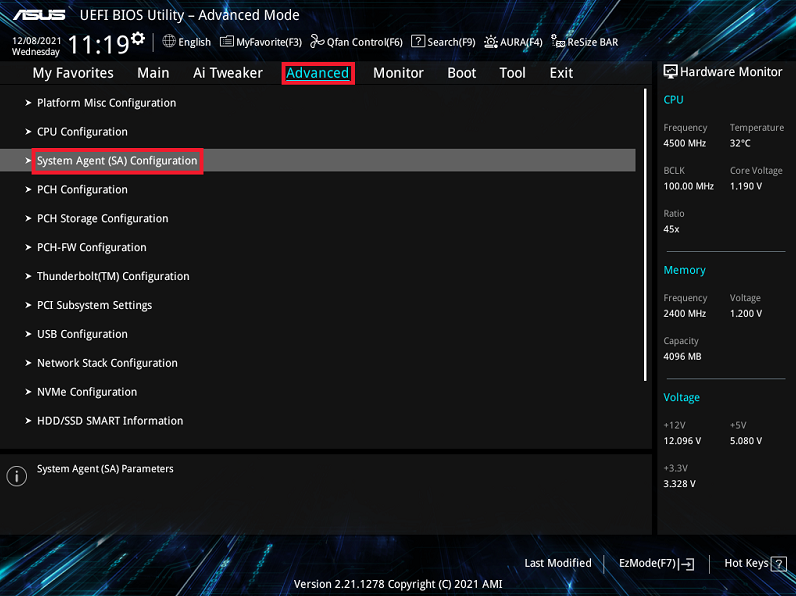
Step 3. For systems with a traditional BIOS interface, navigate to Advanced > PCH Storage Configuration or SATA Configuration. Change the SATA Mode or SATA Mode Selection to AHCI.
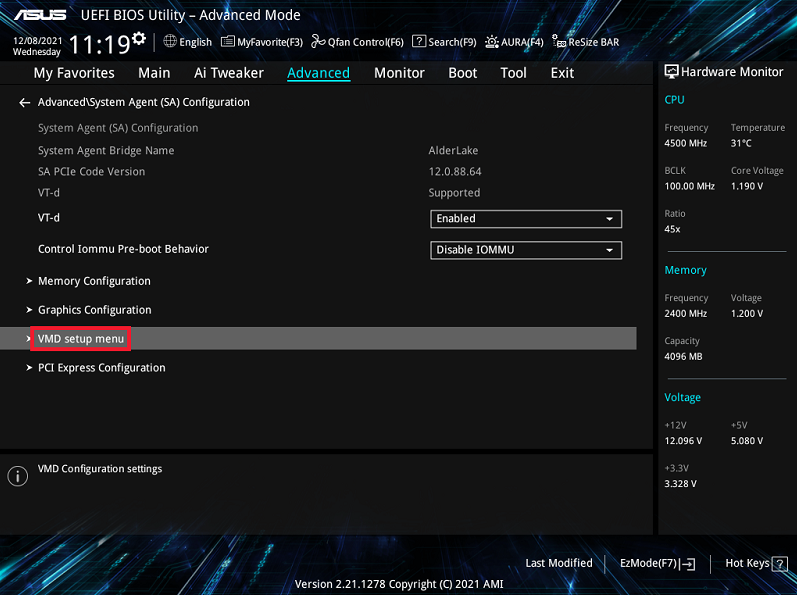
Step 4. For systems with Intel VMD technology, navigate to Advanced > Intel VMD Configuration or VMD Setup Menu. Set the VMD Controller to Disabled, which will automatically enable AHCI mode.

Step 5. After making the changes, press F10 to save the settings and exit the BIOS. The computer will reboot, and you can continue with the Windows installation process.
Important Notes
Before making any changes in the BIOS, it is highly recommended to back up all important data to prevent potential data loss. For systems with dual drives, make sure that the system drive is properly connected and recognized by the BIOS before proceeding. If you are using other brands of computers, the common BIOS access keys are as follows: Dell – F2 or F12, Lenovo – F1 or F2, and ASUS – Delete or F2. Enabling AHCI mode provides several advantages, including support for hot-swapping and NCQ technology, which can improve the performance of SSD drives and ensure better overall system responsiveness.
Why Choose Copilot ReWin11?
Copilot ReWin11 is a powerful one-click Windows reinstallation tool designed to help users quickly repair, upgrade, or refresh their PCs. It is perfect for anyone facing system crashes, slow performance, or display issues, allowing even non-technical users to restore their computers safely and efficiently.
Key Advantages
Smart System Check: Automatically analyzes your PC environment to ensure a safe reinstallation process.
One-Click Full Process: Handles everything from downloading Windows to completing installation, no manual steps required.
Multiple Windows Versions Supported: Choose from official Windows 7, 10, or 11 images.
Fast & Efficient Experience: Uses P2P acceleration technology to reinstall Windows in as little as 30 minutes.
Clean & Safe: No bundled third-party software, plugins, or ads.
Ideal Use Cases
Blue screen, black screen, or display glitches
System crashes that prevent startup
Slow PC performance requires a fresh start
Upgrading or downgrading Windows versions
Repairing the system after virus removal
Final Thoughts
The “Working Directory Not Found” error is usually caused by disk detection or driver issues. By following the registry or BIOS solutions above, you can fix the problem and continue your Windows reinstallation. If the issue persists, consider contacting our technical support for further assistance.


