


How to Connect Your Printer to a Computer for Printing
- Support
- Software Tutorials
- Kate
 516
516- 2026-01-22 18:05:11


When setting up a new printer, connecting it to your computer for printing is a straightforward process. Whether you’re using a USB connection, Wi-Fi, or sharing the printer across multiple devices, you can get started quickly by following these easy steps.
Method 1. USB Wired Connection - Simple & Reliable
USB connection is the most common and stable method, ideal for most home and office environments. Follow the steps below to easily set up your printer using a USB connection:
Step 1. Prepare the USB Cable. Typically, the printer comes with a USB cable in the box. One end has a square connector (USB-B), and the other end has a rectangular connector (USB-A).
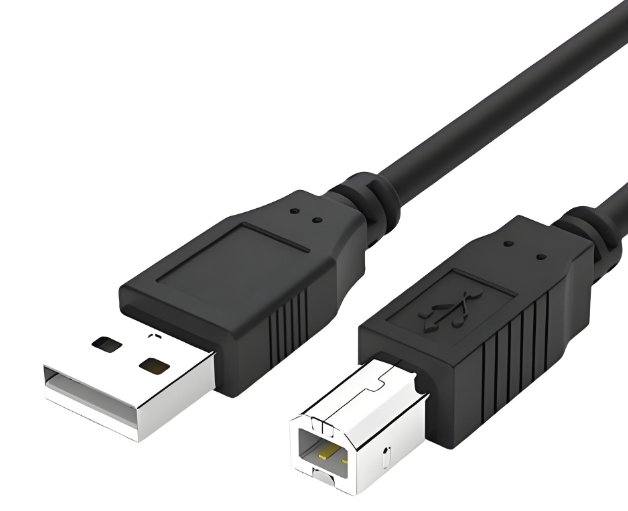
Step 2. Insert the square connector into the printer’s port and the rectangular connector into a USB port on your computer.
Step 3. Press the power button on the printer and ensure the indicator light is on, confirming it is powered up.
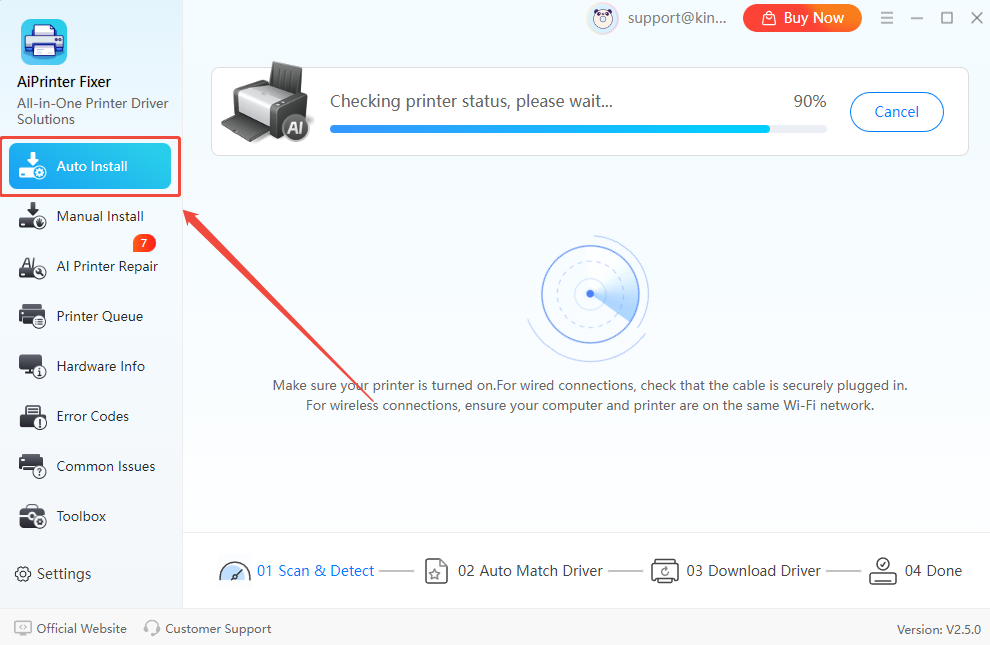
Step 4. Install the Printer Driver. It’s recommended to use an advanced printer driver management tool, such as AiPrinter Fixer, to automatically detect your printer model and install the correct driver.
Download and launch the AiPrinter Fixer. Select "Auto Install" mode. It will automatically detect your printer model and any issues. Then, you can click "Repair Now" to install the driver and resolve any problems.
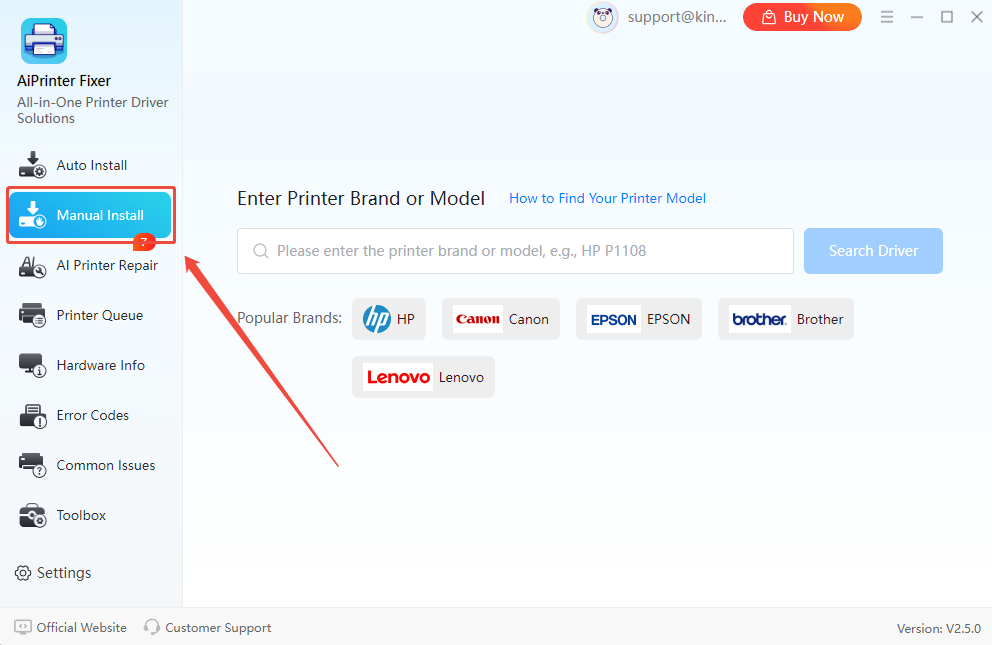
If auto-detection fails, press "Go to Manual Install" mode and search for your printer brand or model to install the driver.
Step 5. Open a document or image and press “Ctrl + P” to open the print window. Select the connected printer and click “Print” to test if the printer works.
Method 2. Wi-Fi Connection (Ideal for Multiple Device Sharing)
If you need to place your printer away from your computer or want to allow multiple devices to use the same printer, setting up a Wi-Fi connection is an efficient and convenient option. Here’s how to do it:
Step 1. Before proceeding, ensure your printer supports wireless connections. This information is typically available on the printer's label or in the user manual.
Step 2. On the printer's control panel, go to the network settings and choose your home Wi-Fi network. Enter the Wi-Fi password to connect the printer to the network. (Some printers, like HP models, also offer mobile apps that make the setup process easier.)
Step 3. Add the Printer to Your Computer:
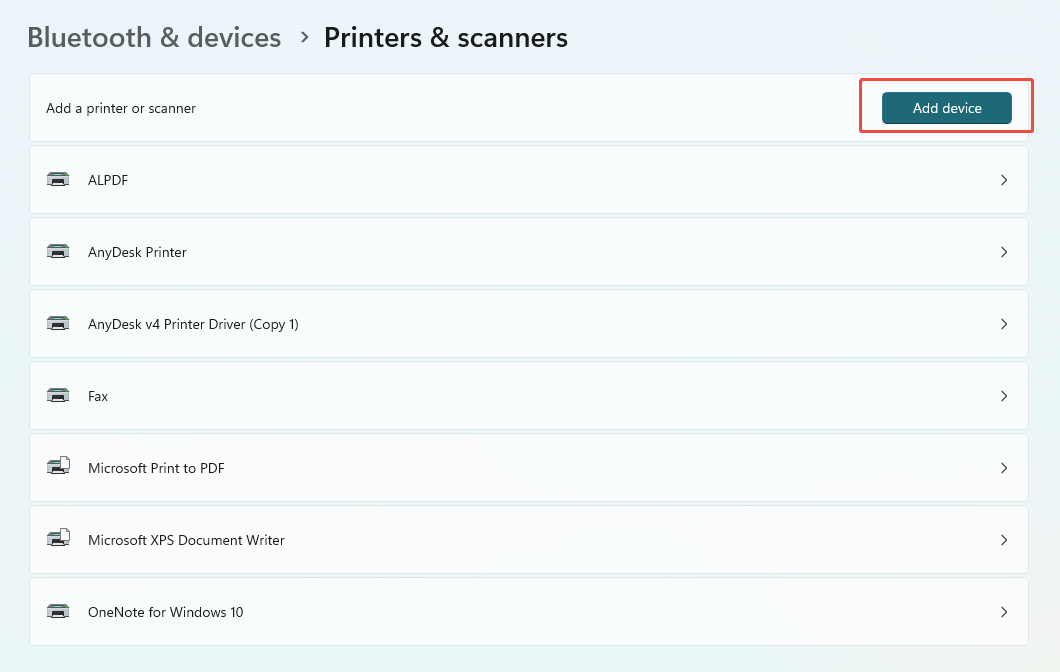
On Windows: Go to Settings -> Bluetooth & devices -> Printers & scanners.
Click “Add a Printer or Scanner”, and your computer will search for available printers. Once your printer appears in the list, select it to complete the connection.
Step 4. Windows typically installs the correct printer driver automatically. If the installation does not happen, use "AiPrinter Fixer" to assist with the driver installation.
Step 5. Print a test page to confirm that everything is working.
Method 3. Printer Sharing (Perfect for Multiple Computers on the Same Network)
If you only have one printer but multiple computers that need access, setting up printer sharing is the best solution. This method allows all devices on the same network to use the printer without needing a direct connection to each computer.
How to Set Up Printer Sharing:
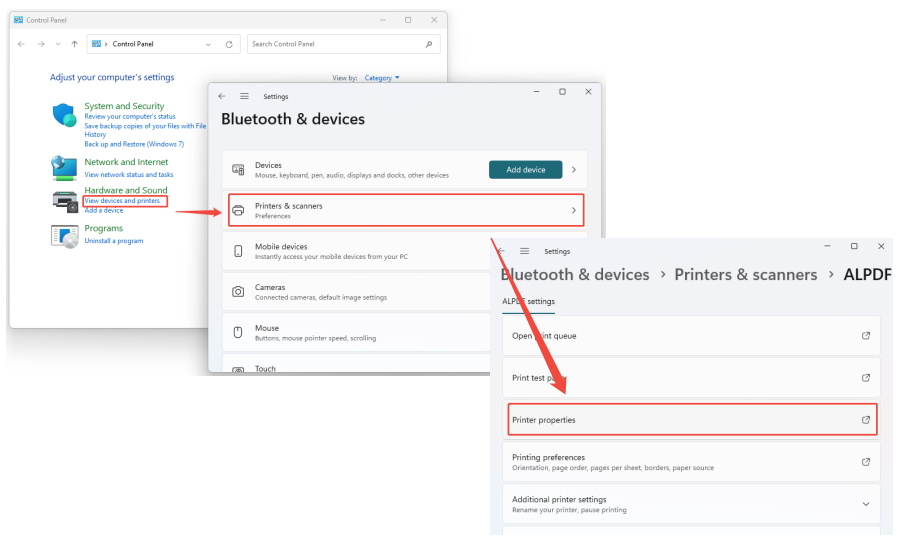
Step 1. Open “Control Panel” and go to “Devices and Printers”, then right-click the printer you want to share and select “Printer Properties”. In the Sharing tab, check “Share this printer” and give it a name so it can be accessed by other computers on the same network.
Step 2. Make sure that all the computers, including the one with the printer, are connected to the same Wi-Fi or local network (LAN). This is important for enabling communication between devices and the shared printer.
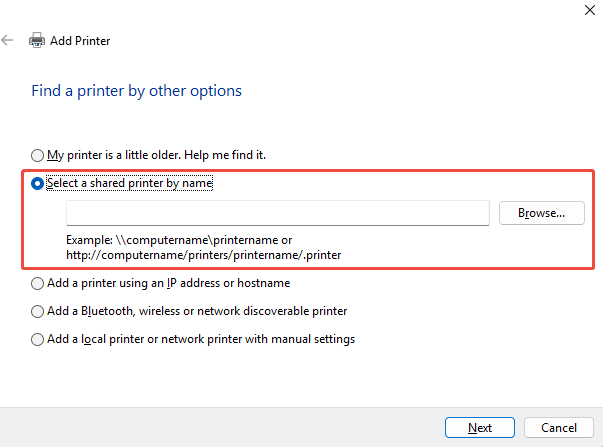
Step 3. On each computer, go to Control Panel -> Devices and Printers -> Printers & Scanners, and click “Add a Printer”. You can then either choose the shared printer from the network list or manually enter the printer path, which will look like \[HostComputerName][SharedPrinterName].
Step 4. Once the printer is added, the system will automatically copy the required drivers from the host computer. If the drivers are not automatically installed, use AiPrinter Fixer to install them manually.
Common Printer Connection Issues and Solutions
If you're encountering issues with connecting your printer to your computer, here are some of the most common problems and solutions:
Incorrect or Missing Printer Driver
If your printer isn't recognized, the driver might not be properly installed. Use AiPrinter Fixer to automatically detect and install the correct driver for your printer.
USB Connection Issues
If you're using a USB connection and the printer isn't responding, try switching to a different USB port or replacing the USB cable. A faulty cable or port can prevent proper communication between your printer and computer.
Weak or Unstable Wi-Fi Signal
If your printer is connected wirelessly and you're facing issues with printing, move the printer closer to the router to ensure a stronger signal. You can also switch to a 5GHz Wi-Fi band to improve the connection stability.
Firewall or Security Software Blocking Printer Services
Sometimes, firewall settings or security software may prevent the printer from communicating with your computer. Check your firewall settings and ensure that the printer software has the necessary permissions to run.
The Bottom Line
Whether you're connecting your printer via USB, Wi-Fi, or a shared network, ensuring the correct driver installation is key to successful printing. If you're encountering issues with installation or connectivity, use AiPrinter Fixer to quickly resolve common problems and optimize your printer's functionality. For more tips and updates, be sure to check the Kingshiper Software.


