[2023]How to Format External Hard Drive on Mac, 100% Works
- Support
- Dynamic News
- Kate
1254
- 2023-11-14 11:37:44
Have you ever experienced a problem with your external hard drive refusing to work when you needed it most? There may be a problem, such as it being sluggish or not working properly with your Mac. There are times when learning how to format an external hard drive on your Mac can save the day. Although formatting might sound technical, don't worry. We will walk you through the process step by step in this comprehensive guide.
Why Should I Format External Hard Drive on Mac?
Many Mac users depend on external hard drives for extra storage space, data backup solutions, and the flexibility to carry large volumes of data. There are, however, situations when you may need to format an external hard drive.
File System Compatibility: Formatting an external hard drive allows you to optimize its file system for your specific needs. Different file systems offer varying features and capabilities. By formatting the drive to a file system that is compatible with macOS, such as HFS+, NTFS, or APFS, you can seamlessly integrate it into your Mac ecosystem. This allows for smooth data transfer, easy file management, and optimal performance.
Data Security: If you want to ensure your personal or confidential information is completely wiped from the drive when you decide to hand over an external hard drive to others, formatting the drive is a must. By formatting the drive, you can ensure that any residual data from previous usage is completely erased.
Performance Optimization: Over time, external hard drives can become fragmented or develop errors that affect their performance. Formatting can refresh the drive and potentially resolve such issues.
Error Prevention: Formatting an external hard drive helps to identify and rectify any potential errors or issues. It allows the drive to be thoroughly checked for bad sectors, file system errors, or other underlying problems. By addressing these issues during the formatting process, you can mitigate the risk of data corruption or drive failure in the future.
How to Format External Hard Drive on Mac - 2 Methods
If you are wondering how to format an external hard drive on Mac, follow these step-by-step guides, which show you two easy methods to format the drive. But before you start formatting, it’s crucial to back up any important files and data that you want to preserve. If you use an NTFS drive, I suggest you use Kingshiper NTFS for Mac to save the data first.
Step 1. Download Kingshiper NTFS for Mac(Click here) and Launch it on your Mac.
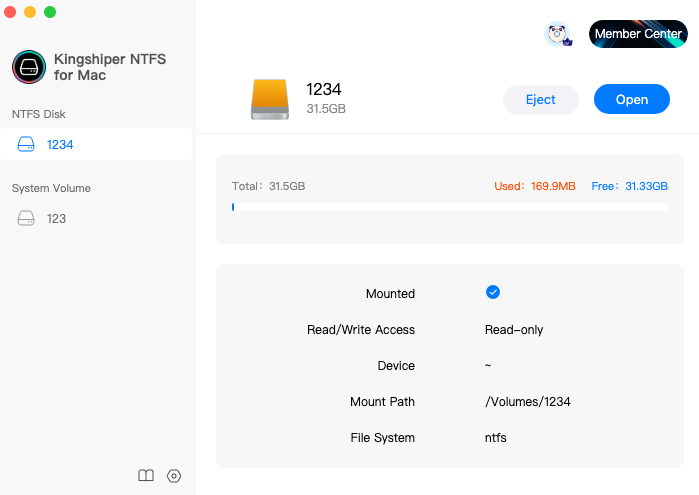
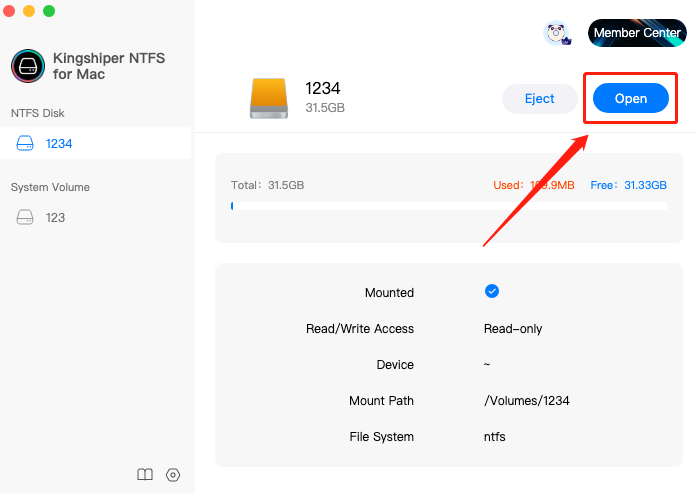
Step 2. Connect your drive to your Mac and select the drive, click "Open" to get writable access.
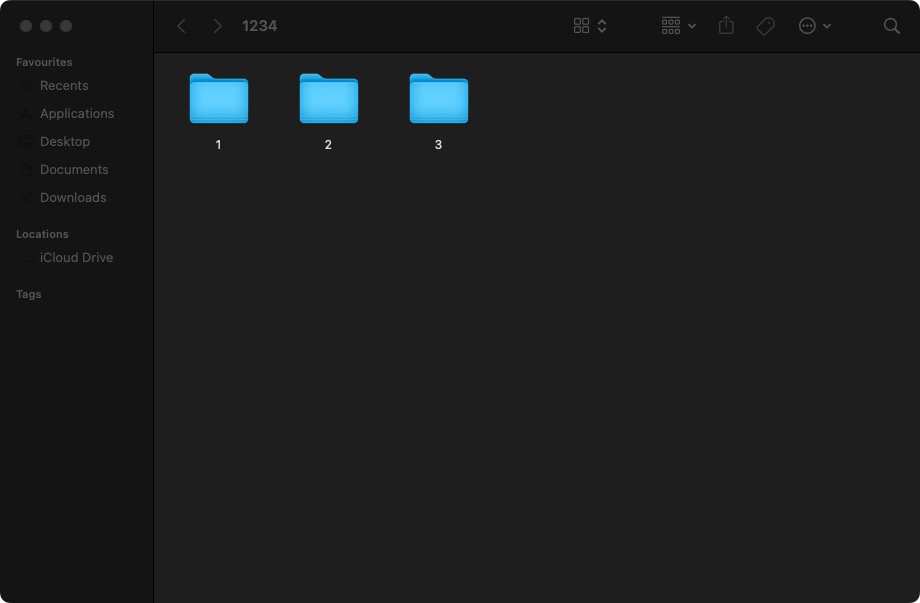
Step 3. In the pop-up window, you can copy or back up all valuable data from the drive to another location on Mac.
Method 1. Use Disk Utility to Format External Hard Drive
Disk Utility is a powerful tool bundled with macOS that allows users to manage and manipulate storage devices. It provides a range of functions, including disk partitioning, disk verification, and disk repair. One of its key features is the ability to format external hard drives, which involves preparing the drive for use by erasing all existing data and configuring it with a specific file system. Besides, Disk Utility simplifies this process, offering various file system options such as Mac OS Extended (Journaled), APFS (Apple File System), and exFAT.
Step 1. Go to "Launchpad" > "Utilities" > "Disk Utility".
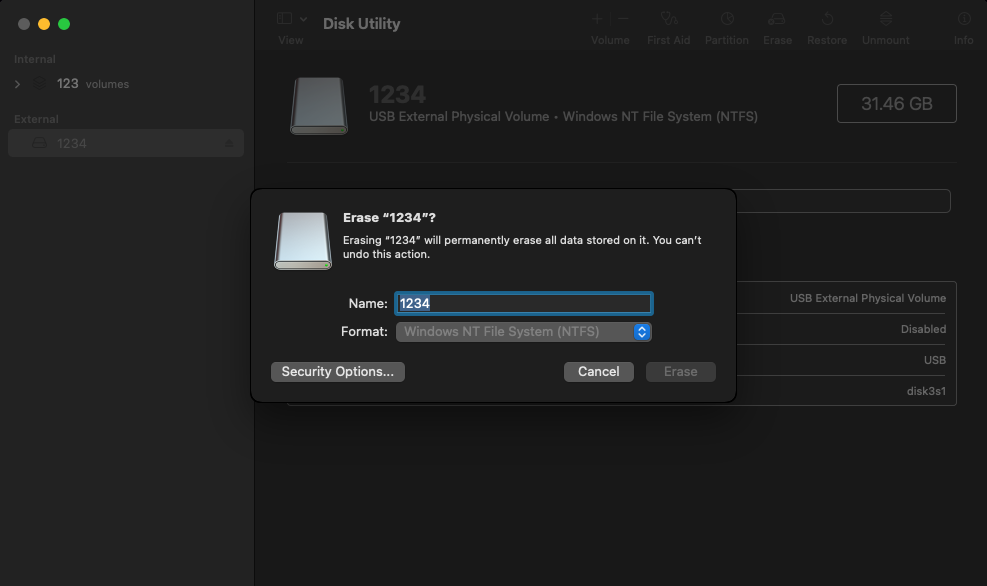
Step 2. Select the drive from the left sidebar and click "Erase" at the top menu bar.
Step 3. Then, it will pop up a window. Here, you can enter a new name for your formatted drive and choose a format.
Step 4. Click "OK" to finish the settings.
Step 5. Click "Erase".
Method 2. Use Terminal Command to Format External Hard Drive
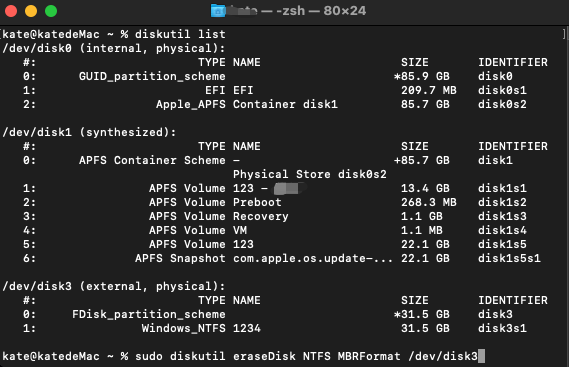
For users who prefer a command-line interface or need more advanced options, Terminal provides a powerful alternative. It provides direct access to manage disks and volumes on macOS. When it comes to formatting external hard drives, Terminal allows you to utilize specific commands to format the drive with different file systems and customize the formatting options.
Step 1. Go to "Launchpad" > "Utilities" > "Terminal" and Connect the external drive to your Mac.
Step 2. Type "diskutil list" in the terminal window.
Step 3. Type "sudo diskutil eraseDisk NTFS 1234NEW /dev/disk3". Here, "NTFS" refers to the file system format and you can change it to another format. "/dev/disk3" refers to the location. You can change it according to your location.
Step 4. It will take some time to proceed. After it has finished, click "close".
![]()
Summary
This guide fully explains why you need to format the drive on Mac and how to format the external hard drive effectively. Both Disk Utility and Terminal Command can help you easily get the job done. But before formatting, make sure you‘ve backed up important files. Try the free NTFS for Mac software right now and it will protect all your data integrity and safety.
You May Also Like
1. How to Write NTFS Drives on M1 Mac[Totally Free]
2. How to Delete Files from NTFS on Mac[2023 New Guide]
3. How to Change Read-Only File Systems on Mac? 100% Free


