How to Write NTFS Drives on M1 Mac[Totally Free]
- Support
- Dynamic News
- Kate
2130
- 2023-11-14 11:37:24
Have you ever plugged in an NTFS-formatted external drive into your M1 Mac, only to realize that while you can view the files, you can't add or edit anything? It's a common scenario for many, especially as the NTFS format is ubiquitous with Windows systems and many external storage solutions. Despite the technological leaps and bounds Apple's M1 Macs have achieved, the longstanding gap of direct NTFS write support persists.
Luckily, there's no need to cost much to fix this problem. On this page, we'll show you how to effortlessly enable write capabilities for NTFS drives on your M1 Mac for free. Let’s get started.
Why Users Like to Use NTFS Drives on Mac
NTFS is the standard file system format used primarily by Windows operating systems. So, why would Mac users, especially M1 Mac owners, want to use NTFS drives? There are several reasons:
Data Transfer: Often, external hard drives, USB flash drives, and external SSDs come pre-formatted with NTFS. Being able to write to these drives allows Mac users to copy, edit, and save files directly on these storage devices.
Compatibility: NTFS is the default file system used by Windows, which means that most external hard drives and USB flash drives are formatted with NTFS. By using an NTFS drive on a Mac, users can easily transfer files between their Mac and a Windows computer without having to worry about compatibility issues.
Large File Support: NTFS offers better support for large files compared to macOS's native file system, APFS. This is important for users who work with video editing, 3D rendering, and other resource-intensive tasks.
Security: NTFS supports file and folder permissions, which allows users to control who has access to their files and folders. This is particularly useful for users who share their computer with others or work in a shared environment.
Reliability: NTFS is a reliable file system that is less prone to corruption and data loss compared to other file systems. This is important for users who store important data on their external drives and need to ensure that their data is safe and secure.
The need for Write NTFS Drives on M1 Mac?
The need to write to NTFS drives on M1 Mac computers arises from the limitations of macOS. While macOS can read NTFS drives without any problems, it doesn't provide native write support. Without third-party solutions, M1 Mac users can only read the contents of NTFS drives, preventing them from creating, modifying, or deleting files on these drives.
Thankfully, there are two free options available to to address this need that you can enable write support for NTFS drives on your M1 Mac.
Option 1. Write NTFS Drives with Kingshiper NTFS for Mac
One of the easiest ways is to use Kingshiper NTFS for Mac, which is a third-party software that allows Mac users to write to NTFS drives without any additional configuration or setup. It is a simple and user-friendly solution that does not require any technical knowledge. Users can simply install the software and start writing to their NTFS drives.
With Kingshiper NTFS for Mac, users can easily copy, move, delete, and modify files on NTFS drives just like they would on a Mac-formatted drive. In addition, Kingshiper NTFS for Mac is compatible with macOS 10.10 and later versions, and it supports all NTFS versions, including NTFS 1.2, 3.0, and 3.1.
Overall, Kingshiper NTFS for Mac is a reliable and convenient solution for Mac users who need to write to NTFS drives.
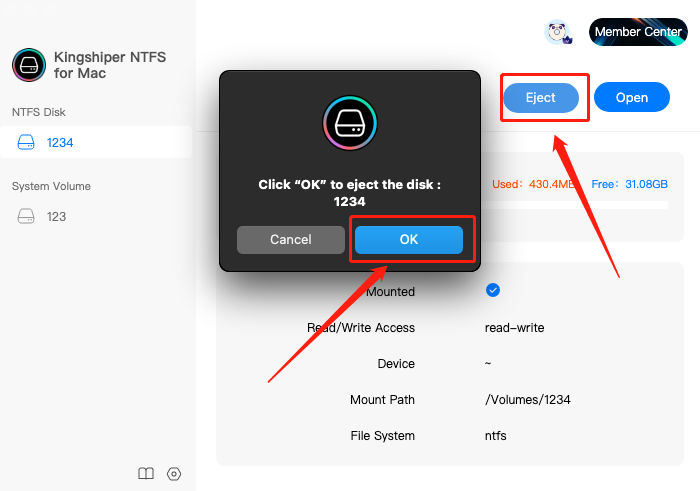
Step 1. Launch Kingshiper NTFS for Mac and connect your NTFS drive.
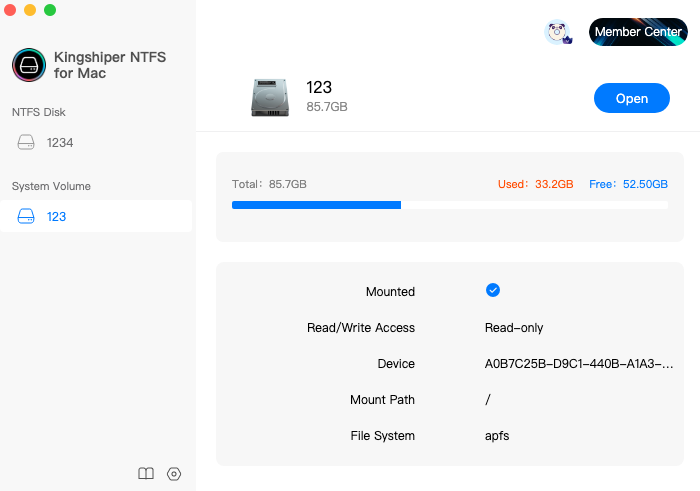
Step 2. Choose the drive you need to edit and click “Open”(Enter the passowrd if any).
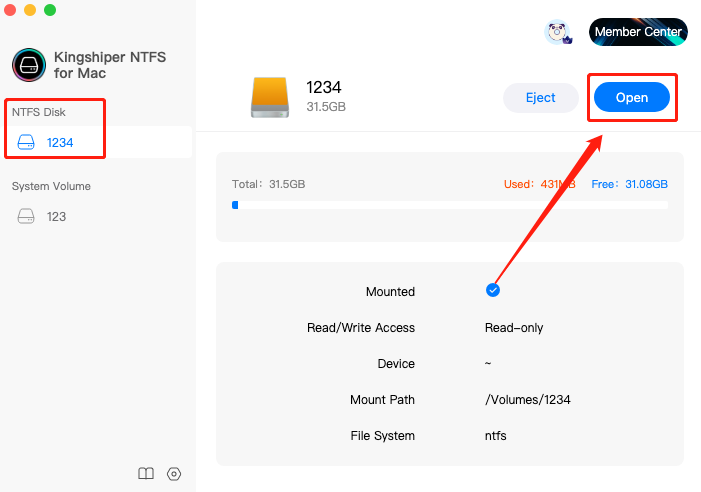
Step 3. Now you get write access to write NTFS drives. You can copy, edit, and even delete the files in the pop-up window.
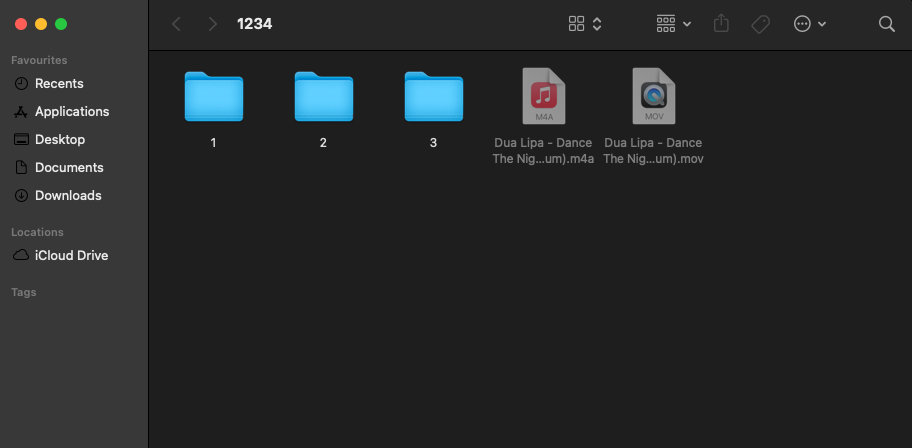
Step 4. If you’ve finished the task, remember to click “Eject” in the interface to safely remove your drive on Mac.
Option 2. Write NTFS Drives with Terminal
Writing to NTFS drives using Terminal requires some technical knowledge and familiarity with command-line interfaces. Users will need to open Terminal and enter a series of commands to mount the NTFS drive and enable write access. This option is more complex than using a third-party software, but it is a free and reliable solution for advanced users who prefer to work with command-line interfaces.
Step 1. Click "Launchpad" > "Utilities" > Find and open "Terminal".
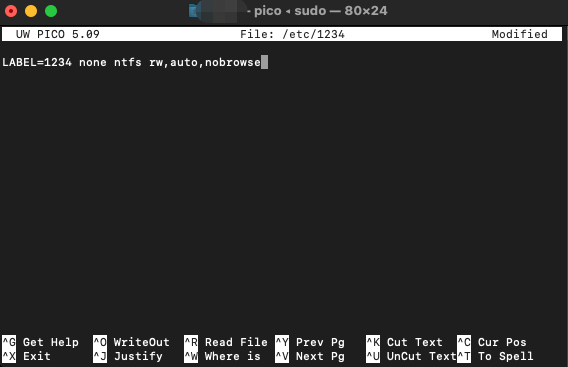
Step 2. When the Terminal window pop up, type the command: sudo nano /etc/1234(repace 1234 to your drive name).
Step 3. Type command line: LABEL=NAME none ntfs rw,auto,nobrowse (Change the NAME with your drive name.).
Step 4. Press Ctrl+O and press Enter to save the file.
Final Thoughts
By now, you should know 2 ways to enable write access to NTFS drives on Mac. Both options are viable for writing to NTFS drives on a Mac, but they differ in terms of ease of use and complexity. if you are a beginner or prefer a simple and user-friendly solution, Kingshiper NTFS for Mac is a good option. Download it and try to use it now!
You May Also Like
1. [2 Methods]How to Format External Hard Drives to NTFS on a Mac
2. How to Change Read-Only File Systems on Mac? 100% Free
3. [2023 Updates]FAT32 VS NTFS VS exFAT, Which is the Best File System


