


5 Best Methods to Cut Audio on Windows & Mac 2024
- Support
- Dynamic News
- Kate
 1861
1861- 2024-06-03 19:23:43


When working with audio files, the ability to cut and trim them precisely is crucial for various purposes, such as creating ringtones, removing unwanted sections, or extracting specific segments. Fortunately, there are numerous software options available for Windows and Mac that facilitate easy audio cutting. In this post, we will explore the five best methods for cutting audio on both operating systems, with a special focus on the powerful and versatile KingShiper Audio Editor.
Method 1. How to Cut Audio in Kingshiper Audio Editor
Kingshiper Audio Editor is a top-notch software that offers an intuitive interface and advanced audio editing features. With this tool, you can easily cut audio files by selecting the desired starting and ending points or specifying the exact duration you want to keep. KingShiper Audio Editor supports a wide range of audio formats and provides real-time waveform visualization, making it simple to identify and trim precise sections.

For the detailed steps, you can follow these:
Step 1. Launch Kingshiper Audio Editor and upload an audio file on your PC.

Step 2. Select the part you unwanted and click “Cut”.

Step 3. Click “Play” to preview the effect.

Step 4. If you are satisfied with it, click “Export” at the top right corner. Set the audio name and output folder, then click “Export” to save it on your PC.

Method 2. How to Cut Audio in Audacity
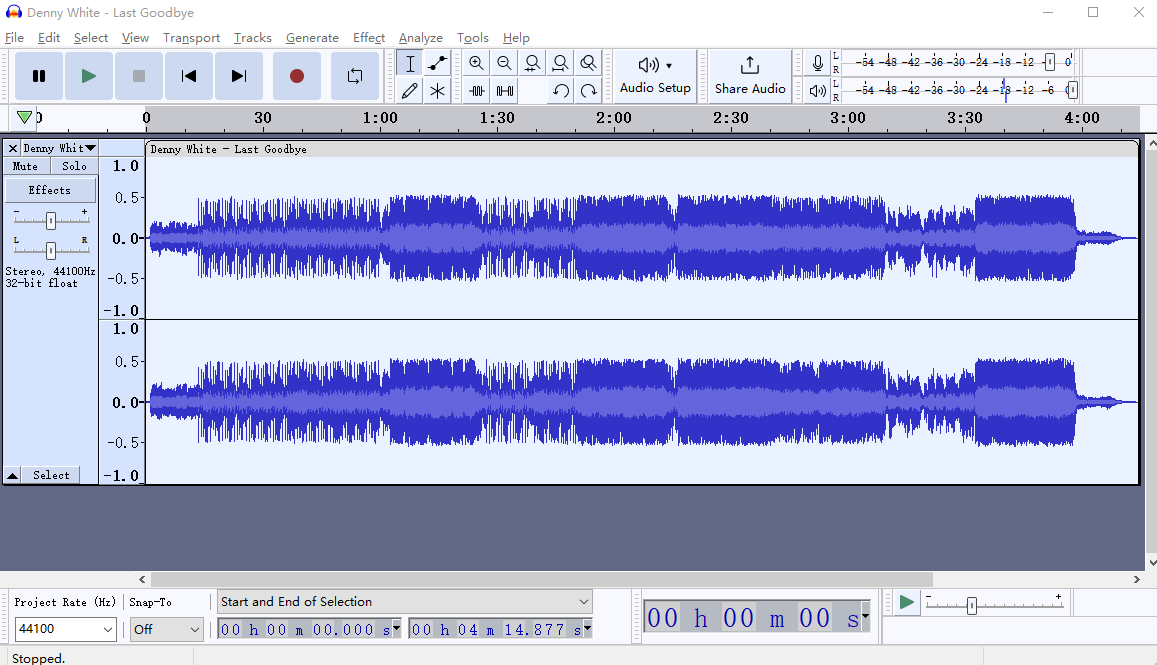
Audacity is a popular open-source audio editing software available for both Windows and Mac. It offers a comprehensive set of tools for cutting audio files. With Audacity, you can select the desired portion of the audio and delete or silence the rest. The software also provides features like fade-in and fade-out effects for smooth transitions. Audacity supports various audio formats and allows for precise editing through its waveform display.
Step 1. Open Audacity on your computer.
Step 2. Click “File” > “Open” to import the audio file.
Step 3. Select one part and click “Edit” > “Cut”.
Step 4. Press the “Play” button to listen to the music.
Step 5. Click “File” > “Export” to save your audio file. Here you can rename the file and change the output folder, then click “Save”.
Method 3. How to Cut Audio in GarageBand
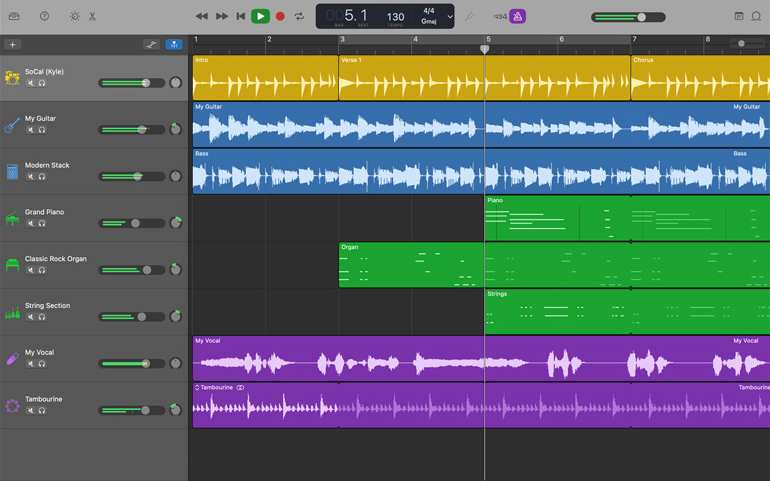
GarageBand is a popular audio editing software exclusive to Mac users. It offers a user-friendly interface and provides easy-to-use tools for cutting audio. With GarageBand, users can trim and split audio tracks, removing unwanted portions effortlessly. The software supports various audio formats and offers additional features like looping, effects, and virtual instruments, making it suitable for both basic and advanced audio editing needs.
Step 1. Launch GarageBand on your Mac.
Step 2. Listen to where needs to be cut. Then, click “Edit” > “Split Regions”.
Step 3. Tap “Share” > “Export Song to Disc” to save your music.
Method 4. How to Cut Audio in QuickTime
QuickTime is a multimedia framework and media player, which is known for its ability to play audio and video files. With QuickTime Player, you can trim, cut, copy, and paste audio clips to create a shorter version of a longer audio file. You can also adjust the volume levels and add fade-in and fade-out effects to your audio tracks. Moreover, it supports a wide range of file formats, making it a versatile platform for handling different types of media content.
Step 1. Launch QuickTime Player on your Mac.
Step 2. Click “File” > “Open File” to import your audio file.
Step 3. Click “Edit” > “Trim” to select the place you want to keep.
Step 4. When you’ve finished, click “Trim”.
Step 5. Press the “Play” button to listen to the music.
Step 6. Click “File” > “Export” > “Audio Only” to save the audio on your Mac.

Method 5. How to Cut Audio in GoldWave
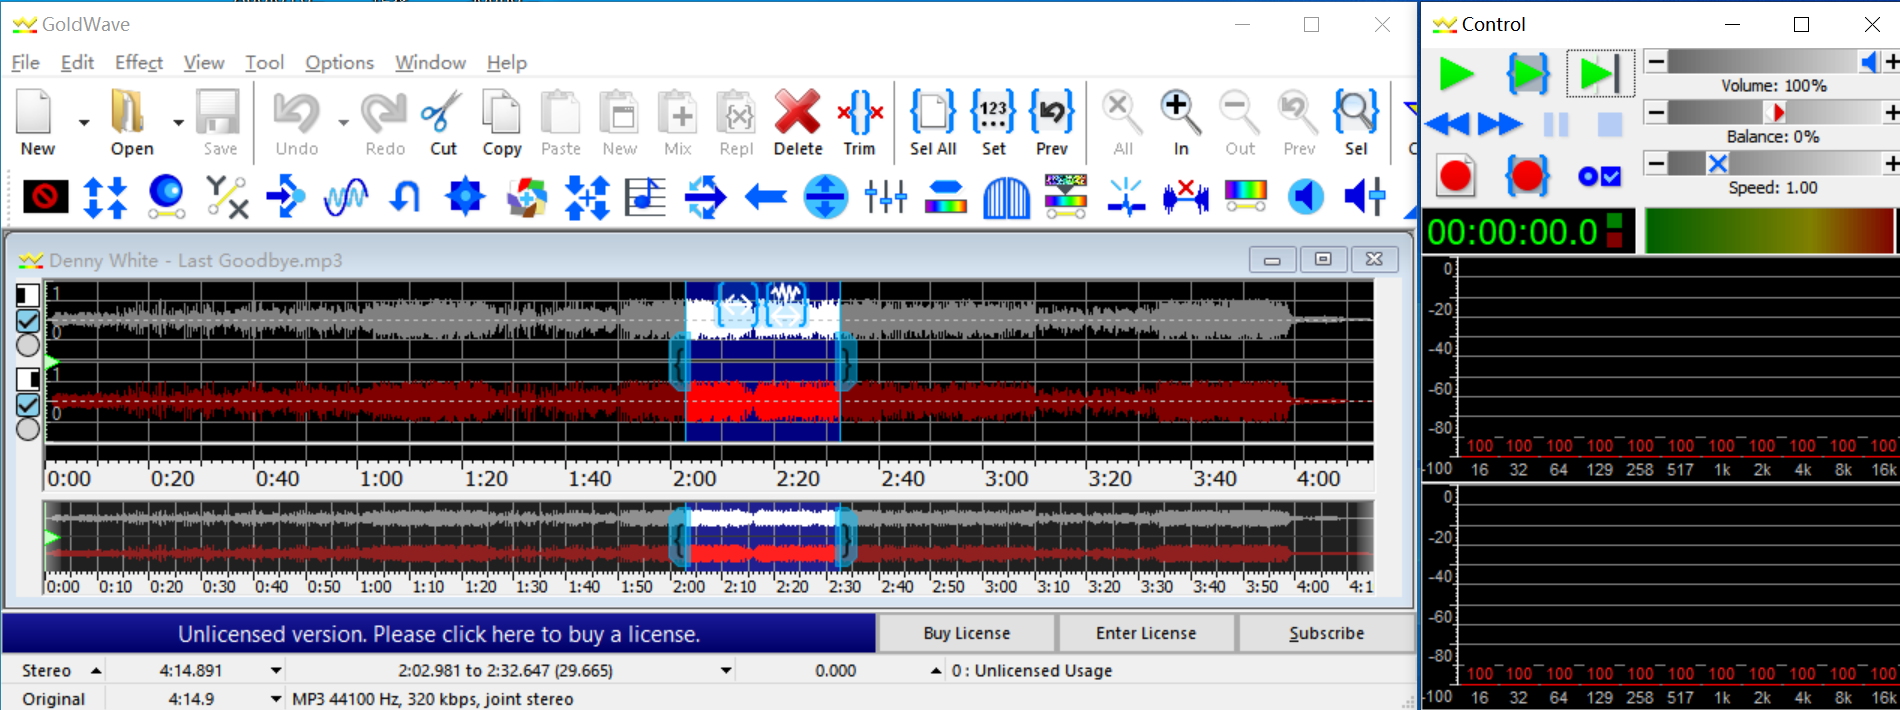
GoldWave is a digital audio editing software that allows users to record, edit, process, and convert audio files in various formats. The software offers a wide range of audio processing capabilities, including trim, cut, insert silence, and pitch shift. Additionally, it supports various audio formats such as WAV, MP3, FLAC, OGG, and many others. GoldWave also includes a sophisticated batch-processing feature, which enables users to apply effects to multiple files simultaneously.
Step 1. Open GoldWave on your PC.
Step 2. Click “File” > “Open” to import your audio file.
Step 3. Select the place and click “Edit” > “Cut”.
Step 4. Press the “Play” button to listen to the music.
Step 5. Click “Save As” to export it on your PC.
The Bottom Line
When it comes to cutting audio files on Windows and Mac, the five methods mentioned above offer effective and reliable solutions. Select the method that best suits your needs and unleash your creativity in audio editing. Among them, KingShiper Audio Editor stands out as a powerful tool with its intuitive interface and advanced editing features.
You May Be Also Interested In
1. How to Cut an Audio File in 5 Steps, 100% Works
2. How to Trim an Audio File in 5 Helpful Methods, Super Fast
3. How to Better Edit Recorded Audio on Windows/Mac/iPhone/Android in 2024


