How to Trim an Audio File in 5 Helpful Methods, Super Fast
- Support
- Dynamic News
- Kate
1308
- 2024-06-03 19:17:59
Trimming audio files is a common task in various projects, from creating shorter clips to removing unwanted sections. If you're looking for speedy and efficient methods to trim audio files, you're in the right place. In this article, we will explore four helpful techniques that will allow you to trim audio files quickly using a diverse range of tools and platforms.
Method 1: Kingshiper Audio Editor - Feature-Packed and User-Friendly
Kingshiper Audio Editor is a standout choice that combines powerful functionality with a user-friendly interface. Designed to meet the needs of both beginners and professionals, Kingshiper Audio Editor offers a comprehensive set of tools to trim, edit, and enhance audio files, which allows users to have a better experience in creating unique music.
Step 1. Launch Kingshiper Audio Editor on your computer, and upload an audio file into it.
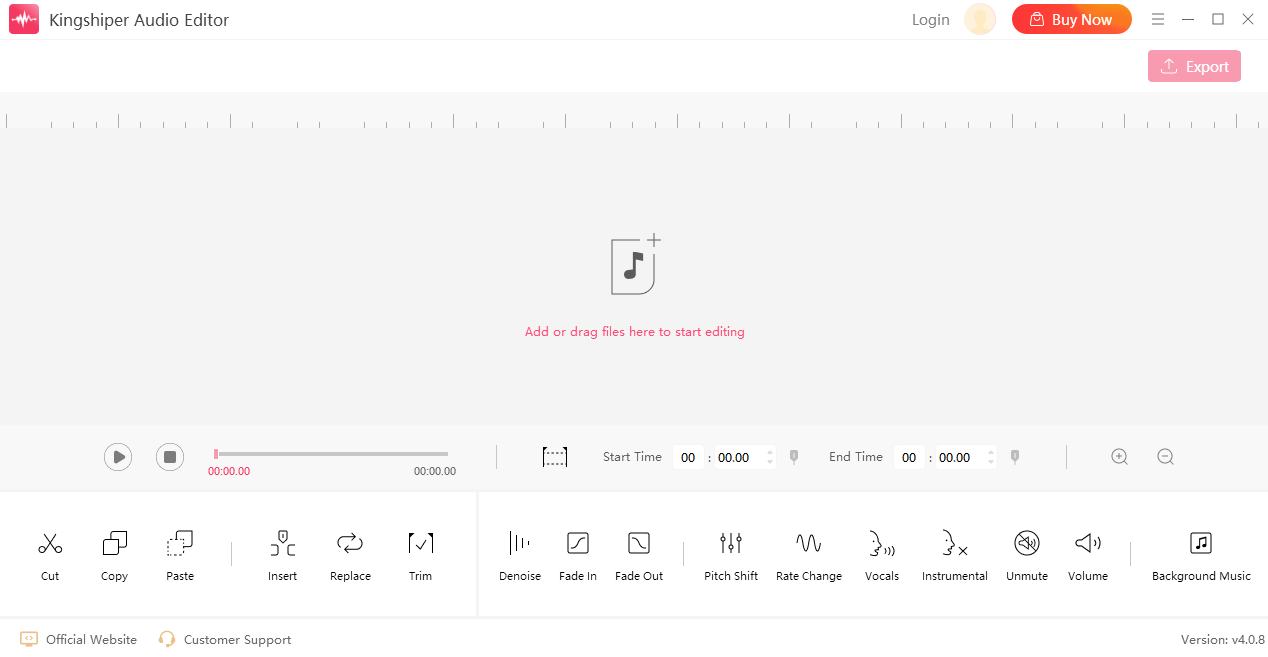
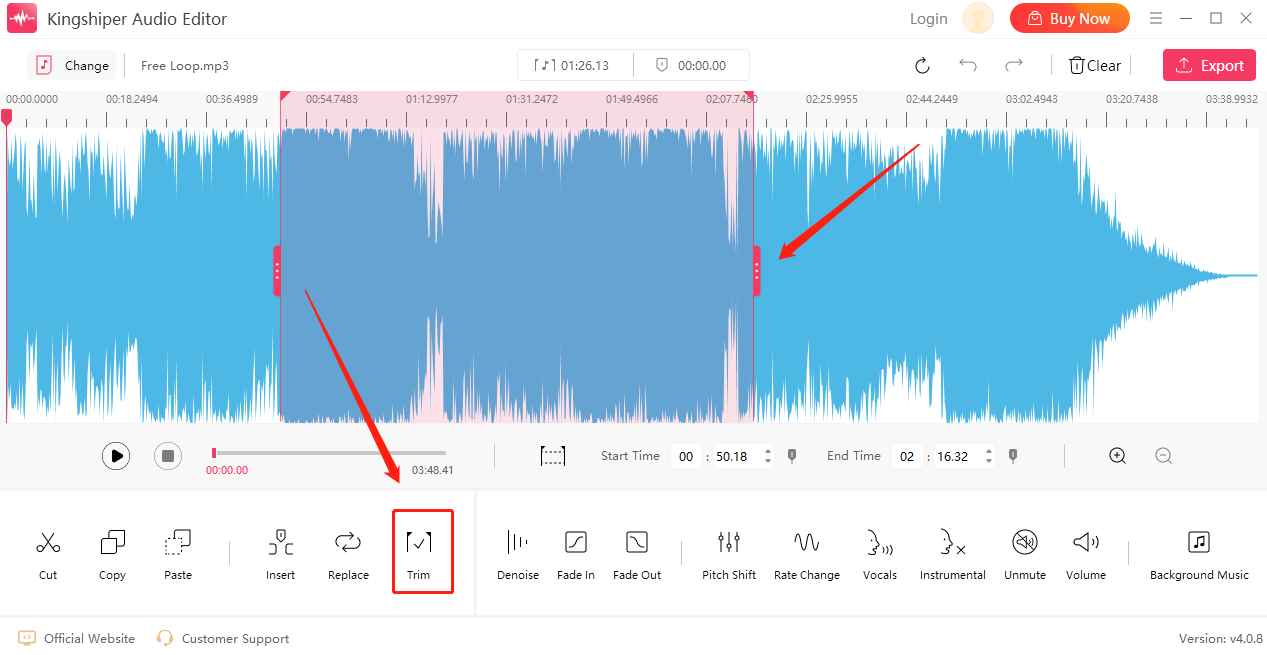
Step 2. Drag the cursor to select a clip and click “Trim”.
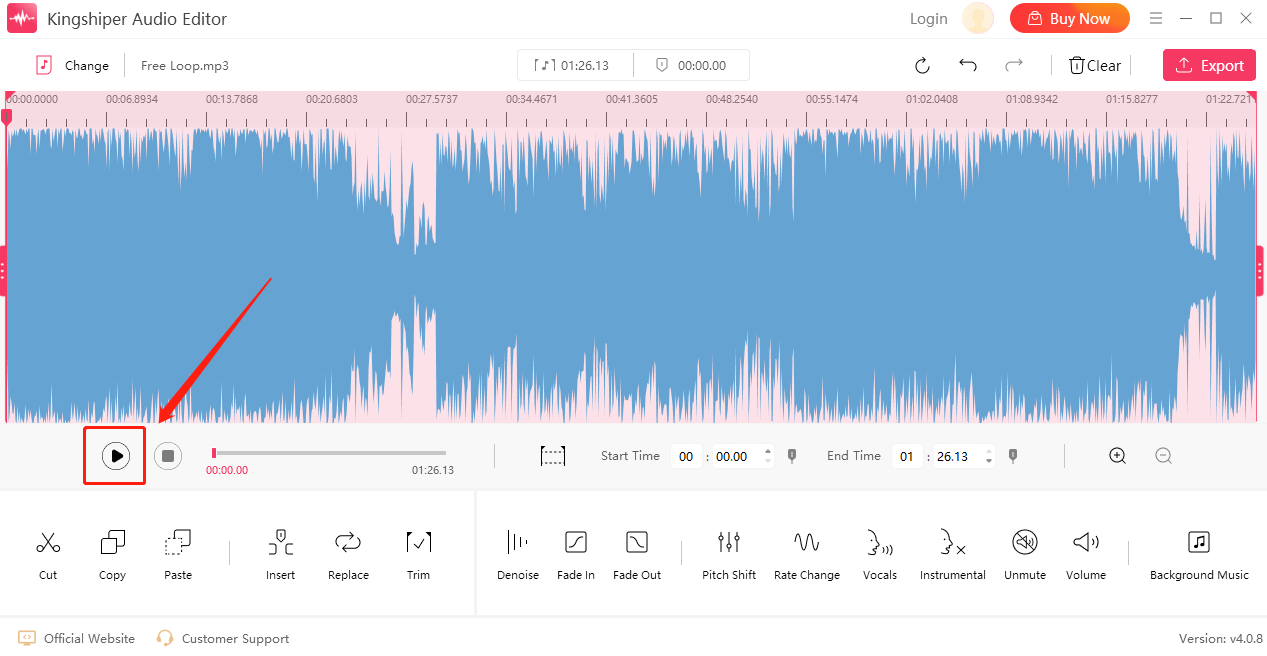
Step 3. Press “Play” to preview the trimmed audio file. If you don’t satisfy it, click “Undo” to readjust the selected timeline.
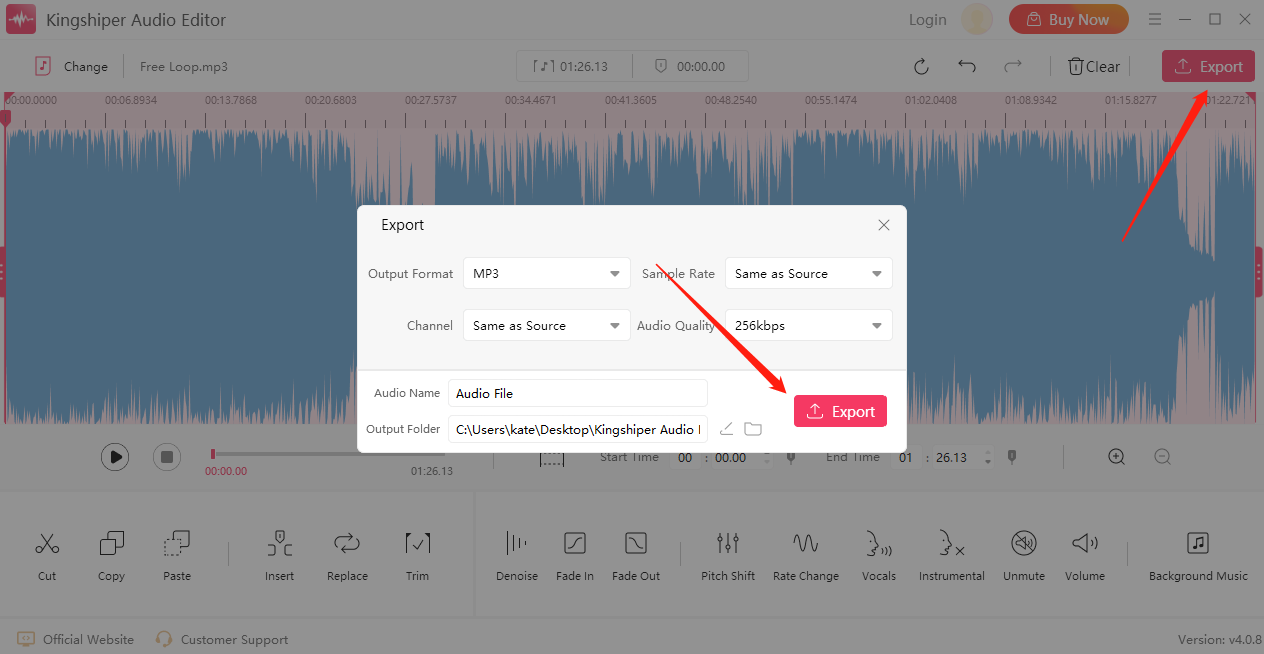
Step 4. Click “Export” at the top right corner. Here, you can adjust the output settings. When you have finished, click "Export".
Once the audio has been successfully exported, press “Go to the output folder” to check it fast on your PC.

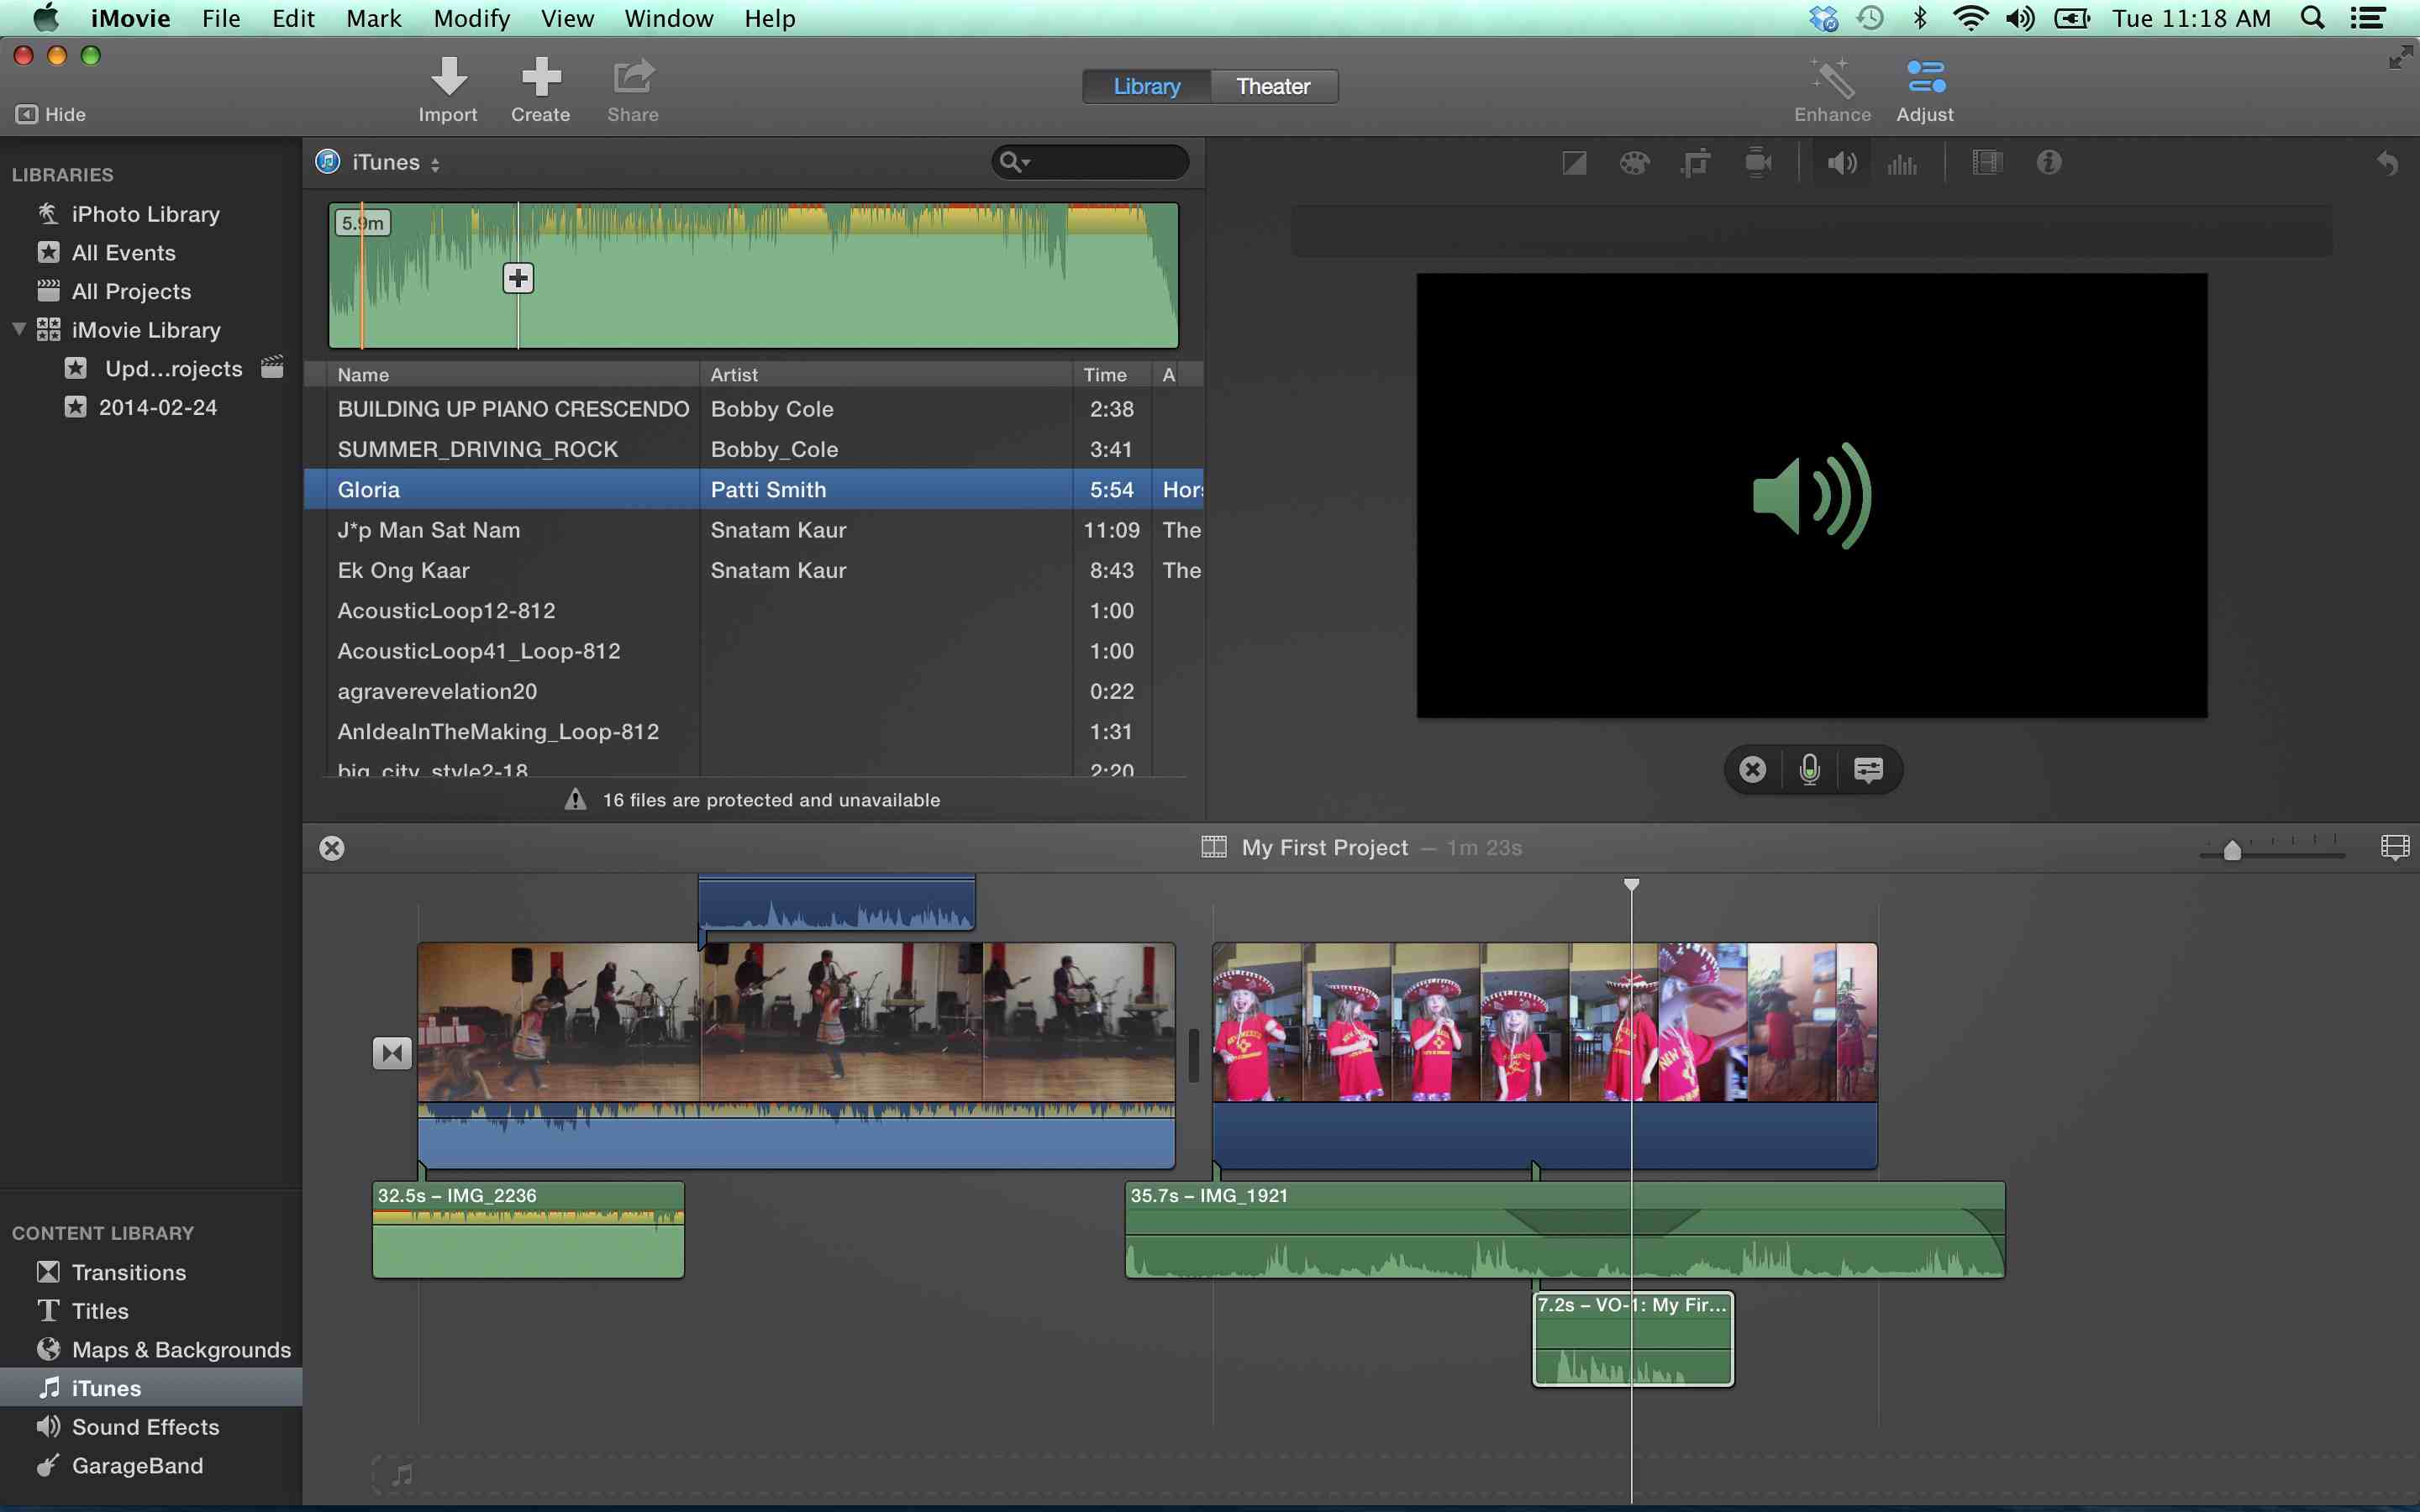
Method 2: iMovie - Simplified Audio Trimming for Mac Users
If you're a Mac user, iMovie is the ideal option for your audio trimming needs. While primarily known as a powerful video editing software, iMovie goes beyond video editing and provides simplified yet effective audio trimming capabilities. This means that you don't need to rely on separate audio editing software to trim your audio files.
Step 1. Launch iMovie on your Mac.
Step 2. Create a new project and import the audio file.
Step 3. Move the playhead to the point where you want to start trimming the audio.
Step 4. Go to the "Modify" menu at the top of the screen and select "Trim to Playhead" or use the keyboard shortcut Command + T to trim the audio file to the playhead position.
Step 5. Press “Play” to preview the effect.
Step 6. Export the trimmed audio file in your desired format.
Method 3: Online Audio Trimmer - Convenience and Accessibility
Audio Trimmer provides a clean and intuitive interface that makes it easy for users of all levels to navigate and operate. It offers a straightforward and hassle-free approach in that you only need to drag the slider to choose where need to trim.
Step 1. Open the Audio Trimmer website from your browser.
Step 2. Click “Choose File” to import your audio file.
Step 3. After it is processed, drag the slider to define the part you want to keep or remove.
Step 4. Click “Crop” to trim it.
Step 5. Press the “Download” button to save it on your PC.

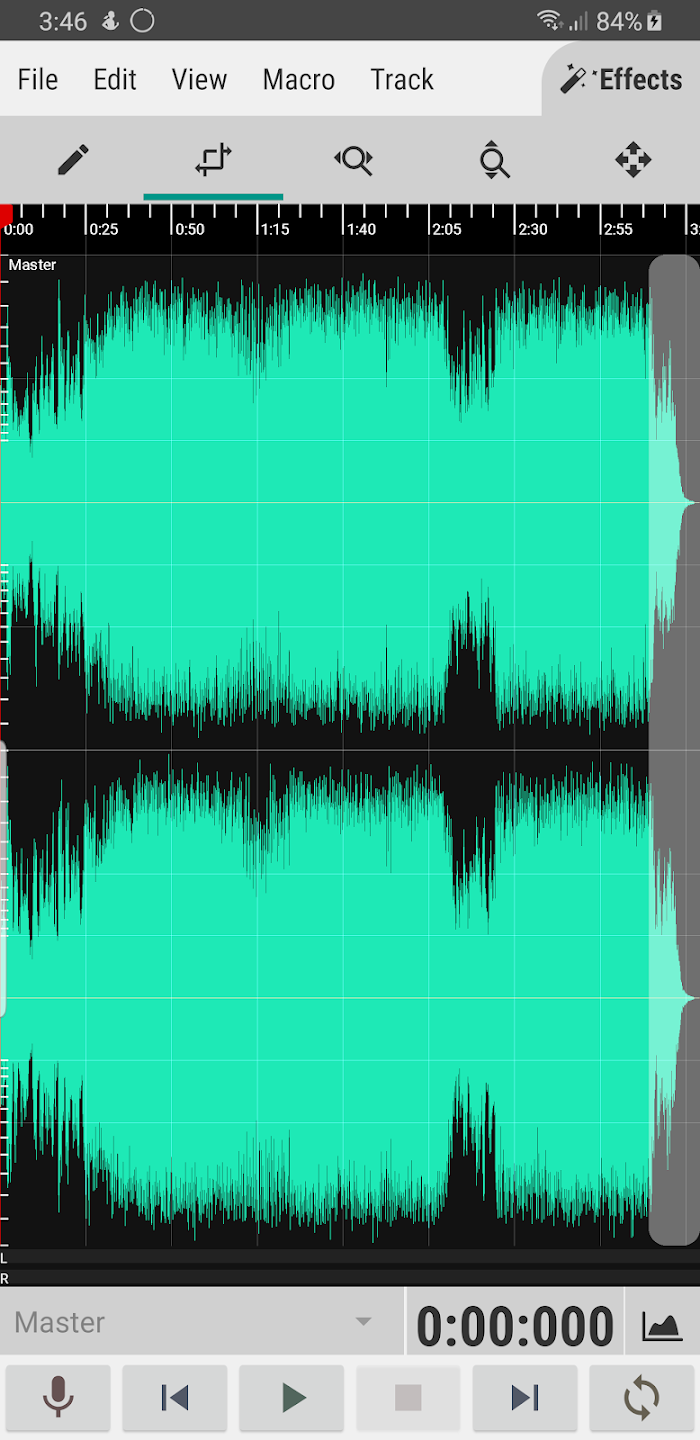
Method 4: Wave Editor - Make Mobile Audio Editing Easy
WaveEditor is a powerful and feature-rich mobile app designed for audio editing on Mobile Phones. It offers a wide range of tools and capabilities that allow you to manipulate and enhance audio files directly on your phone.
Step 1. Download the WaveEditor app from the Google Play Store or the Apple App Store.
Step 2. Launch it on your Phone and open the audio file in the WaveEditor.
Step 3. Locate the section that you want to remove or trim, and tap on the “Set End Point” or “Set Trim End” option.
Step 4. Press the “Play” button to preview the effect.
Step 5. Tap on “Save” or “Export” to save the trimmed audio file.
The Bottom Line
Here are four ways that you can go about it. You will be able to trim audio in any format and export it in various formats with the help of the solutions provided. We are going to choose KingShiper Audio Editor since we think that it is the easiest way to cut an audio file when using this program. What will be your choice? I would appreciate it if you would let me know.
You May Be Also Interested In
1. 4 Easy Steps to Trim Audio or MP3 Files for Free on Windows, Works Fast


