1 Get Started
iLocGo Location Changer is designed to help you change GPS location, simulate movement routes, and manage virtual locations on iOS and Android devices from your Windows computer. Follow the steps below to download, install, activate, and start using iLocGo.
1.1 Download & Install
Step 1. Download it on Your PC
If you don't have iLocGo yet, click the button below to download it. Or visit here to download it.

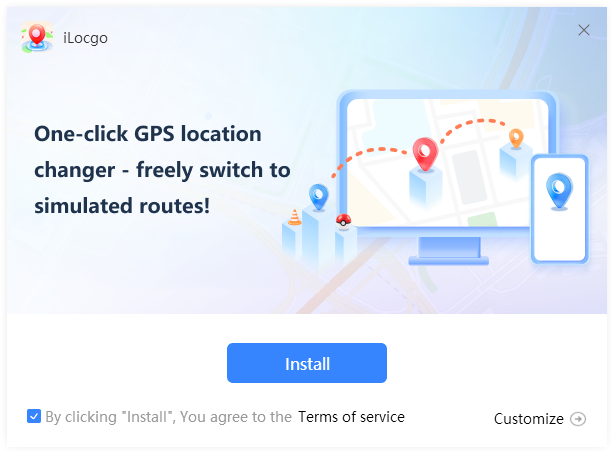
Step 2. Install iLocGo
From the pop-up window, you can click the “Install” button to install our product as the default, or you can choose the “Customize” option.
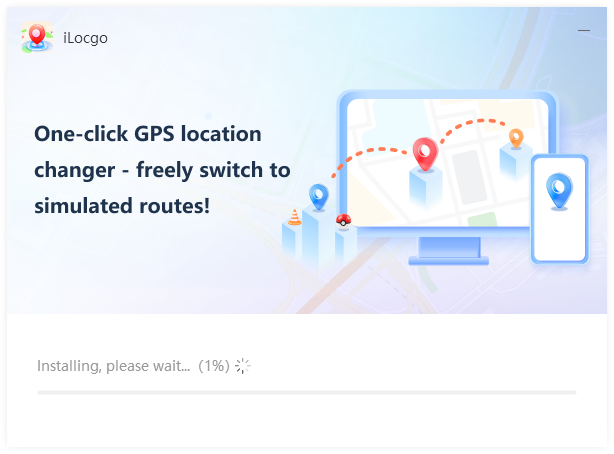
Step 3. Launch iLocGo
It will take seconds to install iLocGo successfully. Once the installation is complete, it will automatically launch.
1.2 Login with Kingshiper Account(Register) & Update & Uninstall
1.2.1 What is Kingshiper Account?
Kingshiper Accouont refers to the account you created from one of the Kingshiper products. It helps you manage your order details and log in to Kingshiper products that support Kingshiper Account.
1.2.2 How to log in to iLocGo?
Launch iLocGo after installation, and click the “Not signed in” icon in the upper right corner to get a login window.

Then, log in to the program with your Kingshiper Account.

1.2.4 How to sign up for a new Kingshiper Account.
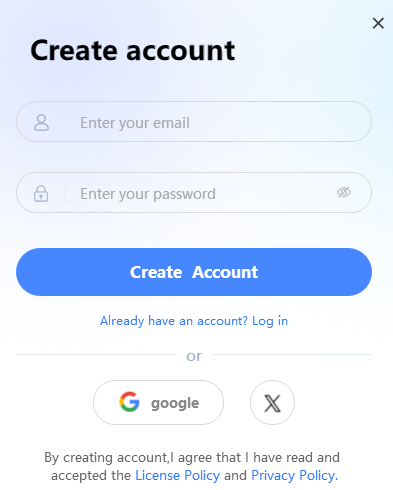
If you don't have a Kingshiper Account, then you need to click the Create account here option on the initial interface and create a new account.

You'll get a new interface to enter your email address and set a password, and then click the “Create Account” button to create the account.
1.2.5 What can you do with Kingshiper Account?
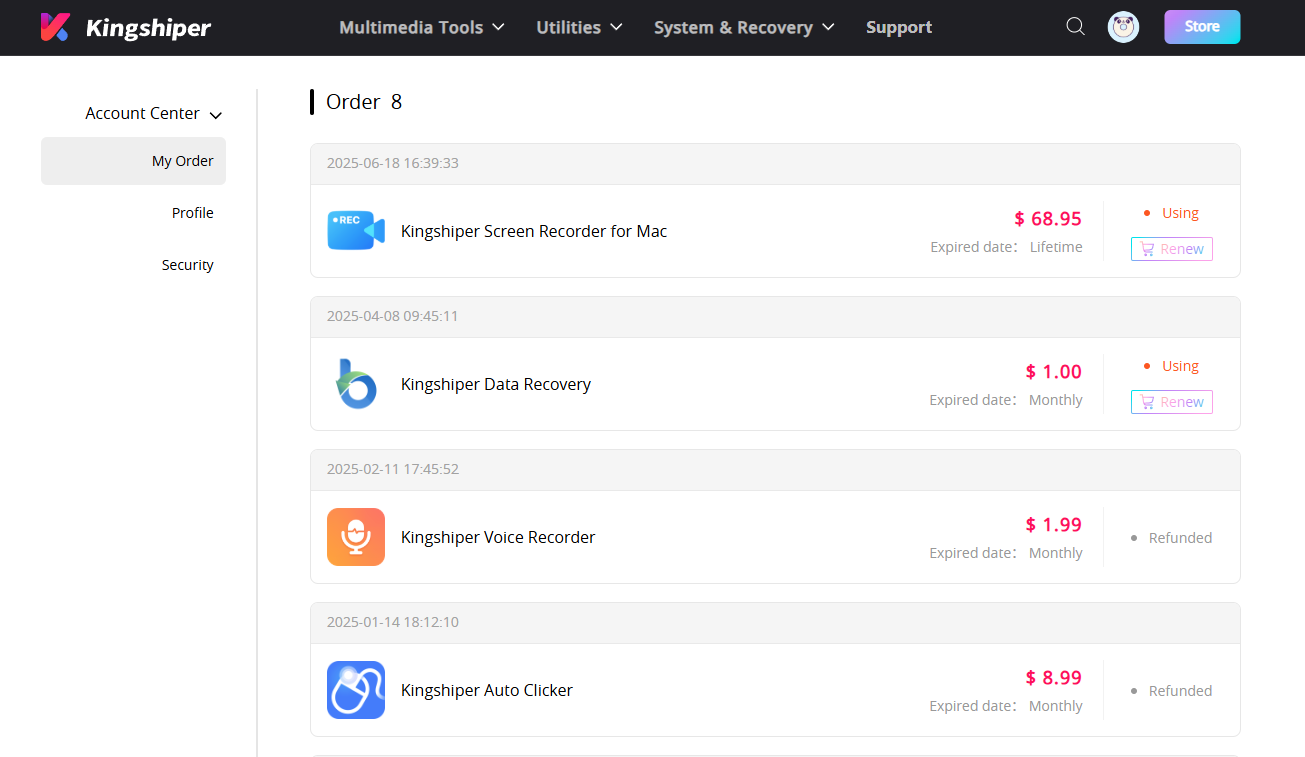
Go to the Kingshiper official website and log in. Click on the Person icon, then choose “Account Center”. You can edit your profile, change your password, and check your order on this page.
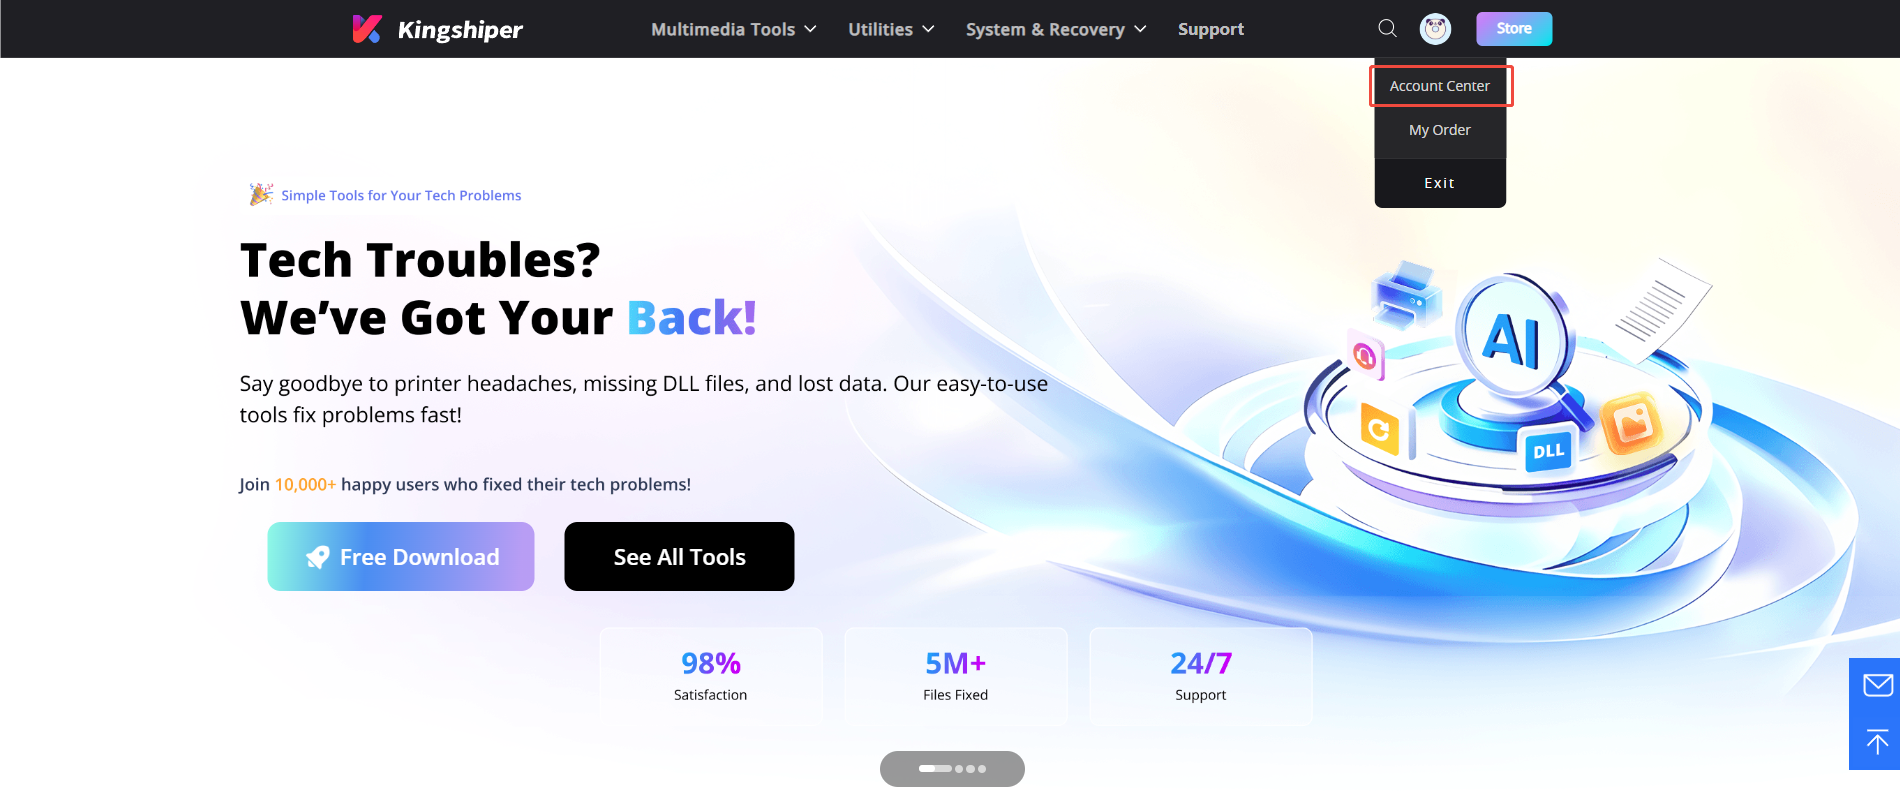
My order: You can find the Order, Profile, and Security information here.
Profile: You can edit your personal information from this tab.
Security: You can change your password here.
1.2.6 Update
If you want to check if your iLocGo is the latest version and update it, you can follow the steps below to update automatically.
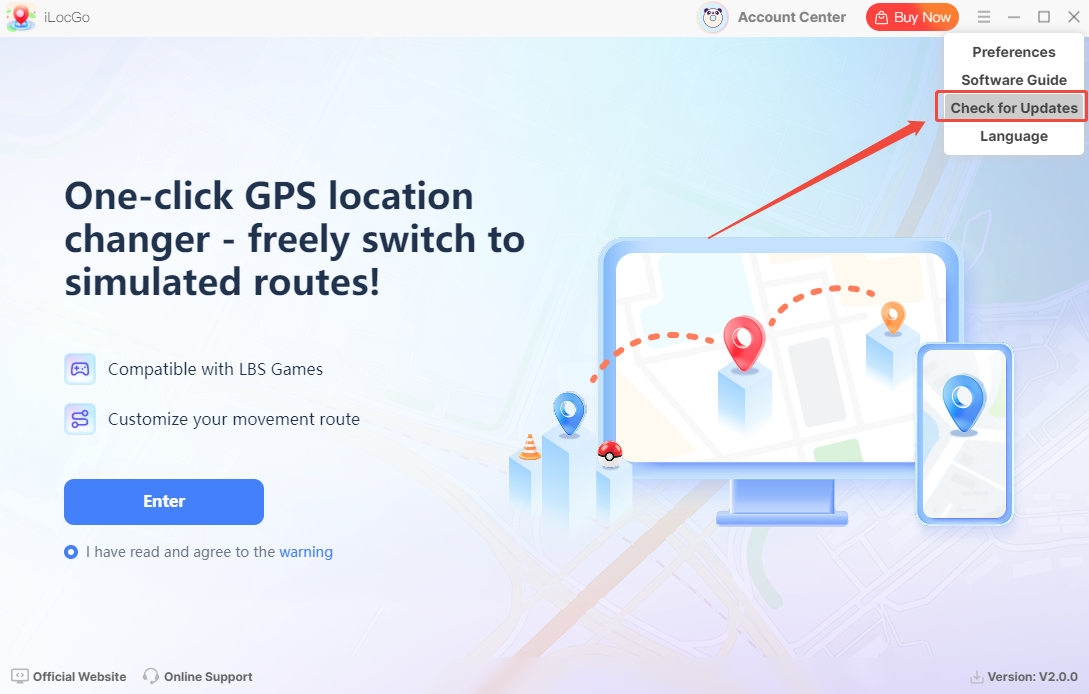
Step 1. Check for Updates.
Go to the “Menu” icon and click “Check for Updates”. It will pop up a Live Update window. Please press “Go to Update” to download the package.
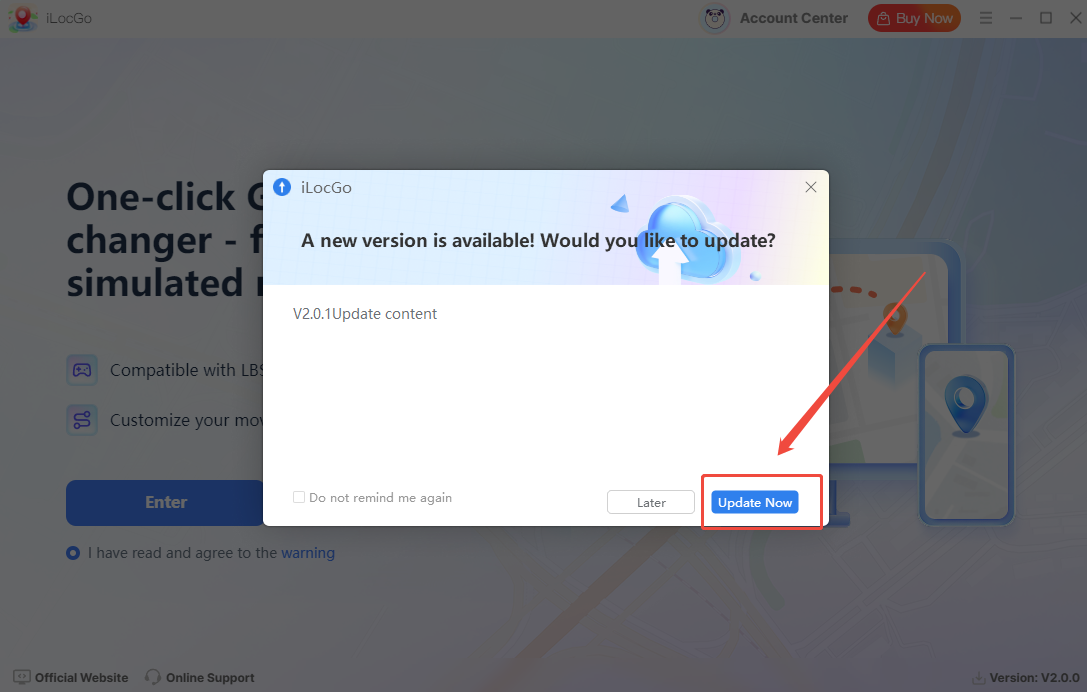
Step 2. Update the package.
If a new version is available, click “Update Now.” Once the update is complete, iLocGo will automatically restart.
1.2.7 Uninstall
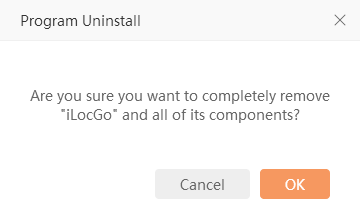
If you think iLocGo hasn't met your expectations or you don't want to use it now, you can uninstall it as follows:
Go to “Control Panel” > “Programs” > “Programs and Features” > “Uninstall” and then right-click the icon of iLocGo and select Uninstall. Click “OK” when asked, "Are you sure you want to completely remove iLocGo and all of its components?"
1.3 Brief Introduction
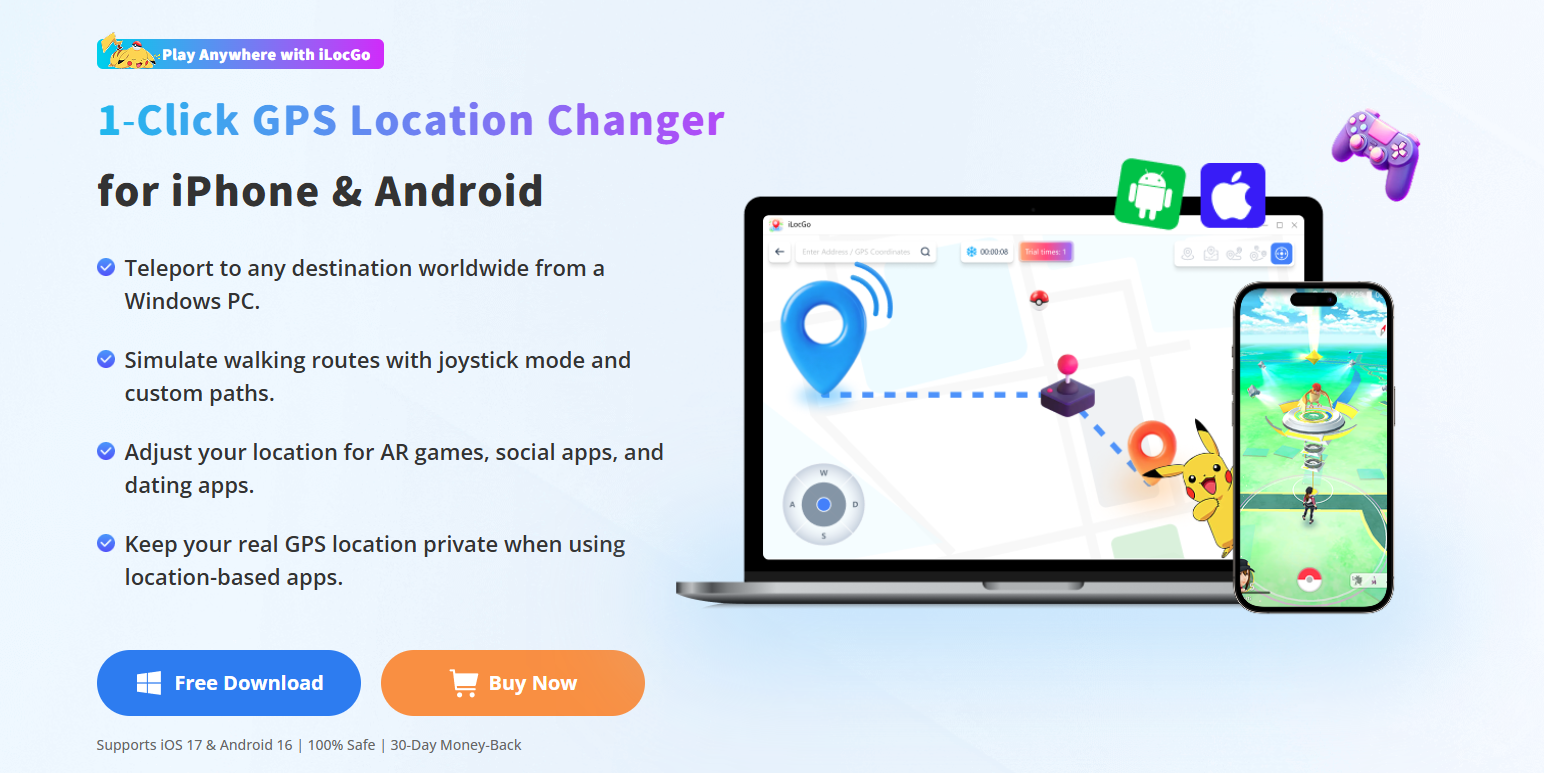
iLocGo is a location changer for Windows that helps modify the GPS location displayed on connected iOS and Android devices. You can search for a location by address or GPS coordinates, select a destination directly on the map, and modify the location with one click. Before you begin, iLocGo displays your current location, selected destination, and planned distance. iLocGo supports location-based games such as Pokémon GO, as well as everyday apps that use location information, including Instagram, Snapchat, life360 and more. It is designed for users who need to manage, test, or adjust location information in supported apps and services.
2 Key Features of iLocGo
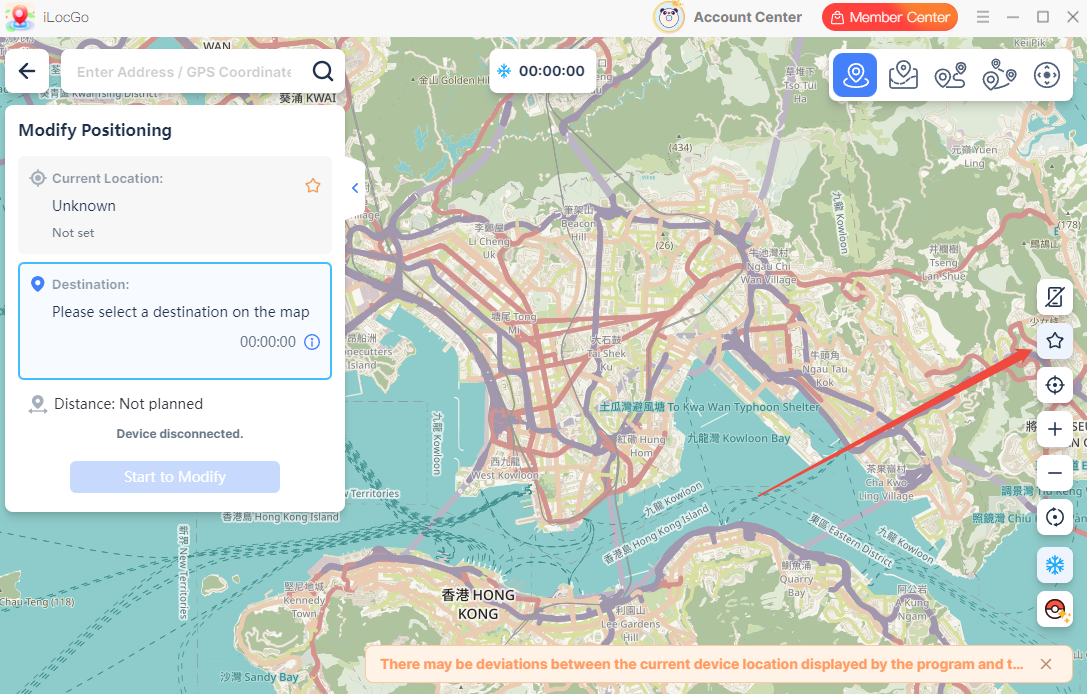
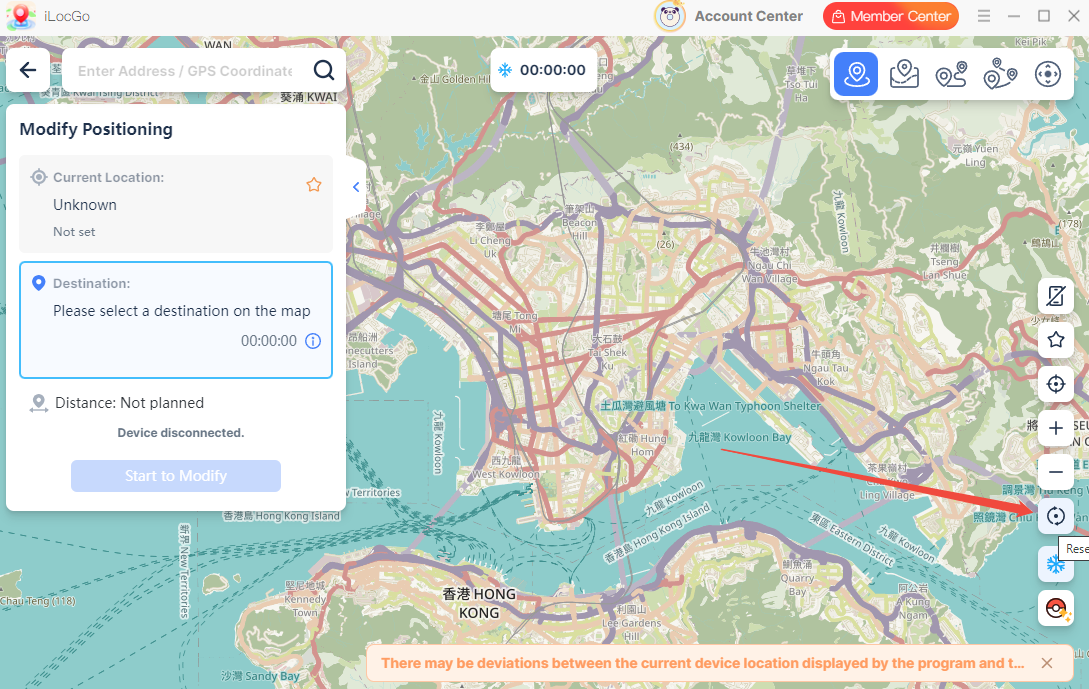
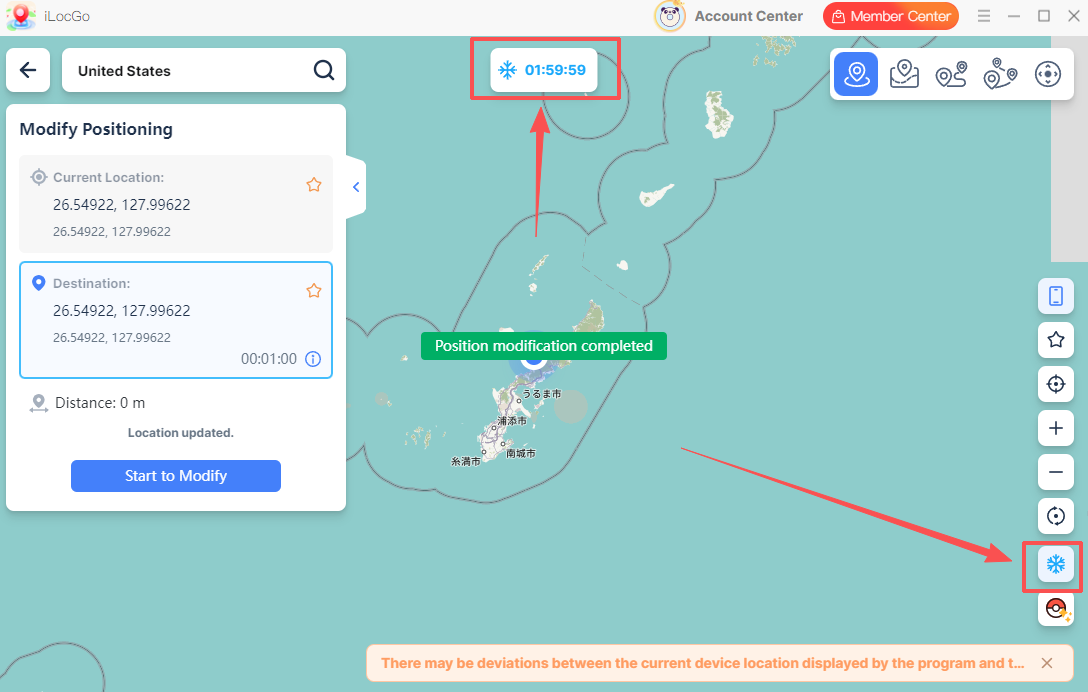
2.1 Modify Positioning
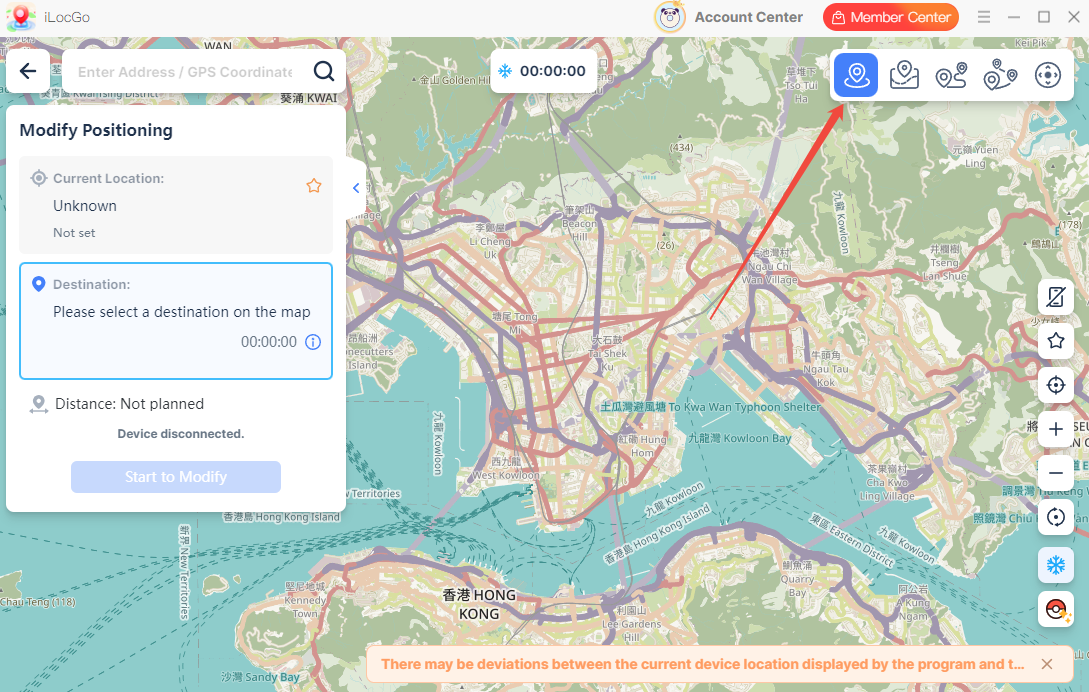
Teleport Mode lets you change your device location to a selected place instantly. Search for an address or enter GPS coordinates, then choose a destination on the map. Once confirmed, iLocGo updates the displayed location of your connected device with one click.
This mode is suitable when you only need to switch to one specific location.
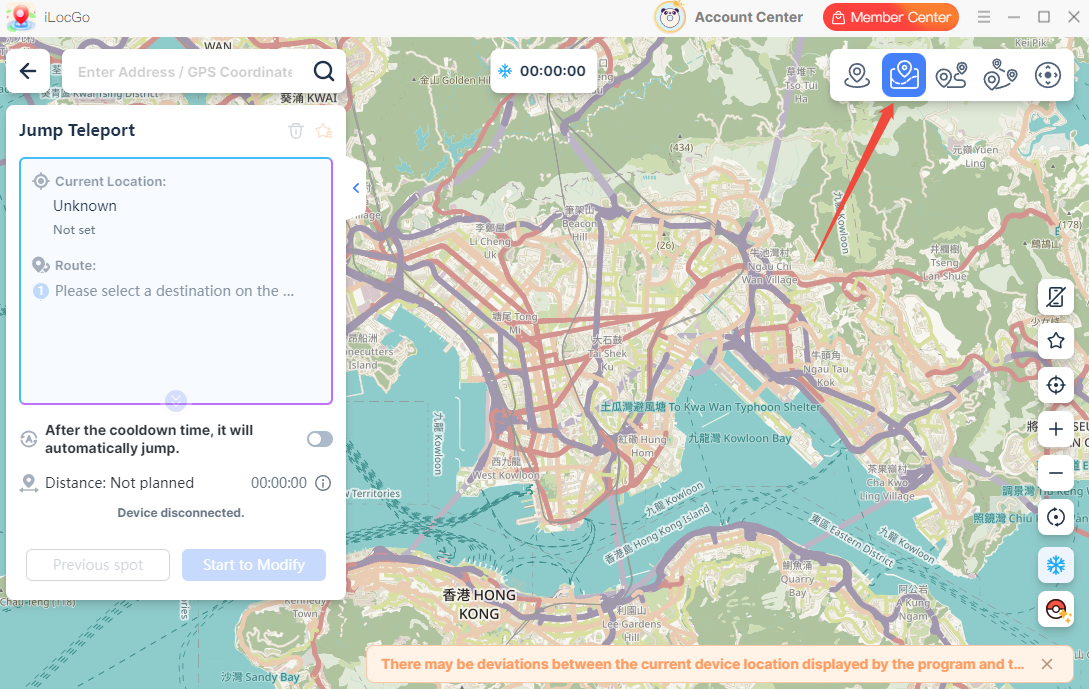
2.2 Jump Teleport Mode
Jump Teleport Mode lets you create a route with multiple teleport points. You can add several locations to the route and move between them one by one. This is useful when you want to plan a location-changing path instead of moving to only one destination.
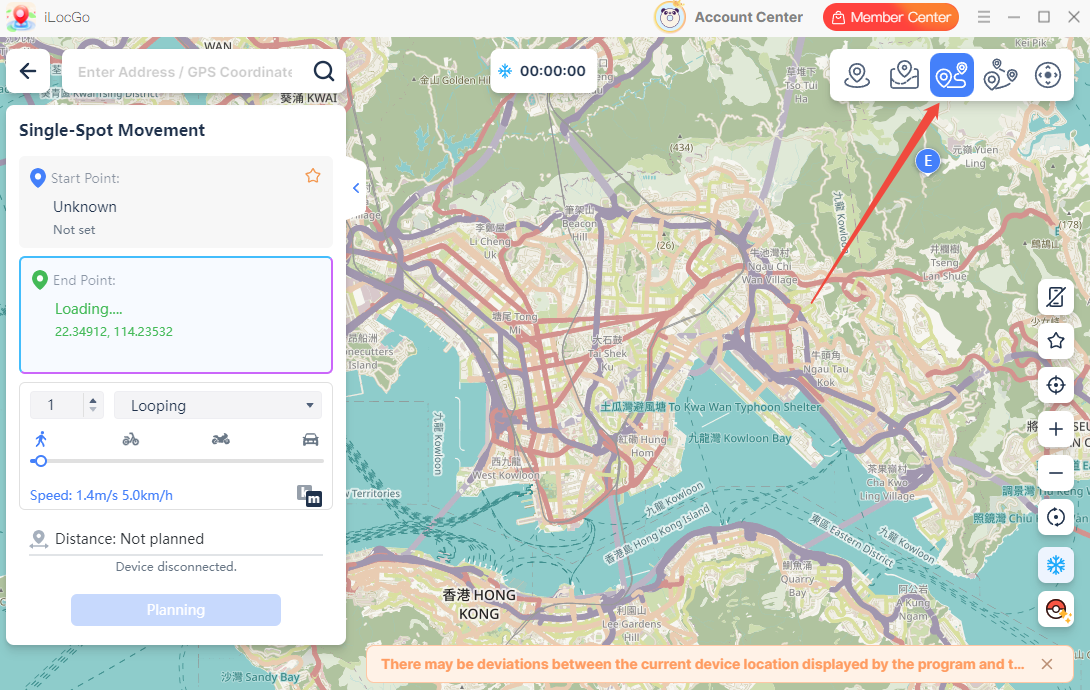
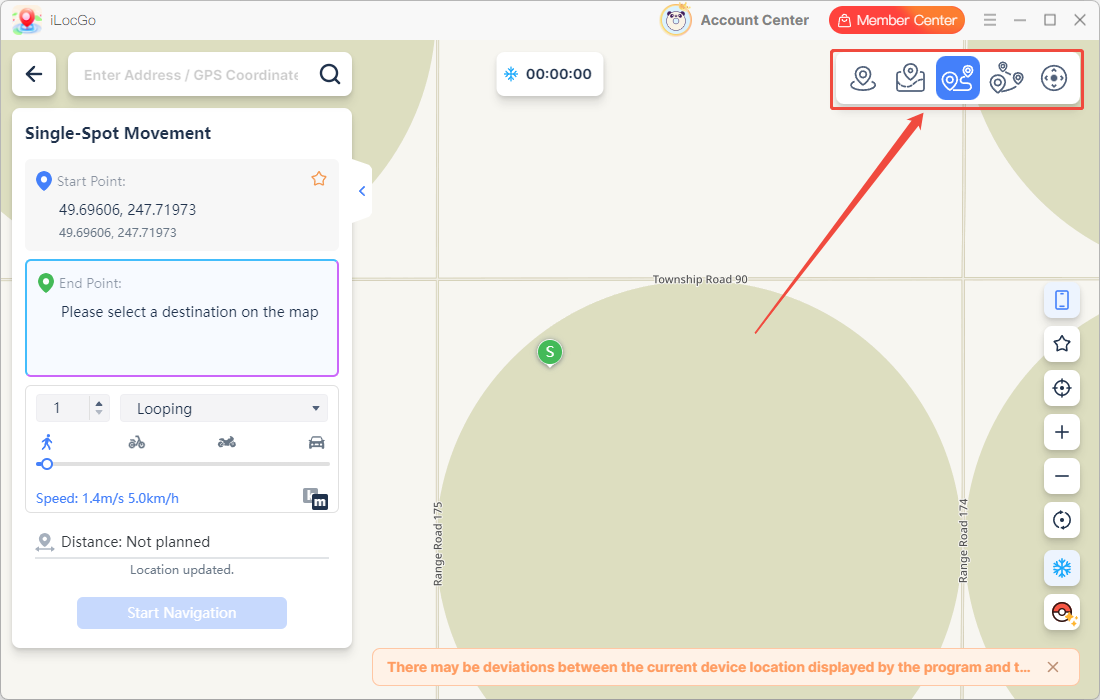
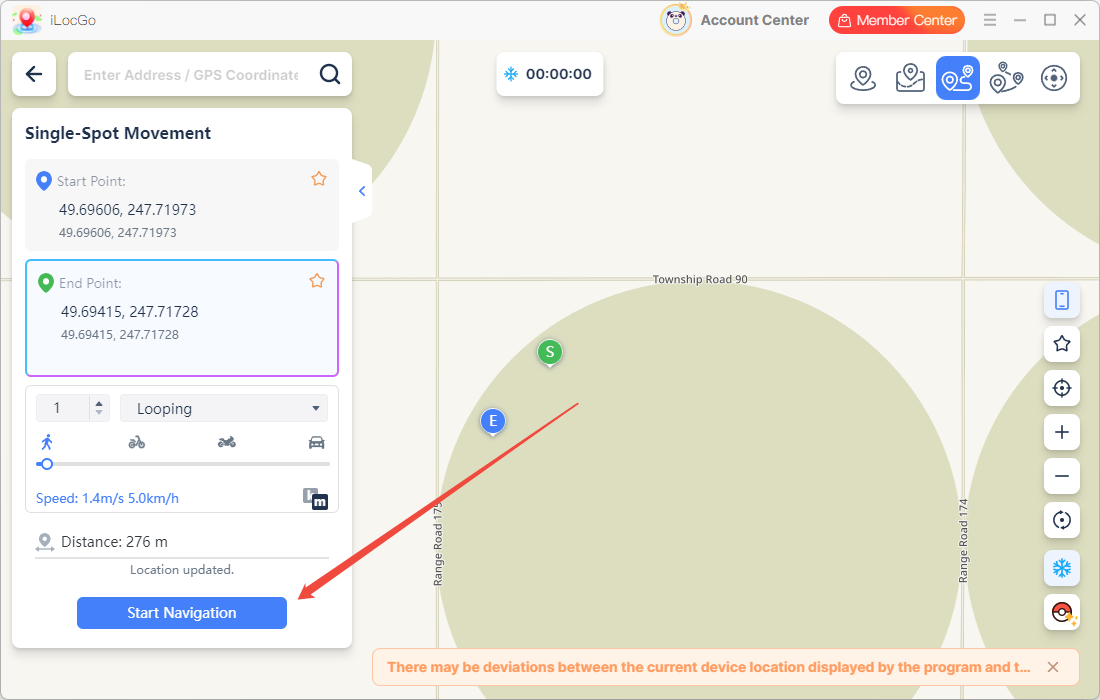
2.3 Single Move Mode (Two-Spot)
Two-Spot Mode lets you simulate movement between two locations. Choose a starting point and destination, then set your preferred movement speed and the number of trips. iLocGo will simulate movement back and forth between the two selected locations.
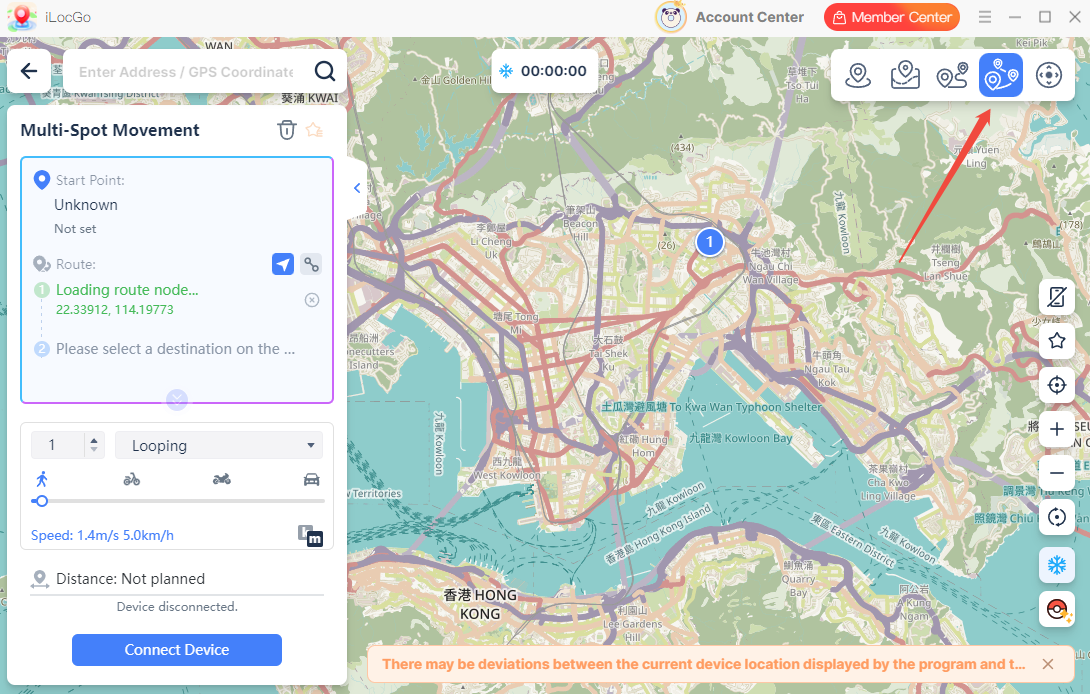
2.4 Multi-Spot Mode
Multi-Spot Mode lets you create a route with multiple stops. You can add several destinations on the map, set the movement speed, and choose how many times the route should repeat. This is useful for simulating walking, cycling, or driving routes.
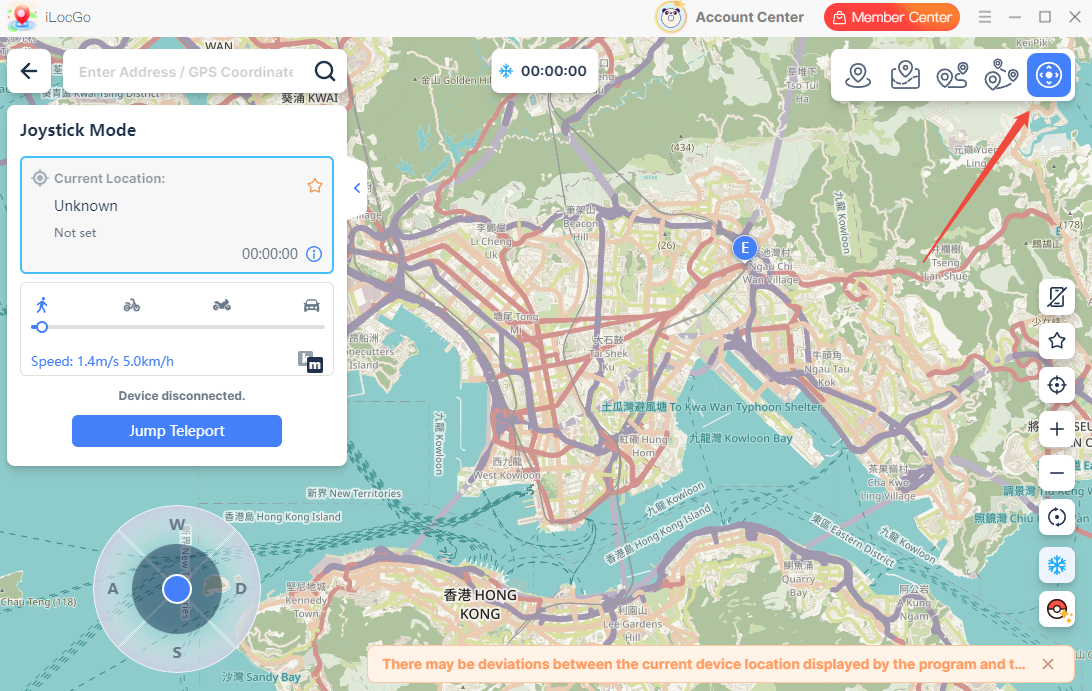
2.5 Joystick Mode
Joystick Mode gives you more flexible control over your virtual location. You can use the on-screen joystick or keyboard controls to move in different directions. This feature is useful when you want to control movement manually instead of following a fixed route.
2.6 History / Favorites
The History and Favorites feature helps you quickly access locations and routes you have used before. History records your recent location changes, making it easy to return to a previous destination without searching again.
Favorites lets you save frequently used locations or routes. Click the star icon next to a location to add it to your Favorites list for quick access later.
2.7 Location Target
This feature helps you quickly return to your current position on the map. Click the “Location Target” icon to center the map on your current device location. This is useful when you have moved around the map and want to find your starting point again.

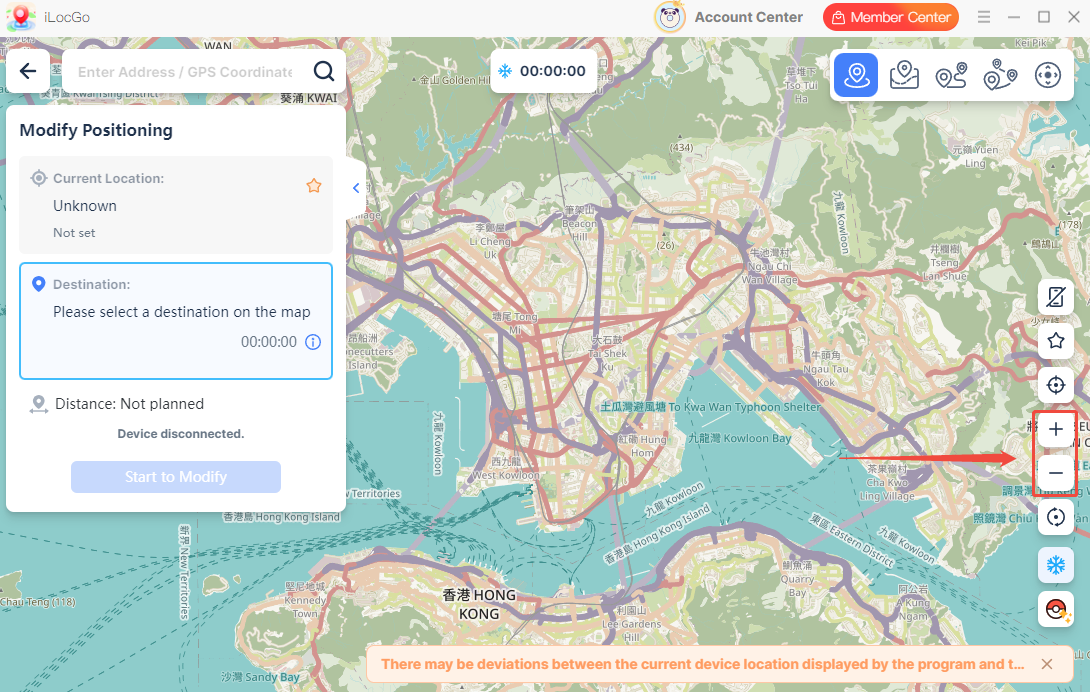
2.8 Zoom In/Out
Use the “Zoom In” and “Zoom Out” icons on the right side of the map to adjust the map view. Zoom in to view streets, buildings, and nearby areas in more detail. Zoom out to see a wider area and plan longer routes more easily.
2.9 Reset Location
Reset Location lets you stop the current virtual location and restore your device location. Click the “Reset” icon when you want to remove the selected virtual location and return to your actual location information.
2.10 Cooldown Countdown
Cooldown Countdown shows a recommended waiting time after you change your location over a long distance. The countdown is calculated based on the distance between your previous location and the new destination. It can help you plan location changes more carefully when using supported location-based games or apps.

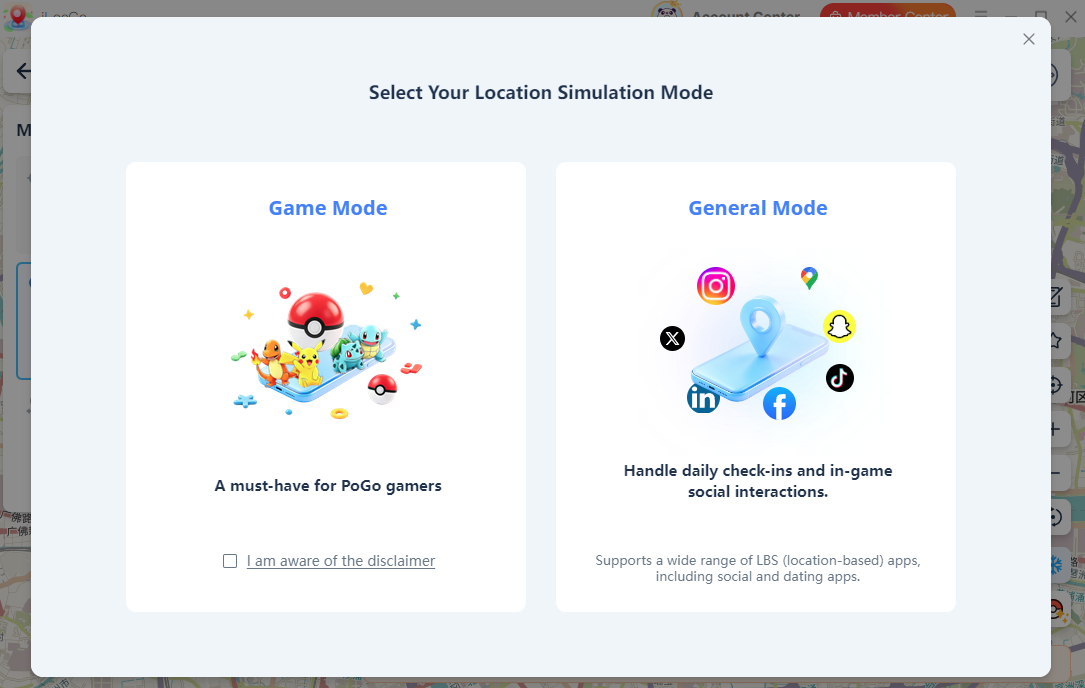
2.11 Location Simulation Mode
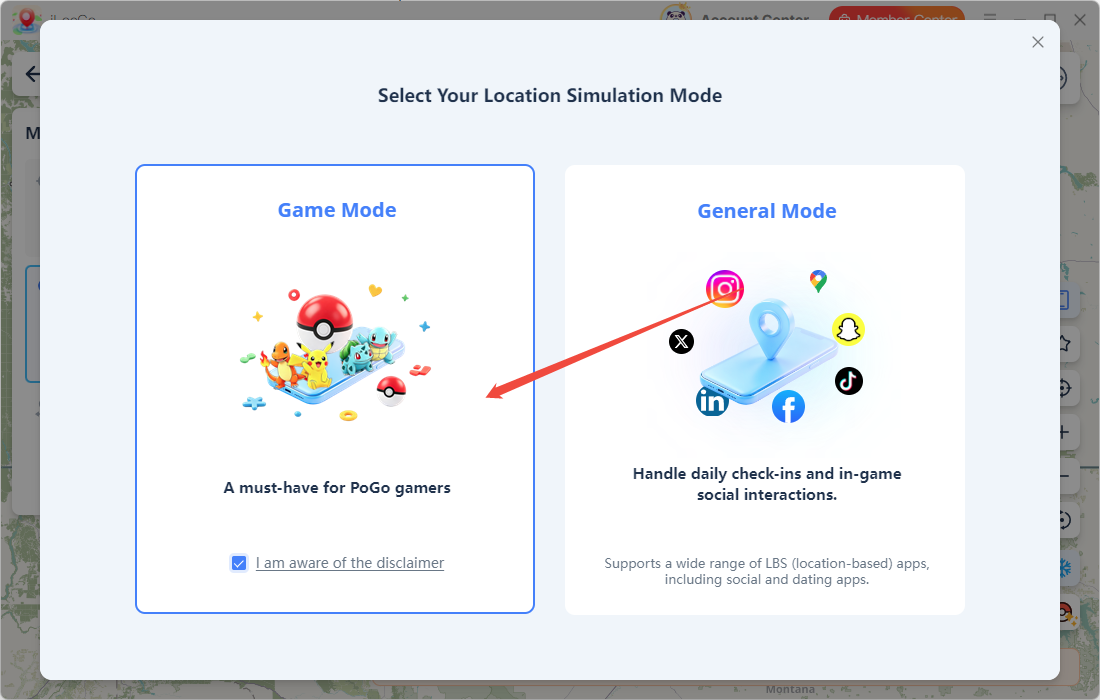
2.11.1 Game Mode
Game Mode is mainly designed for Pokémon GO players. It helps you adjust your in-game position while playing Pokémon GO. You can select a destination, plan a route, or simulate movement based on your needs. Before entering Game Mode, please read the disclaimer carefully and check “I am aware of the disclaimer” to continue.
2.11.2 General Mode
General Mode is designed for social, dating, map, and other everyday apps that use your device location. It works with apps such as Instagram, Snapchat, X, Tinder, Bumble, and more. Select this mode when you want to adjust the location shown in an app for social interactions, testing, check-ins, or other general purposes.

3 How to Use iLocGo
3.1 Connect Your Device to iLocGo
For iPhone:
Step 1. Launch iLocGo on your computer.
Step 2. Connect your iPhone to the computer using a USB cable.
Step 3. Unlock your iPhone. When the “Trust This Computer” message appears, tap “Trust” and enter your device passcode if prompted.
Step 4. Select your device in iLocGo to complete the connection.
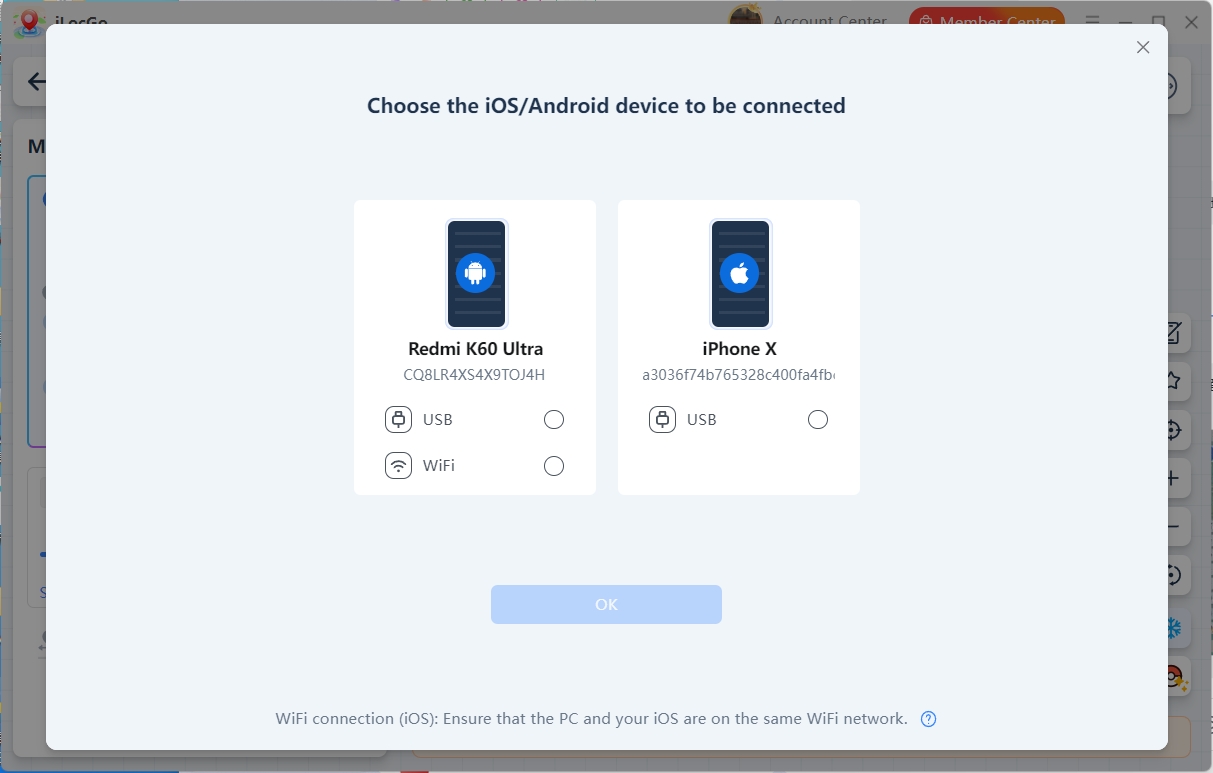
For Android Devices
You can connect your Android device through USB or Wi-Fi.
USB connection:
Connect your Android phone to the computer with a USB cable.
Set the USB connection mode to “File Transfer” or “Media Transfer Protocol”.
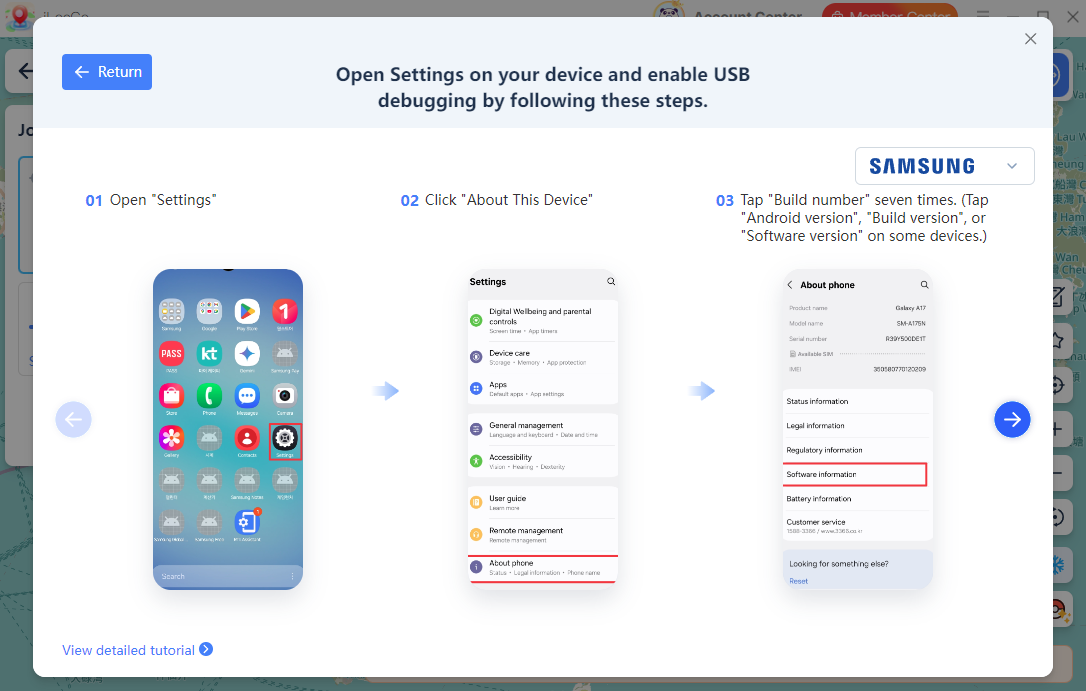
Tap Developer Options on your Android device and enable USB Debugging.
Confirm the USB debugging permission when prompted.
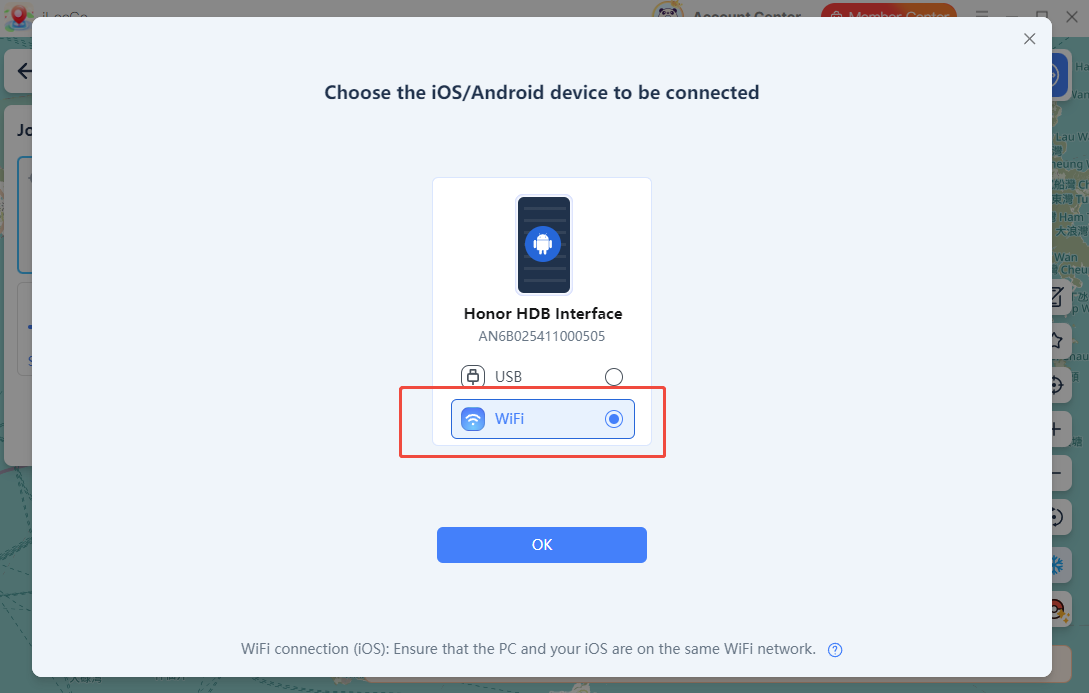
For a Wi-Fi connection: After the first USB connection, you can choose to connect your device to PC via WiFi. Make sure your Android device and computer are connected to the same Wi-Fi network.
3.2 How to Change GPS Location in General Mode
General Mode is designed for social, dating, map, and other everyday apps that use your device location.
Step 1. Launch iLocGo and connect your iPhone or Android device to the computer. Once the connection is successful, the mode selection window will appear.
Step 2. Click “General Mode” to enter the map interface. Wait a moment while the program installs iLocGo Assistant on your mobile device. When prompted, tap “Running in the Background” on your phone.

Step 3. Return to your computer. Click the first mode icon in the upper-right corner and select “Modify Positioning”.
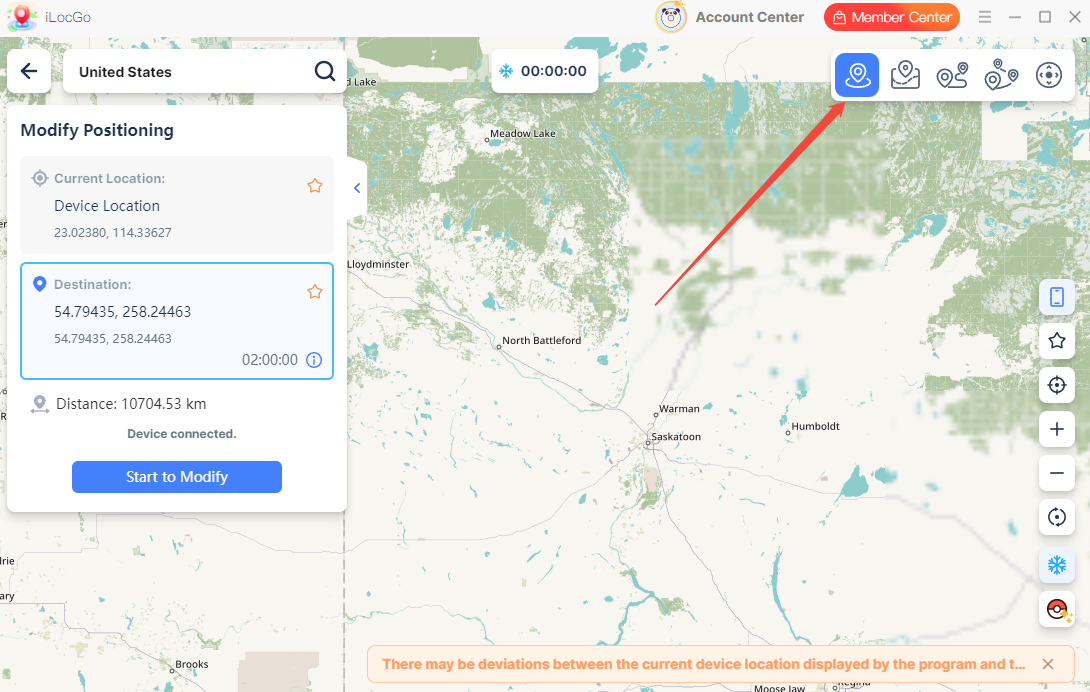
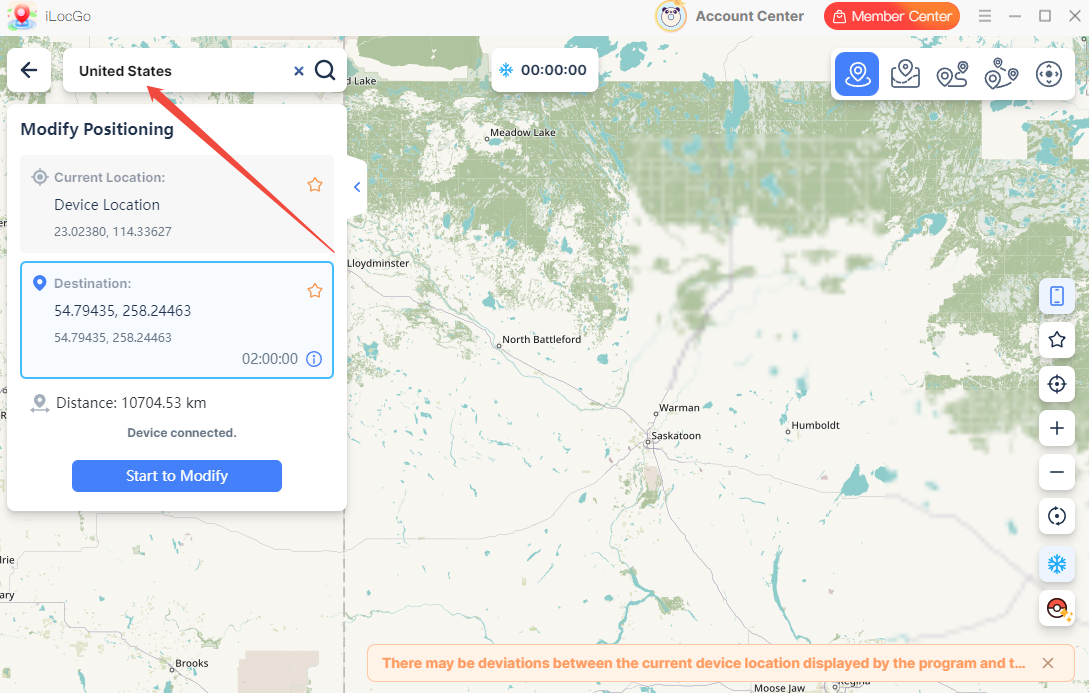
Step 4. Enter an address, city name, landmark, or GPS coordinates in the search box in the upper-left corner. You can also drag the map and click any point to set it as your destination.
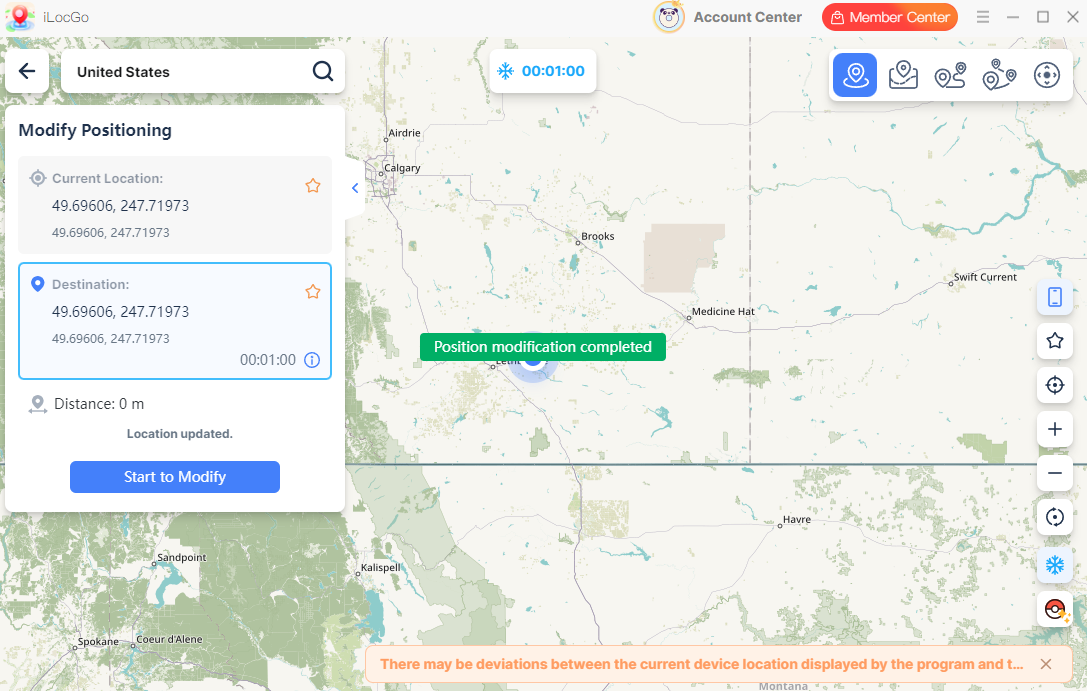
Step 5. Click “Start to Modify” to apply the selected destination. Once completed, the location shown on your connected device will be updated.
3.3 How to Change GPS Location in Game Mode
For users who want to change their GPS location in Pokémon GO, Game Mode lets you choose a destination or simulate movement in the game.
Step 1. Launch iLocGo and connect your iPhone, or Android device to the computer.
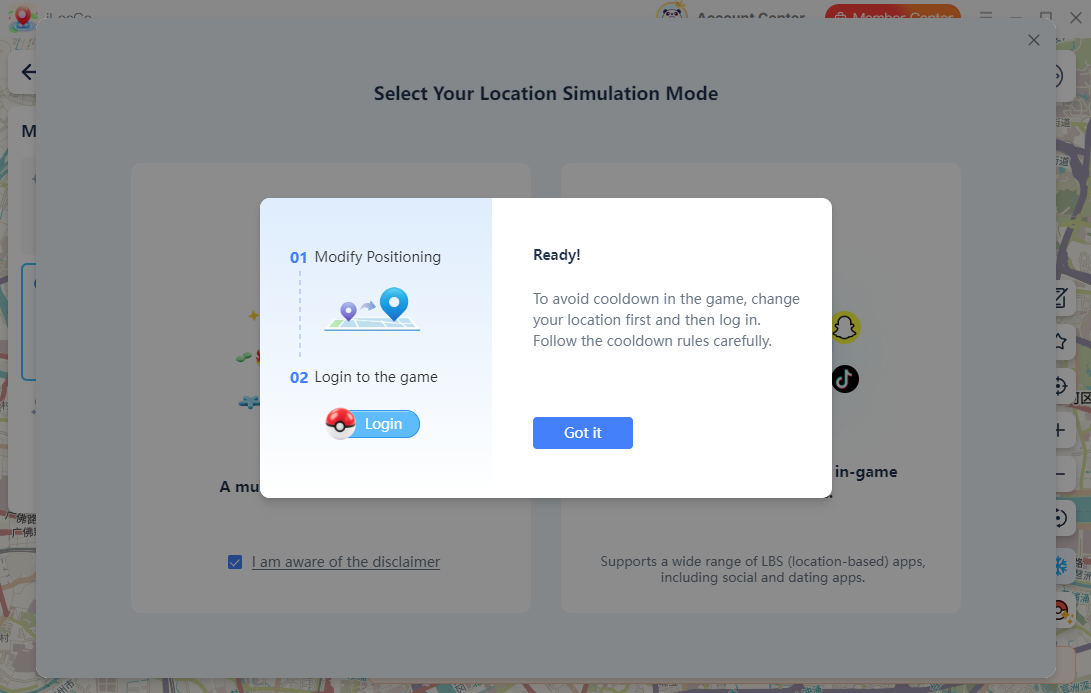
Step 2. On the mode selection screen, click “Game Mode.” Read the disclaimer carefully, then check “I am aware of the disclaimer” to continue.
Step 3. Then the program will install the latest customized Pokémon Go version on your mobile phone. The customized version works the same as the standard Pokémon GO app. It is installed only to support iLocGo Game Mode.
Step 4. Launch Pokémon GO and log in to your account. Then return to iLocGo on your PC. Once the map has fully loaded, select the location mode from the upper-right corner:
Teleport Mode: Change to one selected destination.
Jump Teleport Mode: Move through several selected locations in sequence.
Single Move: Simulate movement between two places.
Multi-point Mode: Create a route with multiple stops.
Joystick: Control movement manually.
Step 5. Select a destination or create a route. Once you’ve finished, click “Start to Modify” or relevant start button to apply the selected location or begin route simulation.
Step 6. After switching to a distant location, review the Cooldown Countdown shown in iLocGo. It provides a suggested waiting time based on the distance between your previous and new positions.
4 Support and Help
If you have any feedback or suggestions on iLocGo, please do not hesitate to let us know. We are also enthusiastic about replying to all your questions about using it. Please feel free to contact us, and we'll help you right away.
Submit Tickets: https://www.kingshiper.com/contact
Email: [email protected]


 All
All


 Hot Products


