Want to recover accidentally deleted DJI videos for saving or later use? Not satisfied with just checking the Recycle Bin or your drone’s built-in recovery? This article shows all that you need to know about “how to recover deleted DJI videos” and the feasible methods to get them back.
Why DJI Videos Go Missing or Get Deleted?
A storage card is the primary medium for saving all flight video data from DJI drones, such as MicroSD cards, built-in drone storage, or external hard drives. It is the main device the drone system relies on to write video files, which makes it crucial for preserving aerial video safely.
Simply put, video loss occurs when the storage medium loses its file index or when the space is marked as available for overwriting. This can happen due to user deletion, system errors, device malfunctions, or other complex situations. Even after a file appears to be lost, the actual data may still exist until it is overwritten by new content.
Common Causes of DJI Video Loss:
Accidental Deletion: Deleting individual videos on the drone or formatting the entire storage card by mistake on a computer.
Sudden Power Loss: The drone battery dies, or the device shuts down unexpectedly during recording, interrupting file writing.
Storage Device Failure: SD cards may develop physical bad sectors, file system corruption, or display a “format required” warning.
Transfer Interruptions: Videos can become corrupted or lost if the transfer from drone to computer is interrupted due to cable disconnection, cache clearing, or software conflicts.
Firmware Update Issues: Interrupted or failed DJI firmware updates can cause data loss, affecting files on the device or SD card.
Formatting Errors or Card Damage: Improper SD card ejection, using the card across multiple devices without proper formatting, or old/low-quality SD cards can result in missing videos.
Can I Recover Deleted DJI Video?
Yes. You can recover deleted DJI videos. But it depends on the specific situation. DJI video recovery methods can be broadly categorized into three types:
DJI official App: For example, recovering from data cache in the DJI Fly App. Usually limited to videos that haven’t been overwritten, and original quality files cannot be restored.
Computer’s built-in or system Recycle Bin: If the videos were downloaded to your computer, you can try the Recycle Bin or “Deleted Files” feature, but not all files are guaranteed to be recovered.
Through third-party data recovery software: AiRecover Data Recovery offers the most effective way to directly restore deleted original files from your SD card or computer.
The following will explain each method in detail. Hopefully, you can choose the appropriate method to recover your DJI videos based on your needs.
Official DJI App to Recover Deleted Video
Its availability is very limited and mainly relies on app cache or cloud backups.
System Requirements: DJI Fly App or DJI GO 4 App with caching enabled
DJI’s official video recovery feature is based on cached flight videos within the app. It can only restore low-resolution cached videos and cannot recover the original HD files stored on the SD card. When “Cache Locally” is enabled during flight, the app automatically saves a copy to your mobile or tablet. These cached videos are usually stored in the app’s album or your device’s local storage.
From a practical standpoint, this method is suitable for users who need to quickly preview flight footage or check general content. However, it cannot meet the needs of recovering the original high-quality videos. Users who want to restore HD original files still need to immediately stop using the SD card and use professional third-party recovery software (such as AiRecover Data Recovery).
Tips:
● Cannot recover the original files deleted from the SD card.
● Cached videos are low resolution, typically 720P.
● Cache may be automatically overwritten due to app cleanup or long flight times.
Steps to recover deleted videos via the DJI official app cache:
Step 1. Open the DJI Fly App and tap on the bottom-right “Album” button.
Step 2. Tap the “All” or “Cache” tab to find the video clips you need.
Step 3. Preview, download, or share the target video.
Recover Deleted DJI Video via Reliable Video Recovery Software
AiRecover Data Recovery can help Windows users recover mistakenly deleted DJI drone video files, and it also works with hard drives, SD cards, and many other storage devices. As long as users start the recovery process as soon as the data loss occurs, AiRecover can safely restore lost multimedia files without damaging the originals.
With this tool, you can recover DJI videos lost due to accidental deletion, formatting, or device errors. Whether it’s an important travel video or critical project materials, such as commercial shots, AiRecover brings them back to your PC without the risk of overwriting existing data. Besides video recovery, it also supports restoring documents, photos, audio, and more from devices like GoPro, Canon, and Nikon cameras.
Recover original-quality DJI videos, including 1080P, 4K, 5.1K, and 5.4K
Preview files before recovery to accurately confirm the content you need
Works with DJI drone SD cards (Mavic, Air, Mini series), computer hard drives, and external drives
Tutorial guide on how to recover deleted DJI videos on Windows:
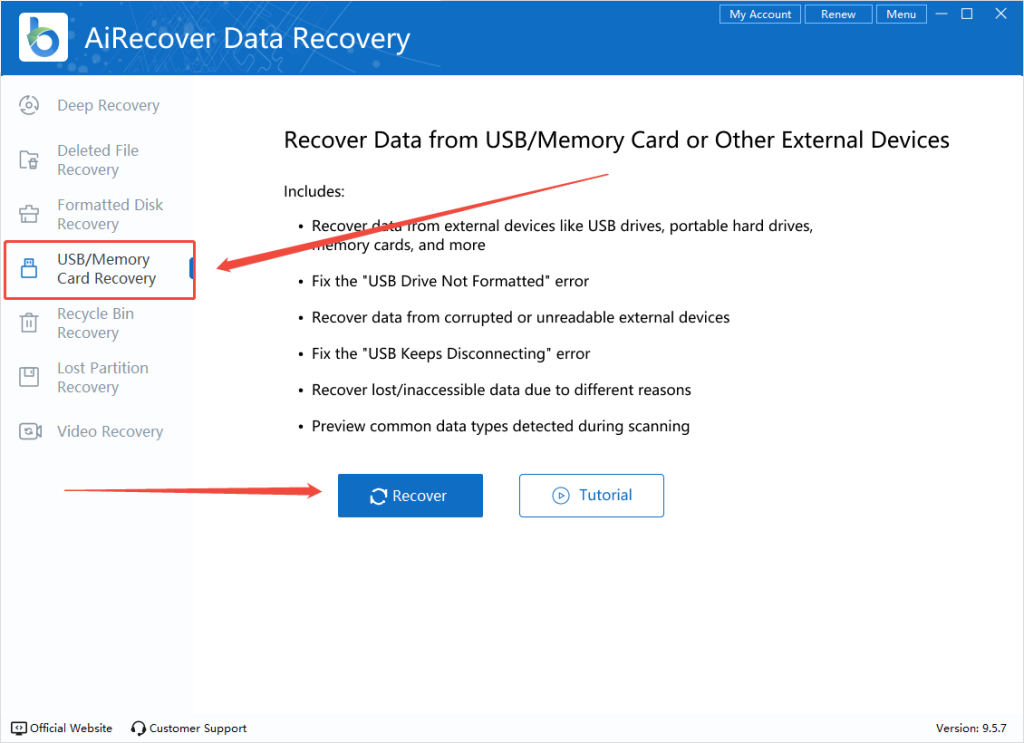
Step 1. Connect the DJI SD card with the missing video using a card reader. Launch AiRecover Data Recovery and choose “USB/Memory Card Recovery” from the left panel.
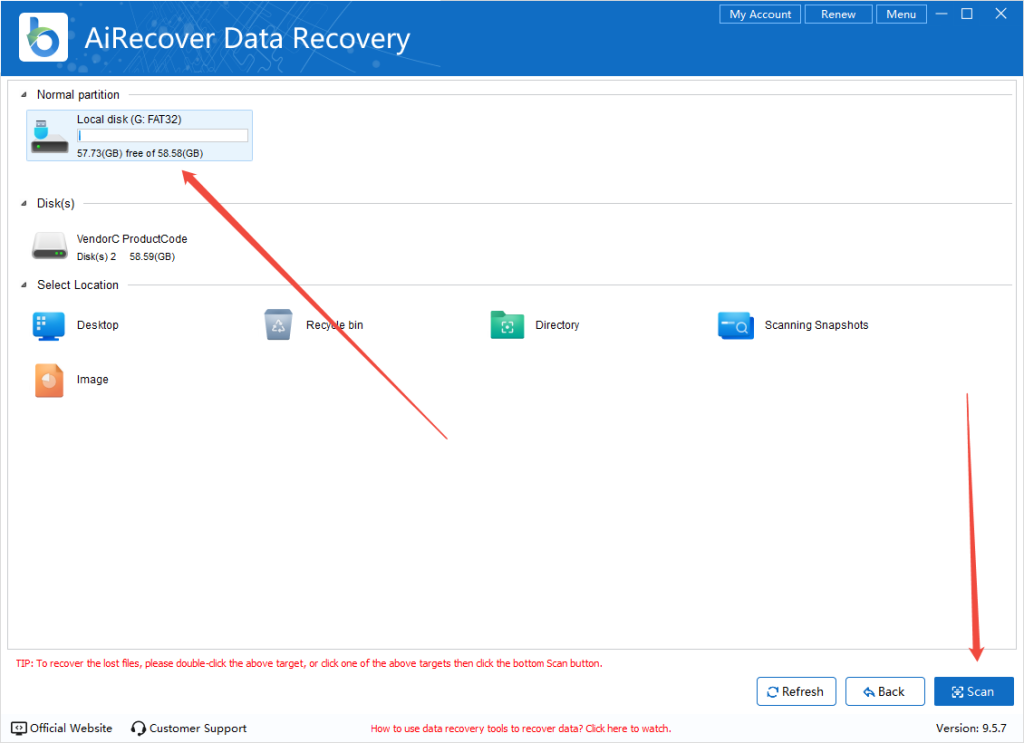
Step 2. Select your DJI storage device and click “Scan”. AiRecover will start scanning for lost videos. If the files don’t appear, return to the interface and select “Deep Recovery” for a thorough search. This mode takes longer but can locate more recoverable files. You may pause or stop the scan at any time.
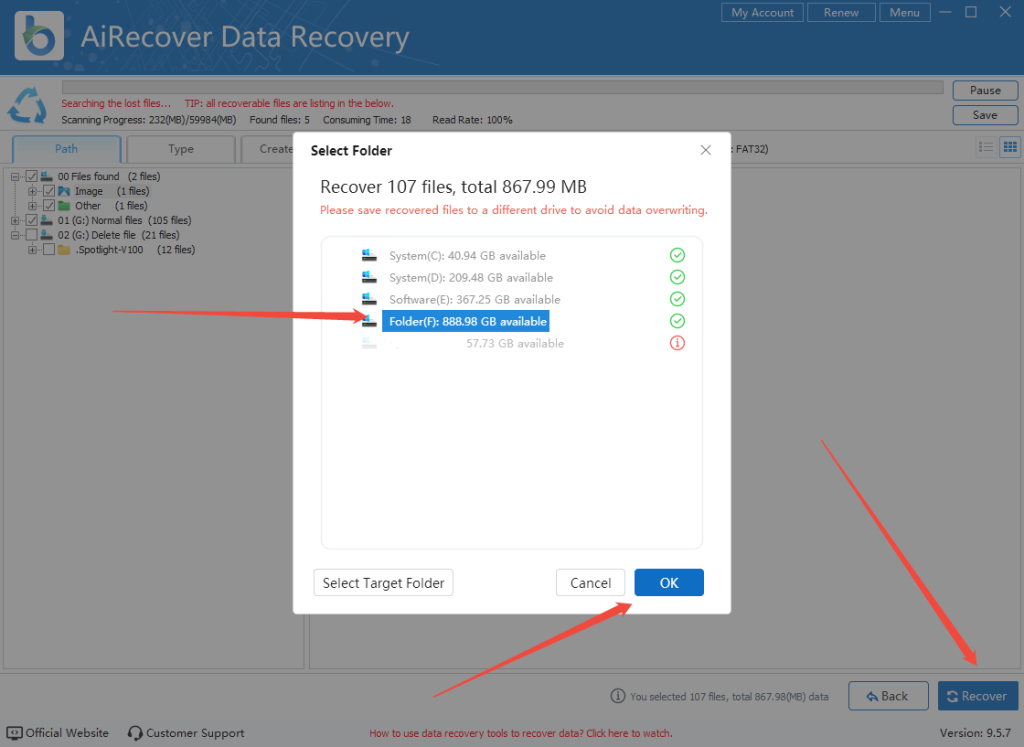
Step 3. During the scan, you can view the DJI video files that appear in the results. Select the videos you want and click “Recover”. For data safety, always choose a different location from the original path to save your recovered files.
Windows Built-in Video Recovery Solutions
When DJI videos are accidentally deleted on a Windows PC, the most common method is to use Windows’ native recovery tools. However, due to system limitations, these methods only work under certain circumstances.
What can Windows built-in recovery recover?
Recovery Scenario
Recoverable?
Videos deleted from the local drive to the Recycle Bin
✔ Yes
Videos lost due to disk file system errors
✔ Possibly
Videos deleted from external devices
❌ No
Files emptied from the Recycle Bin
❌ No
Storage devices with physical damage
❌ No
Recover Deleted DJI Videos via the Recycle Bin
Windows Recycle Bin provides a simple way to restore recently deleted files. As long as the Recycle Bin hasn’t been emptied, deleted DJI videos can be restored with their original folder structure and file properties intact.
Steps to recover DJI videos from the Recycle Bin:
Step 1. Double-click the Recycle Bin icon on your desktop.
Step 2. Search for the DJI video by file name or sort files by Date Deleted.
Step 3. Right-click the target video and select “Restore”. The video will automatically return to its original location.
Recover DJI Videos Using CHKDSK
The CHKDSK tool can scan and repair file system errors, which may make DJI videos accessible again if they were lost due to logical errors.
Detailed steps on how to recover DJI videos with CHKDSK:
Step 1. Connect the storage device to your PC. Run Command Prompt as administrator.
Step 2. Type the following command: chkdsk X: /f. Replace “X” with the actual drive letter of your device.
Step 3. Press “Enter” to start scanning and repairing the drive. Once complete, check if your DJI videos have been restored.
What to Do After Video Recovery?
Once the data recovery process is complete, don’t start new recording or filming tasks just yet. First, verify that the recovered DJI videos are intact by previewing them on your computer. Open several key clips to check that both the video and audio play correctly and without errors.
If the recovered files are important project materials, it’s best to back them up immediately. Copy the recovered videos to at least two different storage devices, such as your computer’s hard drive and an external drive. After backing up, double-check the files to ensure everything was copied correctly and nothing is missing.
How to Prevent DJI Video Loss?
Preventing video loss should be a basic habit for every drone pilot. By following standardized operational procedures and using reliable storage devices, you can minimize the risk of losing precious aerial footage.
Set Up a Multi-Layer Backup System:
Enable dual-card backup during flight: If your drone supports it, use dual-card simultaneous recording.
Transfer files immediately after landing: After each flight, quickly move your footage to your computer and NAS.
Sync important files to the cloud: Upload especially critical project files to cloud storage for off-site protection.
Follow Proper Device Usage and Operational Procedures:
Use high-quality storage devices: Choose SD cards that are officially certified with adequate read/write speeds.
Perform thorough pre-flight checks: Ensure enough storage space and sufficient battery power before takeoff.
Maintain a safe file transfer process: Use a reliable card reader and avoid disconnecting the device until the transfer is fully completed.
Final Words
Lost DJI videos can be recovered using several methods, such as the system’s built-in Recycle Bin or the CHKDSK command. However, using an advanced data recovery tool like AiRecover Data Recovery is the wisest choice. This is because it overcomes the limitations of system tools and provides deep scanning modes, effectively handling a variety of data loss scenarios, including accidental deletion, formatting errors, or device malfunctions.
Recover Deleted DJI Videos FAQs
1. How likely is it to successfully recover deleted DJI videos?
The success of recovery mainly depends on whether the data has been overwritten. If you stop using the storage device immediately after accidental deletion and scan it with professional video recovery software like AiRecover Data Recovery, the chances of recovery are high. However, if new footage is recorded or data is written to the device, the original files may be permanently overwritten and become very difficult to recover.
2. How long does the data recovery process usually take?
Recovery time depends on the scan mode and the storage capacity. A standard scan usually takes only a few minutes, while a deep scan can take tens of minutes to over an hour. Deep scanning provides a more thorough file retrieval, making it ideal for important videos or large storage devices.
3. What should you do if the SD card is physically damaged?
For physically damaged storage devices, attempting recovery on your own can cause further harm. It is recommended to stop all read and write operations immediately and contact a professional data recovery service. Physical repairs usually need to be performed in a dust-free environment by trained technicians to maximize the chances of safely recovering the data.


 All
All


 Windows
 win
win
 mac
mac